

)NSTALLATION'UIDE
NETGEAR Dual Band Wireless PC Card 32-bit CardBus WAG511
These setup instructions assume that you will connect to an access point or wireless router.
See the online help and the
NETGEAR Dual Band Wireless PC Card 32-bit CardBus
WAG511 User Manual
on your CD for wireless security or advanced options.
Estimated Completion Time: 5-15 minutes.
Minimum System Requirements
Before installation, make sure that your computer has the following:
•
A 32-bit CardBus slot.
•
Microsoft Vista, Windows XP, or Windows 2000. Some versions of Windows will ask
for the Windows Installation CD during installation.
•
At least 5 Megabytes disk space.
Installation
1. First, install the WAG511
software.
Insert the NETGEAR CD.
If the CD main
page does not appear, double click
Autorun.exe
on the CD.
a.
Click
Install Driver & Utility
.
b.
The InstallSheild wizard screen opens.
c.
Follow the wizard prompts to install the
Smart Wizard Wireless Utility. When the
Installation Complete message appears,
click Finish.
2. Next, install the WAG511 Wireless PC Card.
a.
Hold the PC Card with the NETGEAR logo facing up and insert it into a
CardBus slot. After a short delay, the Found New Hardware Wizard displays.
Note:
If a Windows XP logo testing warning appears, click Continue Anyway to
proceed.
b.
Follow the Found New Hardware Wizard prompts, and click Finish when done.
c.
Windows 2000 users go to Step 3. Windows XP or Vista users can set up the
wireless adapter with the NETGEAR Smart Wireless Settings Utility
(recommended) or the Windows configuration utilities.
•
NETGEAR Smart Wireless Settings Utility:
Reveals more information
about each network and makes it easier to troubleshoot network connection
problems.
•
Windows configuration utilities:
See the Windows documentation or
“Using Windows XP and Vista Wireless Configuration Utilities” at:
http://documentation.netgear.com/reference/enu/winzerocfg/index.htm
d.
Click
Next
to accept the NETGEAR Smart Wireless Settings Utility.
3. Now, configure the WAG511 and save the Profile.
a.
Click the WAG511 icon
in the Windows system tray to open the Smart
Wireless Settings Utility to the Settings tab page.
b.
Enter your network settings.
Tip:
To view the available wireless networks, use the drop-down list or the
Networks tab and choose the one you want.
c.
Click
Apply
to activate the connection.
4. Verify your wireless connection.
You can use the Status bar and the WAG511 LEDs to verify your wireless connection.
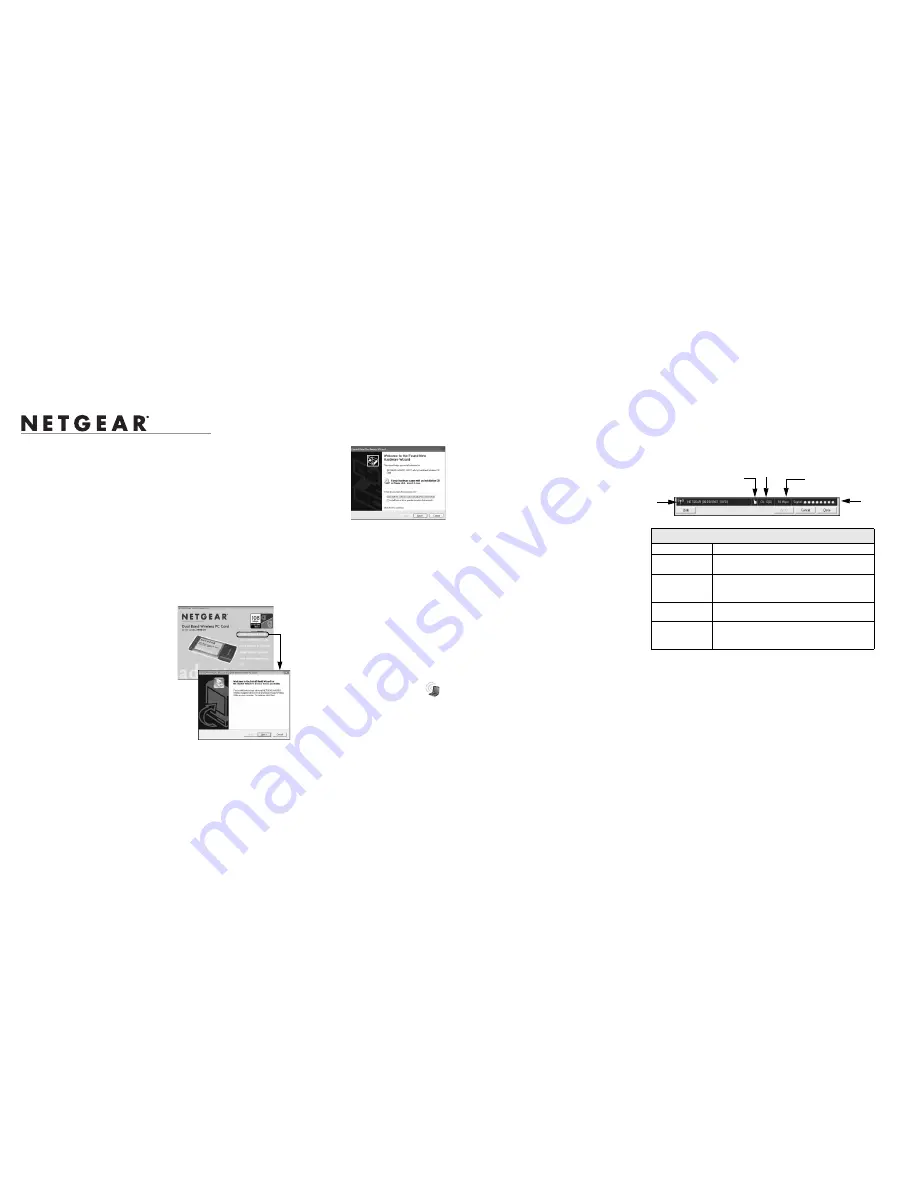
Status Bar
The status bar is located at the bottom of the Settings page.
WAG511 LEDs
Check the WAG511 LEDs:
•
Both blinking alternately means attempting to connect
•
Both blinking together indicates a good connection (fast blinking means data
transmission).
•
Off means the card is not plugged in.
Status Bar
Wireless network
Identifies which wireless network you have joined.
Security
• Locked: security enabled.
• Unlocked: security not enabled.
Channel
The wireless channel used by the network. If many
wireless networks in your area use the same channel
they can interfere with one another.
Throughput
Wireless throughput measured in Mega bits per
second.
Signal strength
More dots indicates a stronger signal. Usually, you
will experience higher throughput when the signal is
strongest.
Wireless
network
Security
Channel
Throughput
Signal
strength


