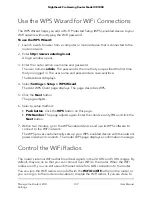
Use the WPS Wizard for WiFi Connections
The WPS Wizard helps you add a Wi-Fi Protected Setup (WPS)–enabled device to your
WiFi network without typing the WiFi password.
To use the WPS Wizard:
1. Launch a web browser from a computer or mobile device that is connected to the
router network.
2. Enter http://www.routerlogin.net.
A login window opens.
3. Enter the router admin user name and password.
The user name is admin. The password is the one that you specified the first time
that you logged in. The user name and password are case-sensitive.
The Dashboard displays.
4. Select Settings > Setup > WPS Wizard.
The Add WPS Client page displays. The page describes WPS.
5. Click the Next button.
The page adjusts.
6. Select a setup method:
• Push button. Click the WPS button on this page.
• PIN Number. The page adjusts again. Enter the client security PIN and click the
Next button.
7. Within two minutes, go to the WPS-enabled device and use its WPS software to
connect to the WiFi network.
The WPS process automatically sets up your WPS-enabled device with the network
password when it connects. The router WPS page displays a confirmation message.
Control the WiFi Radios
The router’s internal WiFi radios broadcast signals in the 2.4 GHz and 5 GHz ranges. By
default, they are on so that you can connect over WiFi to the router. When the WiFi
radios are off, you can still use an Ethernet cable for a LAN connection to the router.
You can turn the WiFi radios on and off with the WiFi On/Off button on the router, or
you can log in to the router and enable or disable the WiFi radios. If you are close to
User Manual
139
Manage the Router’s WiFi
Settings
Nighthawk Pro Gaming Router Model XR1000

