Rail Kit Assembly
221
9.3. Installing the Outer Rail
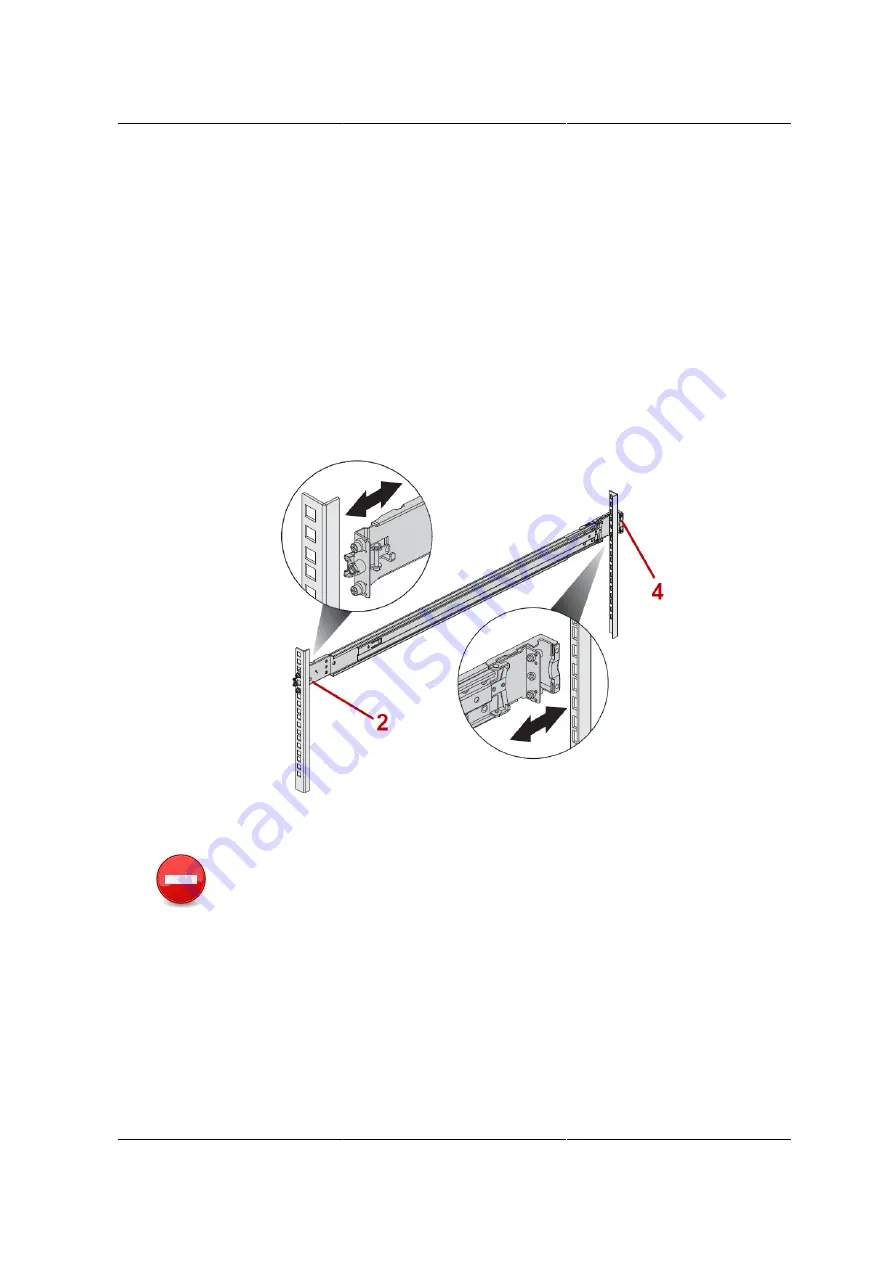
1. Align the screws on the outer rail with the screw holes on the front cabinet column.
2. Guide the screws on outer rail through the screw holes on the front cabinet column until the rail
clicks in place.
3. Extend the rear side of the outer rail, to reach the rear cabinet column.
4. Guide the screws on outer rail through the screw holes on the rear cabinet column until the rail
clicks in place.
Figure 9.4. Installing the Outer Rail
5. Repeat steps 1 to 4 for the second rail.
Heavy object. Two people are required to safely handle the server. Always ask for
assistance to install or remove the server.
Содержание Demos R130 M2
Страница 1: ...Netberg Demos R130 M2 server...
Страница 2: ...Netberg Demos R130 M2 server...
Страница 11: ...Netberg Demos R130 M2 server xi 9 5 Aligning the Rails 222...
Страница 14: ...1 Chapter 1 Netberg Demos R130 M2 server...
Страница 31: ...Netberg Demos R130 M2 server 18 On HDD failure HDD Fault Amber Off No failure detected...
Страница 32: ...19 Chapter 2 Installing hardware...
Страница 57: ...Installing hardware 44 Figure 2 36 Installing the Air Duct...
Страница 60: ...Installing hardware 47 Figure 2 40 Connecting the Fan Assembly Cables...
Страница 143: ...130 Chapter 6 Server Management Software...
Страница 146: ...Server Management Software 133 6 3 Power System BMC controls system power through GPIO pins and IPMI chassis commands...
Страница 166: ...153 Chapter 7 BMC Recovery This section provides guidelines on BMC recovery process in DOS and Linux systems...
Страница 169: ...156 Chapter 8 Web Graphical User Interface GUI for ESMS...
Страница 230: ...217 Chapter 9 Rail Kit Assembly...
Страница 233: ...Rail Kit Assembly 220 Figure 9 3 Securing the Inner Rail 5 Repeat steps 1 through 3 for the remaining side...
Страница 236: ...223 Chapter 10 Troubleshooting...


