


See the VMware documentation for the migration steps.
2. Select the failed node, and select
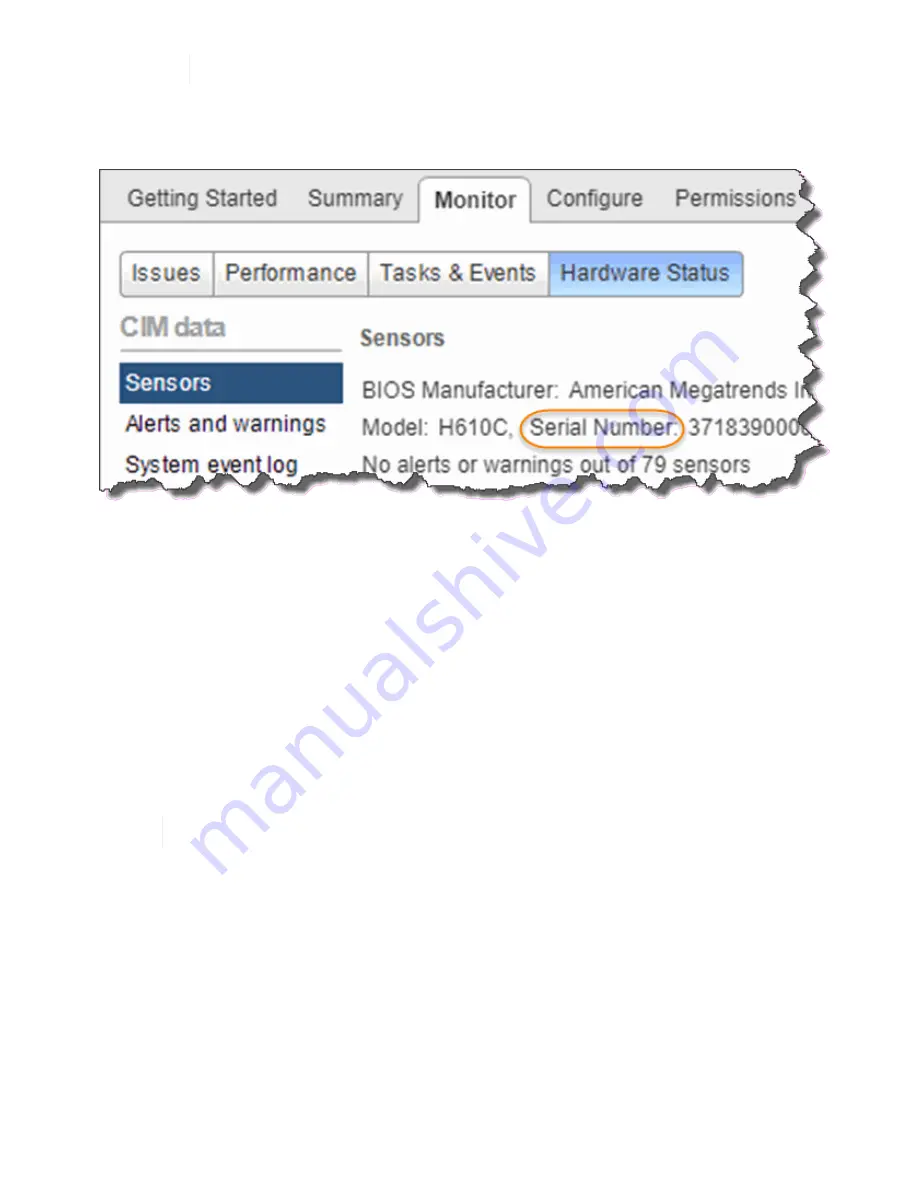
Monitor > Hardware Status > Sensors
.
3. Make a note of the serial number of the failed node. The following screenshot is only an example:
You need the serial number to identify the chassis by matching the number that you noted with the serial
number on the sticker at the back of the node.
4. Right-click the failed node and select
Connection > Disconnect
.
5. Select
Yes
to confirm the action.
6. Right-click the failed node and select
Remove from Inventory
.
7. Click
Yes
to confirm the action.
Replace the node
After you remove the failed node from the cluster, you can remove the failed chassis, and install the
replacement chassis.
Ensure that you have antistatic protection before you perform the steps here.
Steps
1. Unpack the new chassis, and set it on a level surface.
Keep the packaging material for when you return the failed chassis to NetApp.
2. Label each cable that is inserted at the back of the chassis that you are going to remove.
After you install the new chassis, you must insert the cables back into the original ports.
3. Disconnect all the cables from the back of the chassis.
4. Remove the chassis by unscrewing the thumbscrews on the mounting ears.
You must package and return the failed chassis to NetApp.
5. Slide the replacement chassis on to the rails.
Содержание HCI
Страница 95: ...NetApp HCI Resources page...
Страница 275: ...A popup window shows a message about getting started with Rancher 2 Click Deploy Rancher The Rancher UI appears...
Страница 308: ......


