31
Neptronic
®
Evaporative Humidification / Cooling System
www.neptronic.com
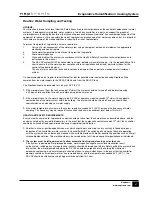
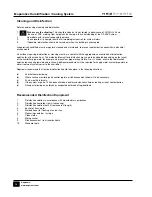
Cleaning and Disinfection Method Statement
Step 1 - Refer to the Risk Assessment.
• Refer to the Manufacturers instructions and safety advice
• Ensure the area is well ventilated.
• Ensure the system is OFF and isolated from external controls.
Step 2
-
Mix Disinfection Solution
• Mix disinfection solution following the manufacturers instructions. L8 recommends 50ppm Chlorine solution
used for 1 hour. NB: For larger or particularly unclean systems this process may need to be repeated.
• Calculate the total water volume of the system using wet and dry weight values (refer to dimension tables at
the end of this manual).
Note:
• Depending of the Risk Assessment, it may be necessary to clean the sump tray prior to disinfection.
• Solution loses strength over time and the process may need to be repeated.
Step 3 - Run the unit
• *Note the various control settings in case it is necessary to override them.
• Switch the panel switch to the drain (lower) position to drain water in sump tray.
• Switch the unit to the on (upper) position and allow the tank to refill.
• Place the unit into a RUN condition (*control settings may need to be overridden, refer to the programming
section of this manual).
Step 4
-
Add disinfection solution-
• Add the solution to the water sump tray and allow to mix
• Measure the strength of the disinfection solution and check it is the correct strength in accordance with
manufacturers guidelines.
• Note the strengths of the disinfection solution at 15 minute intervals and record on a
Record of Cleaning &
Disinfection
sheet for further reference.
• Adjust solution strength as required.
Step 5 - Circulate disinfection solution
• Check all surfaces are wetted for a minimum of 1 hour at 50ppm.
Step 6 - Neutralise the disinfection solution. -
• Mix neutralising agent as manufacturers instructions
• Allow the neutralising agent to disperse over the matrix and circulate in the sump tray.
• Measure the strength until the disinfection solution is weak (less than 5ppm)
Step 7 - Drain the unit into foul drain
• Turn Off any fill cycle.
• Drain unit until empty into appropriate drain (depending on Risk Assessment) and rinse the tank if necessary.
• * Where required, reset to original setting and put unit back into operation. Test for correct operation as per
commissioning section of the manufacturers manual.
• Check for and complete maintenance requirements as per manufacturers instructions.
• Always leave work area clean, dry and tidy.
Step 8 - Recommission the system
• Refer to the commissioning section of this manual.
Содержание SK VAP
Страница 4: ...4 Neptronic www neptronic com Evaporative Humidification Cooling System...
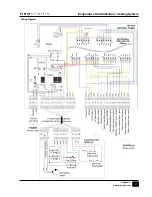
Страница 17: ...17 Neptronic Evaporative Humidification Cooling System www neptronic com Wiring Diagram...
Страница 18: ...18 Neptronic www neptronic com Evaporative Humidification Cooling System...
Страница 19: ...19 Neptronic Evaporative Humidification Cooling System www neptronic com...
Страница 20: ...20 Neptronic www neptronic com Evaporative Humidification Cooling System...
Страница 21: ...21 Neptronic Evaporative Humidification Cooling System www neptronic com...
Страница 22: ...22 Neptronic www neptronic com Evaporative Humidification Cooling System...
Страница 34: ...34 Neptronic www neptronic com Evaporative Humidification Cooling System...
Страница 35: ...35 Neptronic Evaporative Humidification Cooling System www neptronic com...
Страница 36: ...Neptronic 400 boul Lebeau Montreal Quebec H4N 1R6 CANADA TEL 514 333 1433 FAX 514 333 3163 www neptronic com...

