Capio
QUICK-START GUIDE
1.
Unpack
Your Capio is typically shipped with the following items:
•
A keyboard
•
A mouse
•
A power cable
•
A stand for stabilizing your Capio in a vertical orientation (attached).
•
This Quick-Start Guide
2.
Setup
Your Capio can be setup in either a horizontal or vertical orientation.
If you are using your Capio in a horizontal orientation:
•
The USB ports should be on the right-hand side of the appliance.
•
The appliance can be used to support your monitor.
•
Apply the clear rubber feet to the bottom of the appliance chassis.
If you are using your Capio in a vertical orientation:
•
The USB ports should be closer to the bottom of the appliance.
•
The stand should be connected to the appliance.
3.
Connections
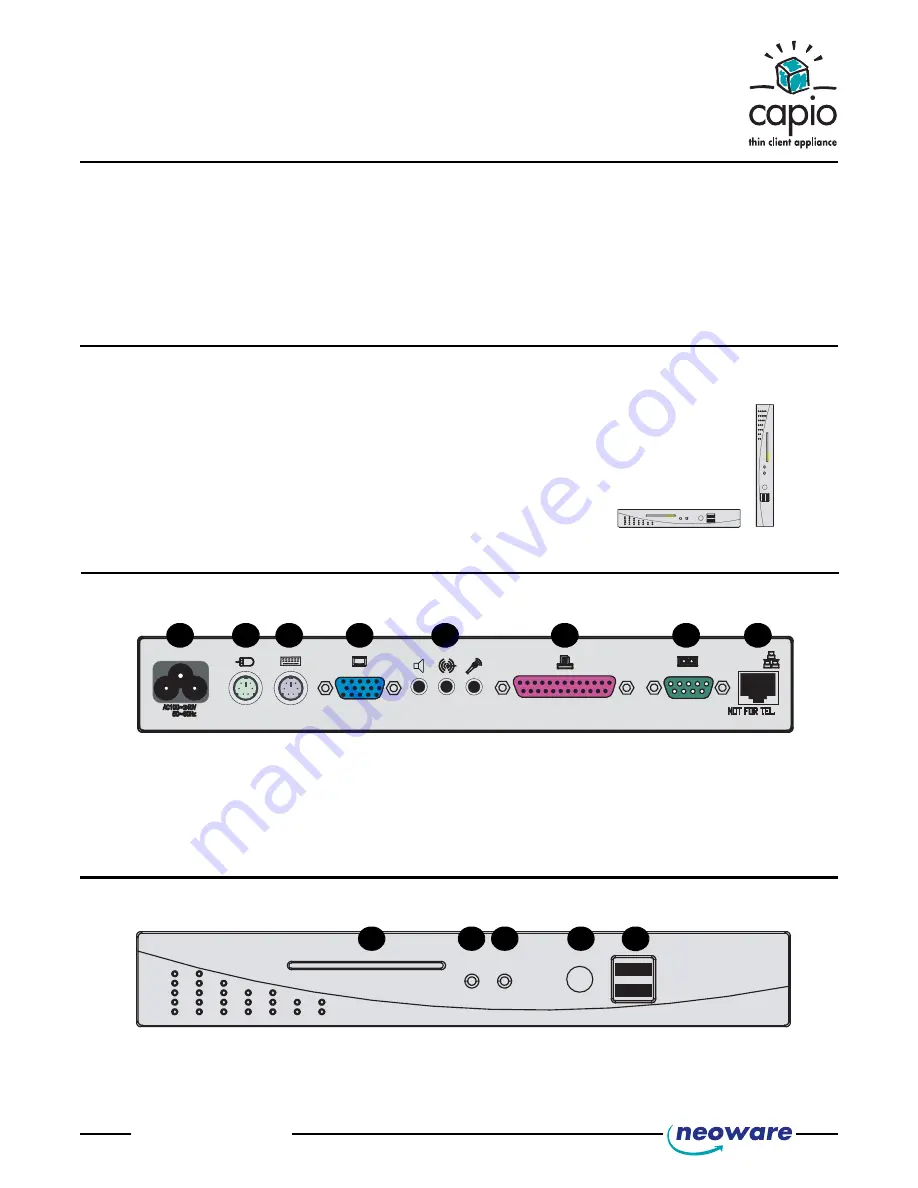
Connect the supplied power cord, mouse, and keyboard to the ports labeled 1, 2, and 3 respectively. Connect your monitor’s cable to
the Video port (4).
1. Power Cord
4. Video Port
7. Serial Port
2. Mouse PS/2
3. Keyboard PS/2
5. Audio Line Out, Line In, Mic.
6. Parallel Port
8. 10/100 BaseT Ethernet Port
7
8
6
5
4
3
2
1
4.
Power Up
In order to turn on your Capio, push in the circular on/off button on its front panel. To turn off your Capio, push the on/off button again.
1
1. Smart Card slot (reader optional)
2
3
2. Power Indicator
3. Network Activity Indicator
4
5
4. On / Off Button
5. USB Ports
H o r i z o n t a l
V
e
r
t
i
c
a
l
www.
neoware
.com


