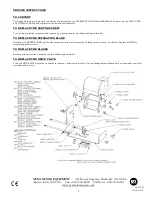
Operating and Maintenance Instructions
Model: 55150B
POWERKUT
Includes 120V and 230V Models
1
INTRODUCTION
1.
Please read instructions before using
2.
When using this machine, basic precautions should be followed to reduce the risk of fire, electric shock and injury to persons.
3.
Clean machine thoroughly before and after all uses using cleaning instructions below. Do not immerse in water or other liquid.
SAFETY INSTRUCTIONS
1.
Plug electrical cord into a certified electrical outlet with a corresponding voltage rating as listed on the machine model labels.
2.
Always unplug the electric cord when machine is not in use and before cleaning, adjusting or maintaining this machine. Do not
operate with a damaged cord or plug or after the machine malfunctions, has been dropped or damaged. Use authorized service
for examination, electrical or mechanical adjustment or repair.
3.
Extreme caution is necessary when used by or near children or invalids and whenever the appliance is left operating and
unattended.
4.
This appliance is not intended for use in wet or moist locations. Never locate appliance where it may fall into a water container.
5.
Keep hands away from cutting blades.
THEY ARE SHARP AND WILL CUT.
6.
THE USE OF TWO SWITCHES IS FOR THE OPERATOR’S SAFETY. NEVER PERMIT ONE OF THE SWITCHES TO BE FIXED
IN THE “ON” POSITION
PREPARATION
1.
Set unit on a flat surface
2.
Position unit near the power outlet. Avoid the use of extension cords. Do not run cord under carpeting or cover with runners or
the like. Arrange cord where it will not be tripped over.
3.
This appliance has live electrical parts inside. Do not use in areas where gasoline, paint or flammable liquids are used or stored.
4.
Clean unit thoroughly before use. Do not immerse in water or other liquid.
5.
If unit fails to operate properly when first installed call NEMCO customer service at 1-800-782-6761
STARTUP
1.
Attach the LOCATOR BASE to the desired location on a workbench or countertop using the fasteners provided in the
MOUNTING SCREW ASSEMBLY KIT. Be sure all (4) FOOT PADS rest on the work surface.
2.
Place the machine over the LOCATOR BASE so that the folds in the base rests in the LOCATOR BASE and its center hole aligns
with the threaded hole in the LOCATOR BASE.
3.
Secure the machine by installing the KNOB in the LOCATOR BASE and tightening it until it is held firmly
ELECTRICAL REQUIREMENTS
Refer to the product tag (serial plate) on the back of the unit for voltage and wattage requirements. Be sure to plug unit into outlet
with sufficient power.
OPERATION
1.
Secure the machine to the table as indicated above.
2.
Check to be sure that the MOTOR portion slides freely and the rest of the machine is secured against moving.
3.
Plug the electric cord into a 3-wire outlet, 120-volt. Do not use a 2-prong adapter.
4.
With MOTOR portion in the required position, place a product on the DRIVE PLATE with its longest part parallel to the GUIDE
RODS.
5.
Slide the MOTOR unit forward to bring the product against the blades. Depress both SWITCHES. Hold them depressed and
push forward firmly.
6.
When the MOTOR unit stops advancing, release the two SWITCHES and pull the MOTOR unit back to the starting position.
7.
Remove the product end from the DRIVE PLATE.
8.
Place another product in place as above and repeat the cycle.
9.
To disconnect the appliance, simply remove plug from outlet.
CLEANING
NOTE:
Proper maintenance plays an important part in the life span and functioning of the unit
1.
Unplug the cord and be careful of the sharp blades.
2.
Do not immerse in water or other liquid. Avoid splashing water into the motor unit.
3.
Remove the FRONT PLATE AND BLADE ASSEMBLY by removing the WING NUT and THUMBSCREW and wash thoroughly.
BLADES can be removed with a screwdriver.
4.
Remove DRIVE PLATE by unthreading (turn counter clockwise) and wash thoroughly.
5.
The MOTOR CARRIAGE ASSEMBLY can be removed from the base assembly by removing KNOBS and pulling the GUIDE RODS
toward the cutting end of the machine.
6.
Wash the BASE ASSEMBLY thoroughly and wash the MOTOR CARRIAGE ASSEMBLY with a sponge and warm water.
DO NOT ALLOW WATER TO ENTER THE ASSEMBLY
.
7.
Wipe dry before reassembling.


