


www.nektartech.com Using Nektar Panorama P-Series with Bitwig Studio 5
Panorama P-series Firmware Update - MacOS
Updating Panorama’s firmware, is required to get Panorama up and running with Bitwig.
Previous versions of the firmware will not work with OS X 10.11 or higher.
1. Connect Panorama P-series to your computer via USB.
2. 2. With Panorama P-series switched off, press and hold
[Toggle/View]+[Mixer] while switching the unit on (P1
needs to be plugged in while holding the buttons). The
display is white when the unit is in firmware update mode.
3. Locate the dmg file named “Firmware P1-P4-P6 MacOS
10_11 or higher” in the downloaded package this guide
came with, and double-click to open.
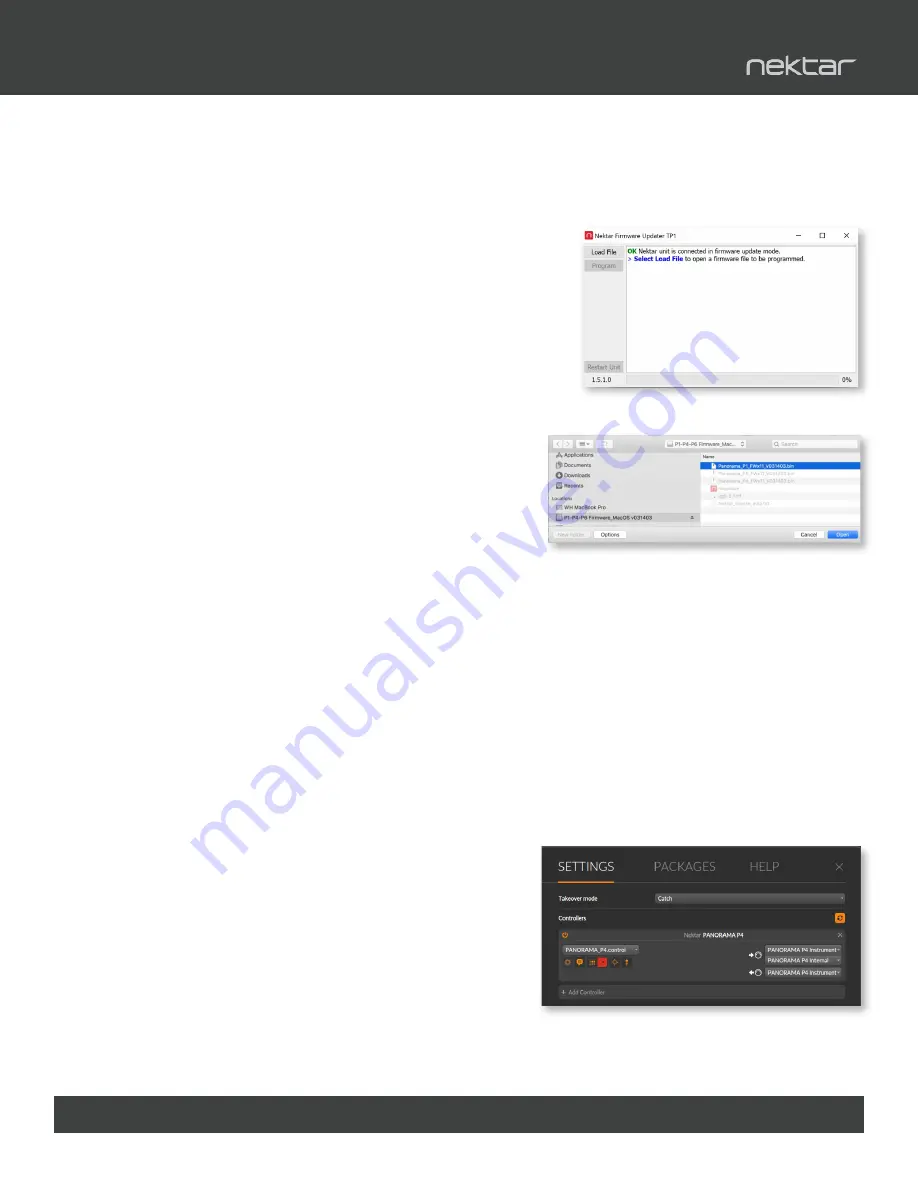
4. Launch the nkupdate application. Once launched, it should
look like the image. If the “Load File” button is grayed
out, close nkupdate and launch it again.
5. Follow the nkupdate on-screen instructions to
load and update Panorama P-series firmware. The
firmware location can be selected after clicking the
[Load File] button.
6. On the left side of the file browser window, select
Location ‘P1-P4-P6 Firmware_MacOS’. Next select the file for your device, and click ‘Open’.
7. Click [Program] and finally close the nkupdate app when complete.
8. IMPORTANT: Reset Panorama to it’s default settings (note this will erase any internal preset
or map settings *) by switching the unit off and press [patch-]+[Patch+] while powering
on again. Keep holding the buttons until you see the fader display. On P1, press the
[Cycle]+[Record] buttons and then press the [Patch-] + [Patch+] buttons within the 2 seconds
countdown.
* Backup your settings: If you want to keep your user memory banks; please do a backup, and
restore after resetting.
Panorama Installation and Setup in Bitwig - MacOS
• First make sure Bitwig Studio is installed and launched at least once.
• In the zip file you downloaded with this guide, locate
the “Panorama_Bitwig_Support” installer and run it.
• With installation complete, make sure your Panorama
is connected to your computer and switched on.
• Launch Bitwig and click on the Bitwig logo top center.
• Select the menu Settings/Controllers.
• Click “Detect available controllers”. Your Panorama
should now appear in the list.
• Click “OK” and exit Device Setup.
That’s it, setup is now complete and you can move on to the fun part, learning how it all works.
Bitwig Studio Integration Setup and Configuration
Using Panorama with Logic
2
Logic Pro Integration Setup and Configuration
Panorama P-series Firmware Update
1. Connect Panorama P-series to your computer via USB.
2. With Panorama P-series switched off, press and hold [Toggle/View]+[Mixer] while
switching the unit on (P1 needs to be plugged in while holding the buttons). The
display is white when the unit is in firmware update mode.
3. Locate the dmg file named “Firmware P1-P4-P6 MacOS 10_11 or higher” in the
downloaded package this guide came with, and double-click to open.
4. Launch the nkupdate application. Once launched, it should look like the image.
If the “Load File” button is grayed out, close nkupdate and launch it again.
5. Follow the nkupdate on-screen instructions to load and update Panorama
P-series firmware. The firmware location can be selected after clicking the
[Load File] button.
6. On the left side of the file browser window, select Location 'P1-P4-P6
Firmware_MacOS’. Next select the file for your device, and click ‘Open’.
7. Click [Program] and finally close the nkupdate app when complete.
8. IMPORTANT: Reset Panorama to it's default settings (note this will erase
any internal preset or map settings *) by switching the unit off and press
[patch-]+[Patch+] while powering on again. Keep holding the buttons until you see the fader display.
On P1, press the [Cycle]+[Record] buttons and then press the [Patch-] + [Patch+] buttons within the 2 seconds countdown.
* Backup your settings:
If you want to keep your user memory banks; please do a
backup
, and restore after resetting.
Install Panorama Integration for Apple Logic
1. Make sure Logic is already installed on your computer. If not, install Logic first and open Logic at least
once, before running the installer for Nektar DAW integration software.
2. Locate the Panorama_Apple_support_xx installer included with this package and run it. This version of
Panorama Logic Pro integration is compatible with Logic Pro 10.7 or higher, running on MacOS 10.12
and higher.
3. Make sure your Panorama is plugged in to your computer and switched on, then launch Logic Pro.
4. In Logic Pro, a dialogue box will appear asking ‘Do you want to automatically assign the controls of the
Nektar “PANORAMA P4”?’. Click “Auto Assign”.
5. Create or load a project in Logic with at least one track.
6.
Logic Pro 10.6 or earlier:
From the ‘Logic Pro’ menu, go to Preferences>Advanced Tools.
Make sure ‘Show Advanced Tools’ is ticked and at minimum that ‘Control Surfaces’ is ticked in
‘Additional Options’.
7.
Logic Pro 10.7 or higher:
From the ‘Logic Pro’ menu, select Settings/Advanced and make
sure ‘Enable Complete Features’ is ticked.
8. Download and install the Nektarine plugin from the ‘My Account’ tab on our website, if you’d
like to use Nektarine alongside the Nektar Logic integration.
That’s it! Setup is complete and you can move on to the fun part, learning how it all works.
Troubleshooting
If Panorama Logic integration is not working as expected, after following the above steps, check the below:
1. Verify that Panorama is running the latest firmware, then perform a factory reset as described in Firmware Update step 8.
2. From the ‘Logic Pro’ menu, go to Control Surfaces/Settings/MIDI Controllers. Locate ‘Panorama T4-T6’ in the list and make
sure it’s ticked in the ‘Auto’ column.
3. From the ’Logic Pro’ menu, to to ‘Control Surfaces’ and select ‘Rebuild Defaults’. The action restore Logic Panorama
integration’s default control surface settings, without losing user data.


