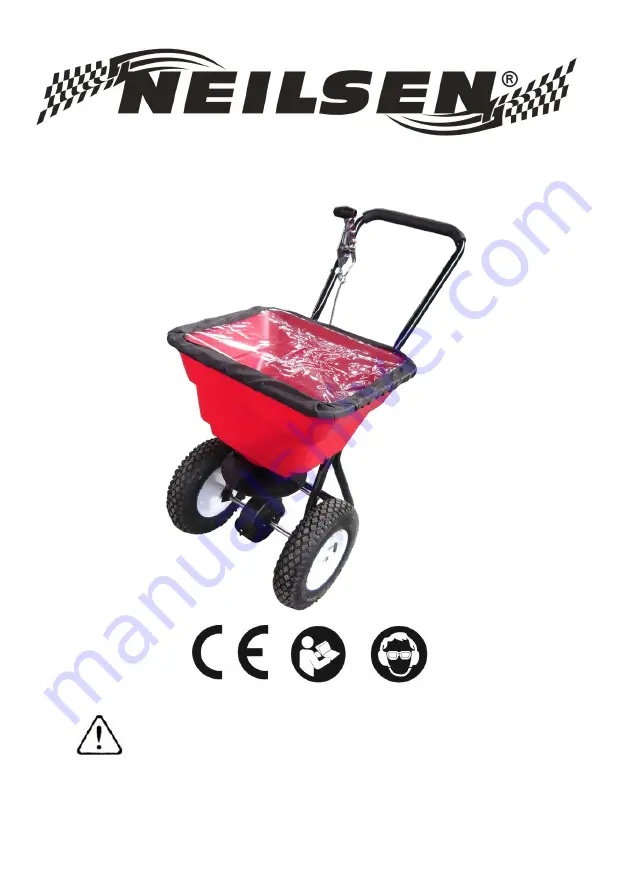
background image

80LB WALK BEHIND SPREADER CT2205

INSTRUCTION MANUAL

SAVE THESE INSTRUCTIONS AND PRECAUTIONS.

READ ALL PRECAUTONS AND INSTRUCTIONS BEFORE USE.

Cannon Tools Limited
Address: 20 Station Road, Rowley Regis, West Midlands, B65 0JU.U.K.

Содержание CT2205

Страница 1: ...HIND SPREADER CT2205 INSTRUCTION MANUAL SAVE THESE INSTRUCTIONS AND PRECAUTIONS READ ALL PRECAUTONS AND INSTRUCTIONS BEFORE USE Cannon Tools Limited Address 20 Station Road Rowley Regis West Midlands...

Страница 2: ...on by us In case of alteration of the machine not agreed upon by us this declaration will lose its validity Product description WALK BEHIND SPREADER Model CT2205 Applicable EC Directives EC Machinery...

Страница 3: ...are of what you are doing at all times Use common sense AVOID DANGEROUS CONDITIONS Make sure there is adequate surrounding workspace Cluttered areas invite injuries Keep your work area clean with suff...

Страница 4: ...MAINTAIN YOUR MACHINE WITH CARE Clean the machine immediately after use Keep the machine clean to ensure it operates to its full safest performance When maintaining this machine only the manufacturer...

Страница 5: ...trols and features Save this manual for future reference 1 Flow Control Controls the flow of material being spread 2 Handle Pushes and moves the spreader easily 3 Support Leg Stabilizes load and sprea...

Страница 6: ...each use Fertilizer stuck on the impeller blades will cause uneven spreading Your spreader is designed to be pushed at three miles per hour which is a brisk walking speed Slower or faster speeds will...

Страница 7: ...6 STEP 1 Install impeller onto the Gear Box Axle Assembly Insert Screw M4x20 through impeller then through Gear Box Axle...

Страница 8: ...o the Fixing Connecting Rod through Wheel Assembly Frame Make sure the hole on Axle of Gear Box is on the right side when assembly as shown Attach Wheel Assembly Frames and Support Leg onto Hopper usi...

Страница 9: ...neatly Install right Wheel Assembly to right Axle using bolt M5x45 and lock nut M5 and then install the Cap onto right Axle using a wooden or rubber hammer Now install left Wheel Assembly to left Axle...

Страница 10: ...9 STEP 4 Insert Upper Handle into the Support Leg and tighten using bolts M6x40 and Lock Nuts M6 NOW GO BACK AND TIGHTEN ALL NUTS AND BOLTS STARTING WITH FIRST STEP DO NOT OVER TIGHTEN...

Страница 11: ...ad of control cable into the small hole on Gauge and Lever Assembly 2 Release two bolts M5x10 and lock nuts on Press Plate 3 Put the Plastic Tube into the slot of Press Plate 4 Tighten two bolts M5x10...

Страница 12: ...r hand to adjust the adjustable plate so as to make sure the hole at the bottom of hopper can be closed completely 3 Push the handle to the lowest position use your hand to adjust the adjustable plate...

Страница 13: ...grinder to maintain good penetration Never exceed load capacity rating of 100lbs it will damage the equipment IMPORTANT If a part needs replacement only use parts that meet the manufacturer s specifi...

Страница 14: ...13 6 PARTS DRAWING...

Страница 15: ...ox Axle Assembly 1 10 Wing Nut 1 35 Screw M4x20 1 11 Hopper 1 36 Hex Bolt M5x45 1 12 R Pin 2x60 1 37 Line Clamp Press Plate 2 13 Center Cover 1 38 Control Rod 1 14 Hex Bolt M6x70 4 39 Screw M5x10 2 15...

Страница 16: ...15 CANNON TOOLS LTD Add 20 station road Rowley Regis west midlands B65 0JU U K Made in China...

Отзывы: