background image

20

Steam cooking

The 

é

 Steam cooking operating mode can only be used in 

conjunction with the Mega System steamer (available as a 

special accessory from specialist retailers).
Only switch Steam cooking on when the cooking compartment 

has cooled down completely (room temperature).
If "Not possible" appears on the text display when you switch 

on the Steam cooking operating mode and 

• 

and 

¨©¨

 appear 

alternately in the temperature display, the cooking compartment 

has not cooled down completely. 
Wait until the cooking compartment has cooled down and 

switch Steam cooking on again. The Steam cooking process is 

controlled automatically.

Notes

Only use the Steam cooking operating mode for steaming.

Only use the Mega System steamer for steaming.

Do not use Steam cooking together with the preselection 

mode clock function.

You will find further useful information in the instruction 

manual included with the Mega System steamer.

Dough proving

In this section, you will find information on

Dough proving 

ê

preparing yeast dough and yoghurt

Only switch on Dough proving once the cooking compartment 

has completely cooled down (to room temperature).
If "Not possible" appears in the text display when the Dough 

proving setting is switched on and 

 or 

œ

 and -

- appear 

alternately in the temperature display, the cooking compartment 

has not cooled down completely.
Wait until the cooking compartment has cooled down and 

switch Dough proving on again.
Do not use Dough proving together with the Preselection mode 

clock function.

Yeast dough

Caution!

Damage to the enamel surfaces from pouring cold water into 

the hot cooking compartment. Do not poor cold water into 

the hot cooking compartment.

Distilled water will damage the surfaces in the cooking 

compartment. Use tap water only.

1.

Pour 200 ml water in the base trough of the cooking 

compartment.

2.

Place the dish in the centre of the wire rack and slide in at 

shelf height 1.

3.

Close the appliance door and switch on 

ê

 Dough proving.

The proving process is controlled automatically. The 

temperature setting is fixed.

4.

Remove any remaining water from the cooking compartment 

after the proving process is complete.

5.

Loosen any limescale with a little vinegar and wipe with clean 

water.

The information in the table contains only guide values.
You can find information on how to proceed, further instructions 

and recipes in the accompanying cookbook. 

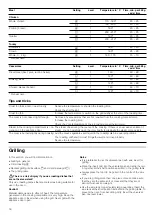
Chicken

Drumsticks

+

2

250

1

st

 side: 16 - 20

2

nd

 side: 12 - 15

Breast (boneless)

+

3

250

1

st

 side: 13 - 15

2

nd

 side: 8 - 10

Whole chicken

4

1

200 - 220

70 - 90***

Quarter

4

2

210 - 230

40 - 50***

Fish

Whole fish, e.g. trout

+

3

220

1

st

 side: 10 - 15

2

nd

 side: 10 - 15

Fillets

+

3

220

1

st

 side: 9 - 13

2

nd

 side: 8 - 12

Meal

Setting

Level

Temperature in °C

Time in minutes

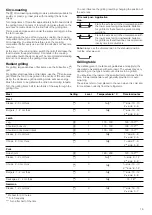
* Preheat for 3 minutes
** Turn frequently
*** Turn after half of the time

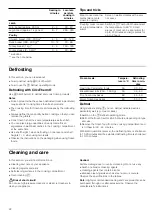
Yeast dough

Amount of 

flour in grams

Proving 

time in min-

utes

Light dough 

(e.g. pizza dough, plaited loaf)

300 - 500

25 - 30

750

30 - 35

Heavy, fat-rich dough 

(e.g. stollen, panettone)

500

40 - 60

750

60 - 80

Light bread dough

1000

30 - 40

Heavy bread dough

1000

50 - 70

Содержание C17E54.3GB

Страница 1: ... en Instruction manual Built in oven C17E54 3GB ...

Страница 2: ......

Страница 3: ...els 13 Baking table 14 Baking table for ready made products 15 Tips and tricks 16 Roasting and braising 16 Roasting 16 Braising 17 Tables for roasting and braising 17 Tips and tricks 18 Grilling 18 Circo roasting 19 Radiant grilling 19 Grilling table 19 Steam cooking 20 Dough proving 20 Yeast dough 20 Yoghurt 21 Low temperature cooking 21 Using Low temperature cooking 21 Table for Low temperature ...

Страница 4: ... in the instruction manual Risk of fire Combustible items stored in the cooking compartment may catch fire Never store combustible items in the cooking compartment Never open the appliance door if there is smoke inside Switch off the appliance and unplug it from the mains or switch off the circuit breaker in the fuse box Risk of fire A draught is created when the appliance door is opened Greasepro...

Страница 5: ...prolonged periods This will damage the enamel Fruit juice when baking particularly juicy fruit pies do not pack the baking tray too generously Fruit juice dripping from the baking tray leaves stains that cannot be removed If possible use the deeper universal pan Cooling with the appliance door open only allow the cooking compartment to cool when it is closed Even if the appliance door is only open...

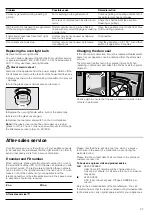
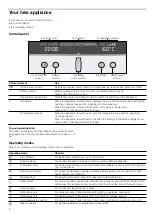
Страница 6: ...hanges the settings in the basic settings menu see section Changing the basic settings OHFWURQLF FORFN 7HPSHUDWXUH GLVSOD QIR EXWWRQ 7H W GLVSOD ORFN IXQFWLRQ EXWWRQ 5RWDU VHOHFWRU 2SHUDWLQJ PRGH VHOHFWRU 7HPSHUDWXUH VHOHFWRU Operating mode Used for 3 CircoTherm For baking and roasting on one or more levels A Defrost setting For gentle defrosting of pieces of meat bread and delicate desserts Top b...

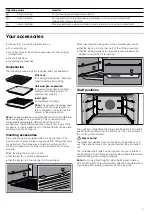
Страница 7: ... faces towards the appliance door when it is inserted Shelf positions The cooking compartment has three shelf positions The shelf positions are counted from the bottom up They are marked in the cooking compartment Risk of burns The telescopic shelves become hot when the appliance is in use Take special care not to get burnt when they are pulled out The individual shelf units can be inserted into y...

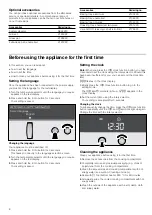
Страница 8: ...been insufficient for you you can amend the clock time later flashes in the clock display 1 Briefly press the KJ clock function button to go to the setting mode The KJ and 3 symbols light up ƒ appears in the clock display 2 Set the current time using the rotary selector Your setting is accepted after 3 seconds Changing the clock To subsequently change the time press the KJclock function button rep...

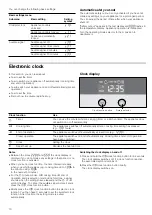
Страница 9: ...perature display whether there is high or low residual heat in the cooking compartment Changing the basic settings Your appliance has various basic settings which are preset at the factory You can however change these basic settings as required The appliance must be switched off 1 Press and hold the info button for 3 seconds to go to the basic settings menu The text display shows Select language G...

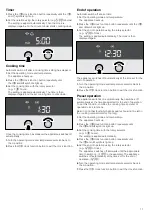
Страница 10: ...d and the Q or y symbol flashes To cancel the audible signal before it ends press the KJ clock function button Briefly press the KJ clock function button to select a clock function You then have 3 seconds to set the selected clock function After this time the setting mode is exited automatically Switching the clock display on and off 1 Press and hold the KJclock function button for 6 seconds The c...

Страница 11: ...clock The setting is applied automatically The clock is then displayed again The appliance switches off automatically at the time set for the end of operation 1 Turn the operating mode and temperature selector back to the Û position 2 Press the KJ clock function button to exit the clock function Preset operation The appliance switches on automatically then switches off automatically at the time pr...

Страница 12: ...ance operation the appliance is not automatically locked Lock it again if necessary or activate the permanent lock Lock appliance 1 Switch off the appliance 2 Press and hold the info button for 3 seconds to go to the basic settings menu 3 Press the info button briefly and repeatedly until appears in the temperature display 4 Turn the temperature selector until appears on the temperature display 5 ...

Страница 13: ...this will have a negative effect on your baking We recommend that you use dark coloured metal baking tins Tinplate and glass dishes increase the baking time required and the cake will not brown evenly If you wish to bake using tinplate tins and Top bottom heat you should use shelf position 1 Always slide the universal pan in carefully as far as it will go and make sure that the sloping edge is fac...

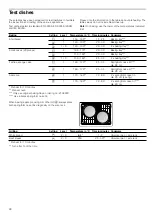
Страница 14: ...210 220 9 12 3 1 3 180 200 8 12 Small cakes 3 1 160 170 20 25 1 160 170 25 35 3 1 3 150 160 20 30 Light fruit cake 3 1 140 150 80 100 Rich fruit cake 3 1 140 150 210 240 Jam tarts 3 1 180 190 15 20 2 200 210 15 20 3 1 3 180 190 20 25 Swiss roll 3 1 180 190 10 15 2 190 200 10 15 Tart 3 1 160 170 50 60 0 1 180 190 35 45 3 1 3 160 170 55 65 Pies 3 1 170 180 70 80 0 1 170 180 70 80 Biscuits 3 1 160 17...

Страница 15: ...ore even browning When baking on several levels only use the CircoTherm 3 or Bread baking ë operating modes Observe the notes in the table about preheating Homemade pizza 3 1 210 200 20 30 0 1 180 190 15 20 3 1 3 180 190 35 45 Jacket potatoes 3 1 160 170 60 70 0 1 160 170 55 65 3 1 3 160 170 65 75 Meal Setting Level Temperature in C Time in minutes Preheat oven Preheat the oven to 130 C Meal Setti...

Страница 16: ...s too dark Check the shelf height If the shelf height is correct you should either shorten the baking time or reduce the temperature The cake is unevenly browned in the bak ing tin Check the shelf height Check the temperature Make sure that your baking tin is not placed directly in front of the air outlets in the rear panel of the cooking compartment Check that the baking tin is in the correct pos...

Страница 17: ... of the cooking time Lean meat Coat lean meat with fat or oil as required and cover it with strips of bacon Cooking time and temperature The cooking time and temperature depend on the size height type and quality of the food and the roasting dish As a general rule the larger the item the lower the temperature and the longer the roasting time You should set the lower of the specified temperatures t...

Страница 18: ...ole chicken 3 1 170 180 20 25 1 190 200 20 25 Portion boned 3 1 190 20 25 1 200 210 20 25 Quarter 3 1 190 20 25 1 200 210 20 25 Turkey Drumstick 3 1 180 20 20 Crown 3 1 160 25 20 Whole 3 4 kg 3 1 160 170 15 10 Casseroles Setting Level Temperature in C Time min per 500 g add time Diced meat beef pork lamb chicken 3 1 140 40 80 1 140 40 80 Braising steak 3 1 140 45 80 1 140 45 80 Chicken pieces bone...

Страница 19: ... the wire rack Note Always use the universal pan in the standard position not the other way up Grilling table The details given in the table are guidelines and apply to the enamelled universal pan with wire insert The values may vary depending on the type and amount of items to be grilled You should set the lower of the specified temperatures the first time A lower temperature will generally provi...

Страница 20: ...gh proving on again Do not use Dough proving together with the Preselection mode clock function Yeast dough Caution Damage to the enamel surfaces from pouring cold water into the hot cooking compartment Do not poor cold water into the hot cooking compartment Distilled water will damage the surfaces in the cooking compartment Use tap water only 1 Pour 200 ml water in the base trough of the cooking ...

Страница 21: ...with the Preselection mode clock function Only switch the Low temperature cooking mode on when the cooking compartment has completely cooled down room temperature If Not possible appears in the text display when the Low temperature cooking mode is switched on and or œ and üüü appear alternately in the temperature display the cooking compartment has not cooled down completely Wait until the cooking...

Страница 22: ...es Cleaning and care In this section you will find information on Cleaning and care of your appliance Cleaning agents and aids Self cleaning surfaces in the cooking compartment Oven cleaning z Risk of short circuit Do not use high pressure cleaners or steam jet cleaners to clean your appliance Caution Surface damage due to incorrect cleaning Do not use any harsh or abrasive cleaning agents cleanin...

Страница 23: ...aids Do not use cleaning agents containing abrasive substances or acids Do not use abrasive cleaning aids such as steel wool or scourers Appliance part surface Cleaning agent aid Stainless steel surfaces Apply commercially available washing up liquid with a soft damp cloth or chamois dry with a soft cloth Use cleaners for matted stainless steel if very dirty Painted surfaces Apply commercially ava...

Страница 24: ...ing the appliance door You can remove the appliance door to clean it more thoroughly Risk of injury The hinges of the appliance door may snap shut with great force Always open the hinge locking lever fully when removing the appliance door and close it fully after refitting Do not reach into the hinge Risk of injury If the appliance door has only been unhinged on one side do not reach into the hing...

Страница 25: ... bottom left Insert the intermediate panel towards the back as far as it will go Fitting the door panel 1 Insert the door panel at an angle towards the back into both brackets as far as it will go The smooth surface must face outwards 2 Put the cover back in place and press on it until it clicks in place 3 Refit the appliance door Cleaning the hook in racks You can remove the hook in racks for eas...

Страница 26: ...ress the KJ clock function button EXXX e g E300 appears in the clock dis play Internal fault in the appliance electronics Press the KJ clock function button If the message does not go out pull out the mains plug and plug it back in again after approx 10 seconds It is not possible to operate the appliance Appliance locked appears on the text display D and appear on the temper ature display The appl...

Страница 27: ...ting plate containing these numbers can be found on the right hand side of the oven door You can make a note of the numbers of your appliance and the telephone number of the after sales service in the space below to save time should it be required Please note that there will be a fee for a visit by a service technician in the event of a malfunction even during the warranty period Please find the c...

Страница 28: ... 15 25 Baking tray 3 1 140 150 20 30 Baking tray 3 1 3 140 150 20 30 2 x baking tray Small cakes 20 pieces 2 160 170 20 30 Baking tray 3 1 150 160 20 30 Baking tray 3 1 3 150 160 25 35 2 x baking tray Fat free sponge cake 1 160 170 25 35 Springform cake tin dia 26 cm 3 1 160 170 25 35 Springform cake tin dia 26 cm Apple pie 3 1 170 180 70 80 2 x springform cake tin dia 20 cm see fig 0 1 170 180 70...

Страница 29: ......

Страница 30: ......

Страница 31: ......

Страница 32: ...940313 9000724621 9000724621 Constructa Neff Vertriebs GmbH Carl Wery Straße 34 D 81739 München ...

Отзывы: