-96-
5.6.4.3
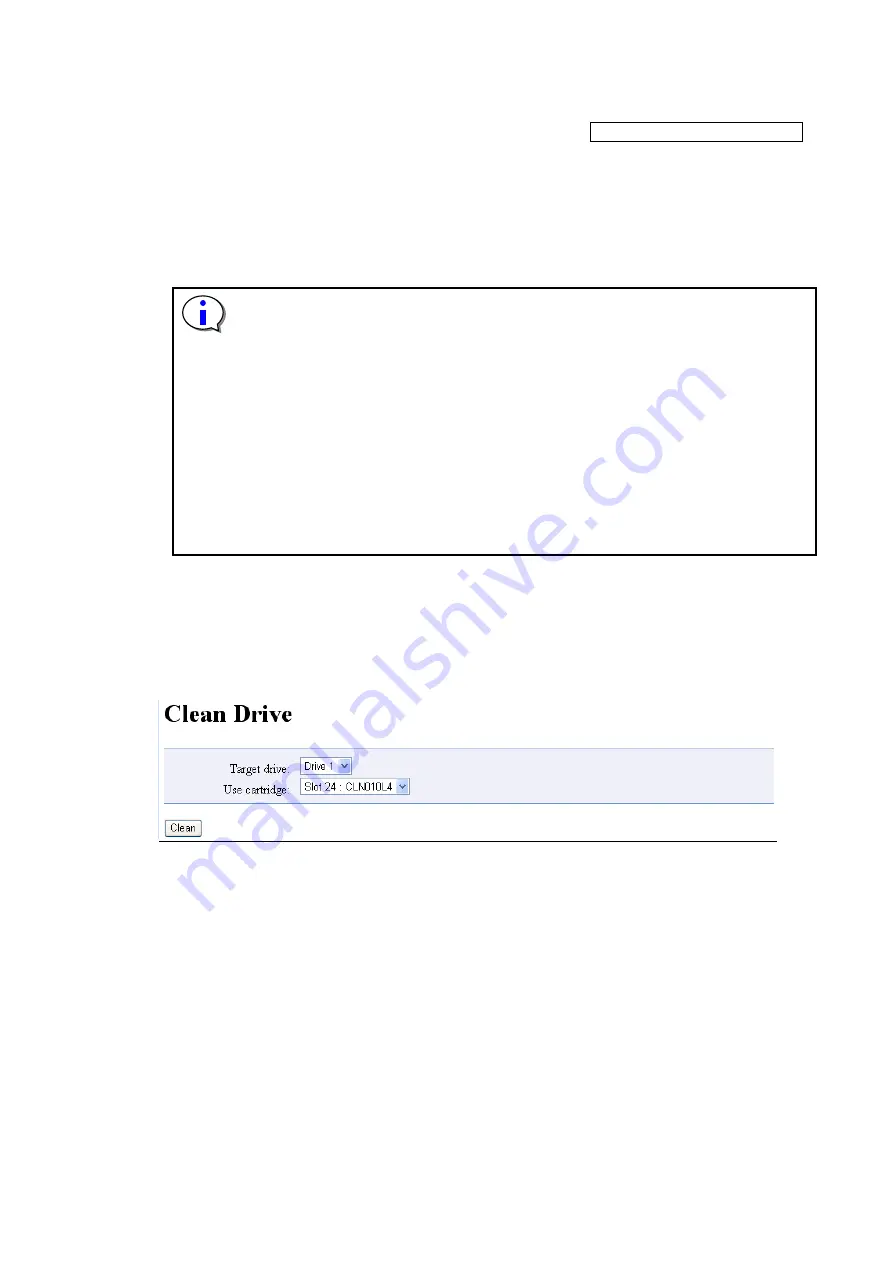
Clean Drive window (Clean Drive)
[Manage Library]-[Clean Drive] Service/Administrator/Super user
[Function]
This window's functions are similar to those of the operation panel's [Clean Drive] menu, which
inserts a cleaning cartridge into the drive specified by the selected slot, and then cleans the drive.
When drive cleaning is finished, the cleaning cartridge is returned to the original slot, and the cleaning
complete dialog box is displayed.
The "Clean Drive" function cannot be executed unless there is a cleaning cartridge in the library.
・
Use a special cleaning cartridge with a bar code label that supports the drive to be
cleaned.
・
Clean the drive once a month or a backup of 100 hours when cleaning is necessary
in operation.(When there is a cleaning request from the drive, clean the drive.)
・
Each cleaning cartridge can be used up to 50 times.
Record the number of use, and when 50 times is reached, replace the cleaning
cartridge.
The drive will not be cleaned even if the cleaning cartridge being used has
exceeded its service life.
・
[Clean Drive] doesn't operate when the bar code for the cleaning cartridge is not
stuck on the cleaning cartridge. In that case, please use and clean [Move
Cartridge].
・
[Clean drive] should be performed only when there are no backup software jobs
being executed.
[Use method]
1.Slect the drive to clean at target drive.
2. Select the cleaning cartridge to be used at “Use cartridge”
3. Click the Clean button to start Cleaning
[Information]
Figure 5-14 Clean Drive
1.Specify the drive
Taget drive: Select the drive to clean from the list.
2.Specify the cleaning cartridge
Use Cartridge: Select the cleaning cartridge to be used
3.Clean button
Click the Clean button, and Cleaning starts.
(1)
(2)
(3)
Содержание T30A
Страница 27: ... xxvi This page is intentionally blank ...
Страница 42: ... 15 4 Remove the cushioning material to take out the library 5 Open the plastic bag and remove the library ...
Страница 73: ... 46 4 4 Top Menu After Log in the following screen is displayed Figure 4 9 Root screen of Top Menu ...
Страница 206: ... 179 4 Remove the four screws anchoring the bezel and demount it Screws ...
Страница 235: ... 208 CONTROLLER BOARD 00CF Reserved ...
Страница 239: ... 212 Maintenance chassis 00FD Reserved 00FE Reserved 00FF Reserved ...


