141
❶
Mounting a lens (sold separately)
Eight separate bayonet style lenses can be used with this projector. The descriptions here are for the NP13ZL (2x
zoom) lens. Mount other lenses in the same manner.
Important:
• Be sure to carry out [LENS CALIBRATION] after replacing the lens.
• The projector and lenses are made of precision parts. Do not subject them to shock or excessive forces.
• Remove the separately sold lens when moving the projector. If not, the lens could be subject to shock while the projector is being
moved, damaging the lens and the lens shift mechanism.
• When dismounting the lens from the projector, return the lens position to the home position before turning off the power. Failure
to do so may prevent the lens from being mounted or dismounted because of narrow space between the projector and the lens.
• Turn off the power and wait for the cooling fan to stop before mounting or removing the lens.
• Never touch the lens surface while the projector is operating.
• Be very careful not to let dirt, grease, etc., on the lens surface and not to scratch the lens surface.
• Perform these operations on a flat surface over a piece of cloth, etc., to prevent the lens from getting scratched.
• When leaving the lens off the projector for long periods of time, mount the dust cap on the projector to prevent dust or dirt from
getting inside.
• If you have multiple projectors, be careful of the following:
- When mounting a lens designed exclusively for this projector onto another projector in the NP series, be sure to remove the
lens attachment before mounting the lens on the projector. The lens cannot be mounted if its attachment is on. For the types
of lenses that can be mounted and instructions on removing them, see the lense’s operating instructions.
- Other types of lenses cannot be mounted on this projector.
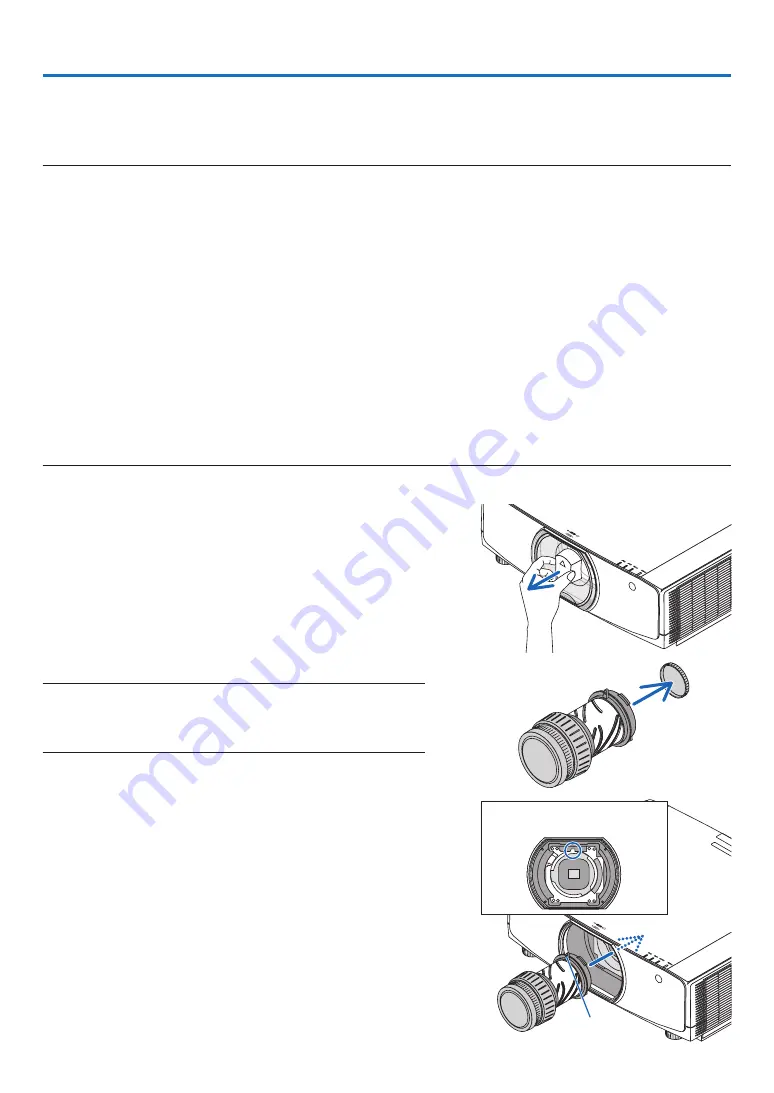
Mounting the lens
1. Remove the dust cap from the projector.
2. Remove the lens cap on the back of the lens.
NOTE:
• Make sure to remove the lens cap at the unit back side. If the lens unit
with the lens cap remaining on is installed on the projector, it may cause
of malfunction.
3. Insert the lens onto the projector with the yellow-marked
protrusion on the lens facing upwards.
There is a positioning slit on the projector’s lens insertion slot.
Insert the lens slowly all the way in, keeping the positioning
slit at the same angle.
Guiding notch
Yellow mark
6. Connecting to Other Equipment
Содержание PA803U
Страница 208: ... NEC Display Solutions Ltd 2016 7N952551 ...


