manualshive.com logo in svg
background image


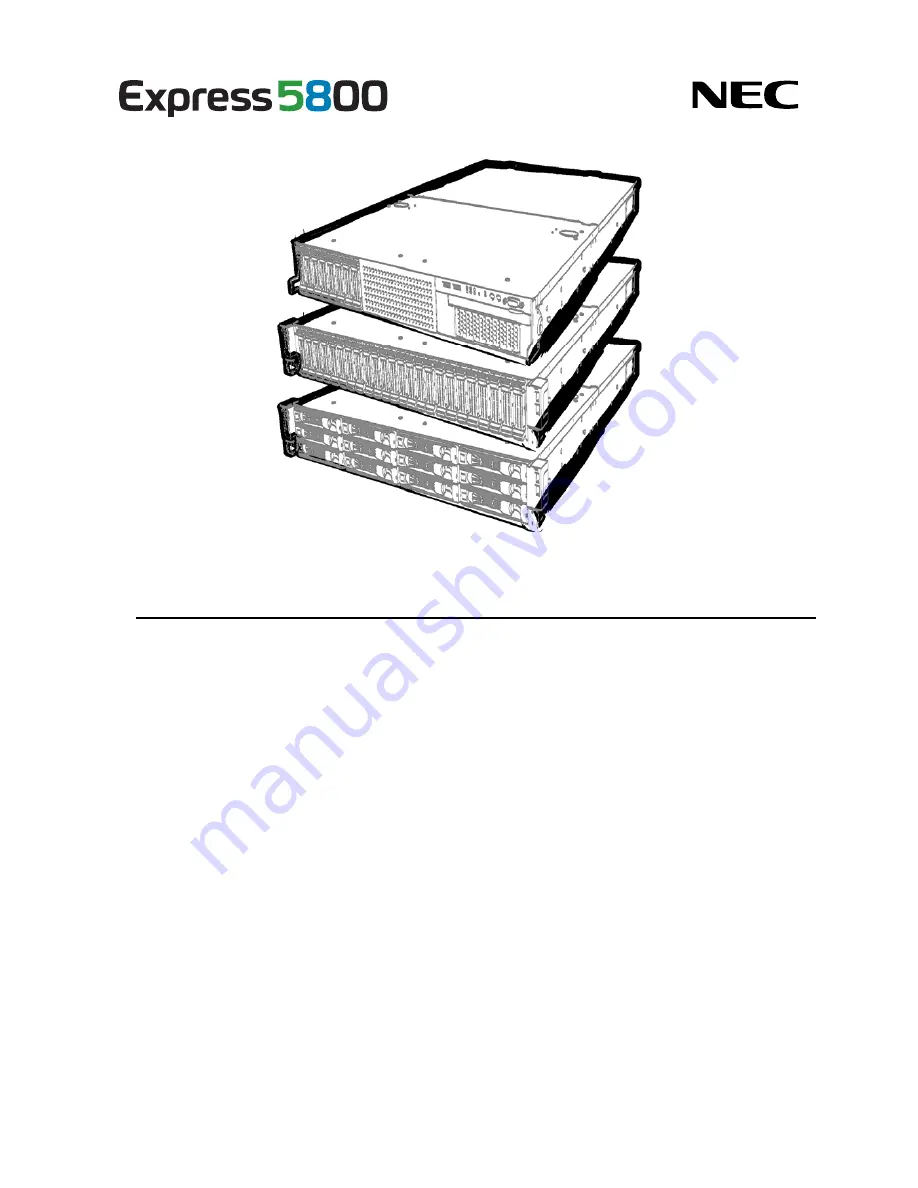
NEC Express Server


Express5800 Series 

10.023.02-101.02

March 2013, Scond Edition

© NEC Corporation 2013

Express5800/R120d-2E 

EXP481A 
User’s Guide 

Model Number:  R120d-2E: N8100-1950F/1951F/1952F/1953F 


Chapter 1  General Description 

Chapter 2  Preparations 

Chapter 3  Setup 
 
Chapter 4  Appendix 

Содержание NEC Express5800/R120d-2E

Страница 1: ... 023 02 101 02 March 2013 Scond Edition NEC Corporation 2013 Express5800 R120d 2E EXP481A User s Guide Model Number R120d 2E N8100 1950F 1951F 1952F 1953F Chapter 1 General Description Chapter 2 Preparations Chapter 3 Setup Chapter 4 Appendix ...

Страница 2: ... connection of peripheral devices and ideal location for this server Chapter 3 Setting Up Your Server System BIOS configurations and summary of EXPRESSBUILDER PDF Chapter 4 Appendix Specifications and other information Installation Guide Windows Chapter 1 Installing Windows Installation of Windows and drivers and important information for installation PDF Chapter 2 Installing the Bundled Software ...

Страница 3: ...Installation relocation storage and connection 18 Cleaning and working with internal devices 19 During operation 20 Warning labels 21 External view 21 Handling precautions for proper operations 22 Handling precautions Anti static Measures 23 Chapter 1 General Description 25 1 Introduction 26 2 Accessories 27 3 Standard Features 28 3 1 Management Features 31 3 2 Firmware and Software Version Manage...

Страница 4: ...0 1 11 Extra Battery for RAID Controller 73 1 11 1 Handling precautions 73 1 11 2 Installing N8103 153 162 extra battery 73 1 11 3 Removal 74 1 12 Backup File Device 75 1 12 1 Installation USB File Devices 75 1 12 2 Removal 77 1 13 PCI Card 78 1 13 1 Notes 78 1 13 2 Supported cards and available slots 79 1 13 3 Installation 81 1 13 4 Removal 86 1 14 Additional HDD Cage 87 1 14 1 Installation 87 1 ...

Страница 5: ...e power supply UPS 139 Chapter 3 Setup 140 1 Turning on the Server 141 1 1 POST 143 1 1 1 POST sequence 143 1 1 2 POST error messages 144 2 System BIOS Setup 145 2 1 Overview 145 2 2 Starting and Exiting SETUP Utility 145 2 2 1 Starting SETUP Utility 145 2 2 2 Exting SETUP Utility 145 2 3 Description on On Screen Items and Key Usage 146 2 4 Cases that Require Configuration 148 3 EXPRESSSCOPE ENGIN...

Страница 6: ...occur Note Indicates items that must be confirmed when handling the server or operating software Tips Indicates information that is helpful to keep in mind when using this server Optical disk drives This server is equipped with one of the following drives depending on the order at the time of purchase These drives are referred to as optical disk drives in this document DVD ROM drive DVD Super MULT...

Страница 7: ...ard Windows Server 2003 R2 2 Windows Server 2003 R2 Enterprise Windows Server 2003 Standard Windows Server 2003 2 Windows Server 2003 Enterprise Windows 7 Professional 64 bit x64 Edition Windows 7 Windows 7 Professional 32 bit x86 Edition Windows Vista Business 64 bit x64 Edition Windows Vista Windows Vista Business 32 bit x86 Edition Windows XP Professional x64 Edition Windows XP Windows XP Profe...

Страница 8: ... or trademarks of Adaptec Inc of the United States LSI and the LSI logo design are trademarks or registered trademarks of LSI Corporation Adobe the Adobe logo and Acrobat are trademarks of Adobe Systems Incorporated DLT and DLTtape are trademarks of Quantum Corporation of the United States PCI Express is a trademark of Peripheral Component Interconnect Special Interest Group Linux is a trademark o...

Страница 9: ...on d Industrie Canada Cet appareil numérique de la classe A est conforme à la norme NMB 003 du Canada CE Australia and New Zealand Statement This is a Class A product In domestic environment this product may cause radio interference in which case the user may be required to take adequate measures EN55022 BSMI Statement Disposing of your used product In the European Union EU wide legislation as imp...

Страница 10: ...м Технічного Регламенту Обмеження Використання деяких Небезпечних Речовин в електричному та електронному обладнанні затвердженого Постановою 1057 Кабінету Міністрів України Виріб відповідає вимогам Технічного Регламенту Обмеження Використання деяких Небезпечних Речовин в електричному та електронному обладнанні ТР ОВНР Вміст небезпечних речовин у випадках не обумовлених в Додатку 2 ТР ОВНР 1 свинец...

Страница 11: ... миллионных частей 3 ртуть Hg не превышает 0 1 веса вещества или в концентрации до 1000 миллионных частей 4 шестивалентный хром Cr6 не превышает 0 1 веса вещества или в концентрации до 1000 миллионных частей 5 полибромбифенолы PBB не превышает 0 1 веса вещества или в концентрации до 1000 миллионных частей 6 полибромдифеноловые эфиры PBDE не превышает 0 1 веса вещества или в концентрации до 1000 ми...

Страница 12: ...r omissions please contact your retailer 5 Regardless of these 4 items NEC Corporation does not take responsibility for effects resulting from operations 6 The sample values used in this document are not the actual values Keep this document nearby so that you may refer to it as necessary Latest editions This document was created based on the information available at the time of its creation The sc...

Страница 13: ...els WARNING or CAUTION is used to indicate a degree of danger These terms are defined as follows WARNING Indicates there is a risk of death or serious personal injury CAUTION Indicates there is a risk of burns other personal injury or property damage Precautions and notices against hazards are presented with one of the following three symbols The individual symbols are defined as follows Attention...

Страница 14: ... shock or fire may be caused Do not touch the server with wet hand Otherwise an electric shock may be caused Do not touch the component specified by this symbol Otherwise an electric shock or burn may be caused Do not use the server in the place where water or liquid may pour Otherwise an electric shock or fire may be caused Do not place the server near the fire Otherwise a fire may be caused Indi...

Страница 15: ... shock Use a rack that conforms to the designated standard This server can be mounted onto a 19 inch rack that conforms to EIA standards Do not mount the server onto any rack that does not conform to EIA standards Doing so may cause a server malfunction personal injury or damage to peripheral devices For more information about racks that can be used with the server consult with your maintenance se...

Страница 16: ...mponents such as the door or rails When installing the door make sure that both upper and lower hinge pins are held in place Incomplete attachment may cause components to fall off as well as personal injury Do not extend any device from the rack that is not stabilized When extending a device from the rack make sure that the rack is stable by using a stabilizer or seismic reinforcement Otherwise th...

Страница 17: ...ingle outlet by using extension cords The electric current exceeding the rated flow overheats the outlet which may cause a fire Insert the power plug into the outlet as far as it goes Heat generation resulting from a halfway inserted power plug imperfect contact may cause a fire Heat will also be generated if condensation is formed on dusty blades of the halfway inserted plug increasing the possib...

Страница 18: ...specified Do not install the server in the following places or any place other than specified in this User s Guide Failure to follow this instruction may cause a fire A dusty place A humid place such as near a boiler A place exposed to direct sunlight An unstable place Do not use the server in an environment where corrosive gas is present Do not install the server in a place subject to corrosive g...

Страница 19: ...e the server with loose cable connections Do not use any damaged cable Cleaning and working with internal devices WARNING Do not disassemble repair or alter the server Never attempt to disassemble repair or alter the server on any occasion except as described in this document Failure to follow this warning may cause not only malfunction of the server but also an electric shock or fire Do not attem...

Страница 20: ...erver during thunderstorms Do not touch any part of the server including the cables when a thunderstorm is approaching Also do not connect or disconnect any devices There may be a risk of electric shock from lightning strike Keep animals away from the server Keep animals such as pets away from the server Pet hair or other waste enters the server which may cause a fire or electric shock Do not leav...

Страница 21: ...ched or printed on the component to draw attention from users to potential hazards involved in handling the server Do not remove or black out this label and keep it clean If no label is attached or printed on the server or if there is a label coming off or stained contact the store where you purchased the product External view Ex Express5800 R120d 2E 3 5 inch Drive Model 243 203025 003 00 ...

Страница 22: ... guarantee that any copy protected CD that does not conform to standards will play on the CD player In the following cases check and adjust the system clock before operation After transportation After storage After the server is used following a period of disuse in which storage conditions did not conform to those that guarantee server operations temperature 10 C to 40 C 1 humidity 20 to 80 Check ...

Страница 23: ...ake off any jewels a ring bracelet or wrist watch before working with the server Handling of components Keep any component in an anti static bag until you actually install it to the server Hold any component by its edge to avoid touching any terminals or parts To store or carry any component place it in an anti static bag Handling of cables When connecting a cable e g LAN cable static electricity ...

Страница 24: ...n from reflecting bright lights and to make the display contents easy to see Working without adjusting the display to a comfortable angle makes it difficult for you to maintain a proper posture and you will get tired easily Adjust the viewing angle before use Adjust the brightness and contrast of the display Display screens have functions to control brightness and contrast The most suitable bright...

Страница 25: ...atures of this server and the name of each part 1 Introduction 2 Accessories Verify the condition of your server s accessories 3 Standard Features Check and maintain the server system by using the functions explained in this section 4 Names and Functions of Parts This section describes the name of each part contained in this server ...

Страница 26: ... processor NEC s latest technology and architectures realize high power and high speed operation that cannot be matched by existing servers The server is designed with consideration of not only reliability but also expandability which enables you to use it as a network server Read this document before using the server thoroughly to fully understand handling of Express5800 Series Server and appreci...

Страница 27: ...position Getting Started Use notes Traditional Chinese version 1 Documents are stored in EXPRESSBUILDER Adobe Reader is required to read the documents so make sure you have it installed in your PC Make sure you have all accessories and inspect them If an accessory is missing or damaged contact your sales representative Important The chassis serial number plate and maintenance label is located on t...

Страница 28: ...neracy feature logical isolation of a failed device Memory throttle ring feature Memory x4 x8 SDDC feature Memory mirroring Lockstep x8 SDDC Sparing mode Memory Independent Lockstep Mirroring Sparing mode Bus parity error detection Temperature detection Error detection Internal fan monitoring feature Internal voltage monitoring feature Power redundant feature hot swapping supported RAID system dis...

Страница 29: ...B 4 Can upgrade to multi processor system with up to two processors Hard disk drive bays 16x 2 5 inch Drive Model 2 5 inch drive bay 16 slots 5 26x 2 5 inch Drive Model 2 5 inch drive bay 26 slots 6 3 5 inch Drive Model 3 5 inch drive bay 12 slots 2 5 inch drive bay 2 slots 7 Optical disk drive bay provided as standard 16x 2 5 inch Drive Model Back up device bay provided as standard 16cx 2 5 inch ...

Страница 30: ...ed processor type 2 Processor core speed depends on the number and type of CPU and DIMMs installed and operating voltage 1 35 1 5 V 3 PCI card is support only of a low profile type but please use one for full heights for a bracket 4 In 2 CPU configuration Up to 192 GB in 1 CPU configuration 5 With N8154 46 2 5 inch HDD cage installed 8 slots for 2 5 inch hard disk drive in standard configuration 6...

Страница 31: ...ial ports keyboard mouse and video Monitors temperatures fans voltage power supply and others Temperature Monitors the temperature inside of the chassis Fan Monitors the fans Voltage Monitors the voltage inside of the chassis System environment Power supply Monitors the power supply unit Software Shows service driver and OS information Network Shows network LAN information and monitors packets BIO...

Страница 32: ...nagement Use of NEC ESMPRO Manager and ExpressUpdate Agent allows you to manage versions of firmware and software as well as update them by applying update packages This function automatically updates multiple modules without stopping the system just by specifying the application of an update package from NEC ESMPRO Manager ...

Страница 33: ...equential numbers 1 2 3 and 4 indicate LAN connectors 1 2 3 and 4 respectively 4 Disk Access LED green amber This LED lights green when the internal hard disk drive is being accessed An amber light turns on if a hard disk drive is broken and a light flashes green and amber alternately when a hard disk drive is being rebuilt RAID System only 5 STATUS LED green amber This LED indicates the server st...

Страница 34: ...LAN connectors 1 2 3 and 4 respectively 4 Disk Access LED green amber This LED lights green when the internal hard disk drive is being accessed An amber light turns on if a hard disk drive is broken and a light flashes green and amber alternately when a hard disk drive is being rebuilt RAID System only 5 STATUS LED green amber This LED indicates the server status It lights green when the server is...

Страница 35: ...NMI When the DUMP switch is pressed memory dump is performed 14 Unit ID UID Switch blue The switch to turn on and off the UID LEDs provided at the front and rear of the server Pressing the switch once turns on the UID LED and pressing once more turns off the LED Commands from the software also cause it to turn on or flash 15 POWER Switch LED green amber The switch to turn the server on and off Pre...

Страница 36: ...n there is something wrong with EXPRESSSCOPE Engine 3 BMC To use this switch press it at least five seconds 12 DUMP Switch NMI When the DUMP switch is pressed memory dump is performed 13 Unit ID UID Switch blue The switch to turn on and off the UID LEDs provided at the front and rear of the server Pressing the switch once turns on the UID LED and pressing once more turns off the LED Commands from ...

Страница 37: ...rver Use the switch only when there is something wrong with EXPRESSSCOPE Engine 3 BMC To use this switch press it at least five seconds 12 DUMP Switch NMI When the DUMP switch is pressed memory dump is performed 13 Unit ID UID Switch blue The switch to turn on and off the UID LEDs provided at the front and rear of the server Pressing the switch once turns on the UID LED and pressing once more turn...

Страница 38: ...al Description 4 3 Rear View With N8154 47 2 5 inch HDD cage rear installed Express5800 R120d 2E 26x 2 5 inch Drive Model and Express5800 R120d 2E 3 5 inch Drive Model only 4 M 3 2 1 16 12 24 16 13 25 4 M 3 2 1 2 3 11 9 11 8 1 4 10 4 9 11 10 3 9 10 2 9 11 10 1 9 11 12 14 15 6 5 13 4 7 ...

Страница 39: ...ROM Utility LAN connector 1 can also be used as the management LAN port However sharing port is not recommended from the point of performance and security because LAN port 1 may receive both data 11 SPEED LED green amber The LED indicates the transfer speed of LAN ports 12 Management LAN Port Ethernet connector which supports 100BASE TX 10BASE T This port cannot be used as a data transmission port...

Страница 40: ...Guide 40 Chapter 1 General Description 4 4 External View Express5800 R120d 2E 16x 2 5 inch Drive Model Express5800 R120d 2E 26x 2 5 inch Drive Model Express5800 R120d 2E 3 5 inch Drive Model 1 Top Cover front 2 Release Button 3 Top Cover rear 3 2 1 3 2 1 3 2 1 ...

Страница 41: ...al 8 FAN3F Optional 9 FAN4F Optional 10 FAN5F Optional FAN1R 3R and 5R are standard parts FAN4R is option parts when CPU 2 is installed FAN1F 5F are option parts when redundant FAN configuration 5 Processor attached under the heat sink 6 DIMM optional 7 Motherboard MB 8 PCI Riser Card 1 Riser A RAID Controller Only 2 Riser B 3 Riser C 9 Power Supply Unit In 1 CPU configuration Install redundant fa...

Страница 42: ...5R 6 FAN1F Optional 7 FAN2F Optional 8 FAN3F Optional 9 FAN4F Optional 10 FAN5F Optional FAN1R 5R are standard parts FAN1F 5F are option parts when redundant FAN configuration 6 PCI Riser Card 1 Riser A RAID Controller Only 2 Riser B 3 Riser C 7 Power Supply Unit 8 Additional HDD Cage Rear 9 Cooling fan Rear 1 FAN6R 2 FAN7R 3 Processor attached under the heat sink 4 DIMM optional 5 Motherboard MB ...

Страница 43: ...U connector 1 default POW 1 2 redundant POW 2 15 SATA Optical Disk Drive signal connector 16 SATA connector 17 Buzzer 18 COM connector for Option N8117 01A COM port B when N8117 01A is used 19 EXPRESSSCOPE Profile Key connector EXPRESSSCOPE Profile Key has been installed where BIOS and BMC configuration data is stored Move it when replacing MB to keep using the data 20 TPM Kit connector 21 Clear P...

Страница 44: ...em with hardware The following table lists STATUS LED patterns their explanation and solution Tips You can reference error logs to check the causes of failures by using NEC ESMPRO STATUS LED pattern Explanation Solution On green Normal state Memory is in a degraded state An uncorrectable memory error has often occurred Operating while CPU error is detected Flashing green In redundant power configu...

Страница 45: ... fan cable is properly connected If the LED indication does not change when the fans are normal contact your sales representative A temperature warning was detected Check the internal fan for dusts Also check if the fan unit is properly connected If the LED indication does not change when the fans are normal contact your sales representative A voltage warning was detected Flashing amber One or mor...

Страница 46: ... is not pressed OFF Tips You can turn on or flashing an LED using remote management software 4 7 7 LED on a hard disk drive DISK LED on a hard disk drive to be installed in the drive bay indicates different states DISK Access LED pattern Explanation On green This indicates a hard disk drive is being accessed On amber This indicates a hard disk drive is failing Flashing green and amber alternately ...

Страница 47: ...perly connected Flashing green The network port is transmitting or receiving data Off Check the cable or connection SPEED LED 1 2 3 4 M This LED indicates which network interface is used The four LAN connectors for data transmission support 1000BASE T 100BASE TX and 10BASE T Management LAN port supports 100BASE TX and 10BASE T SPEED LED pattern Explanation On amber Operating with 1000BASE T On gre...

Страница 48: ...tion On green The server is powered on The power cable is connected and AC power is supplied Flashing green Cold Redundant feature is enabled The power cable is not connected in redundant power configuration Connect the power cable On amber Power supply unit is failing Flashing amber Power supply unit is failing Contact your sales representative AC POWER LED Standard power supply unit ...

Страница 49: ...s This chapter describes preparations for using this server 1 Installing Internal Optional Devices You can skip this section if you did not purchase any optional devices 2 Installation and Connection You must place the server in an ideal location and connect some cables following this section ...

Страница 50: ...iod 1 1 Safety Precautions Be sure to observe the following precautions to install and remove optional devices properly and safely WARNING Be sure to observe the following precautions to use the server safety Failure to observe the precautions may cause death or serious injury For details refer to Safety precautions in Precautions for Use Do not disassemble repair or modify the server Do not remov...

Страница 51: ...e the server on an anti static mat to work with Clothing Do not wear wool or synthetic clothes Wear anti static shoes Take off any jewels a ring bracelet or wrist watch before working with the server Handling of components Keep any component in an anti static bag until you actually install it to the server Hold any component by its edge to avoid touching any terminals or parts To store or carry an...

Страница 52: ...s 1 If the server is mounted on a rack use the UID switch to identify the target server Refer to Chapter 2 1 4 Confirming Servers UID Switch 2 Remove the front bezel if applicable Refer to Chapter 2 1 5 Removing the Front Bezel 3 If the server is ON turn it off Refer to Chapter 3 6 Turning Off the Server 4 Disconnect the power cord from the outlet and the server Important After disconnecting the p...

Страница 53: ...m 8 Attach the top cover Refer to Chapter 2 1 19 Installing Top Cover 9 Mount the server onto the rack Refer to Chapter 2 2 1 2 Installation 10 Install Hard Disk Drives Refer to Chapter 2 1 20 2 5 inch Hard Disk Drive and Chapter 2 1 21 3 5 inch Hard Disk Drive 11 Install Power Supply Unit Refer to Chapter 2 1 22 Power Supply Unit 12 Attach the front bezel Refer to Chapter 2 1 5 Removing the Front...

Страница 54: ...the server is working or before you turn the server off or disconnect a cable from the server be sure to identify the target server by using the UID switch first If UID Unit ID switch is pressed UID LED will be on or flash If it is pressed again the LED will be off Front View Express5800 R120d 2E 16x 2 5 inch Drive Model Express5800 R120d 2E 26x 2 5 inch Drive Model M 1 2 3 4 UID switch UID switch...

Страница 55: ...1 Installing Internal Optional Devices Express5800 R120d 2E User s Guide 55 Chapter 2 Preparations Express5800 R120d 2E 3 5 inch Drive Model Rear View UID switch M 1 2 3 4 UID switch ...

Страница 56: ...ront bezel when manipulating POWER switch or removing the top cover 1 Insert the attached security key into the key slot and turn the key to the front bezel side while pressing it lightly to release the lock 解除 ロック 2 Hold the both end of the front bezel carefully pull it toward you and remove it Note Be careful not to press POWER Switch Unlocked Locked ...

Страница 57: ... Additional HDD cage rear Additional redundant fan unit Optical disk drive Important Before removing the top cover be sure to disconnect cables from PCI card such as LAN adapter If not cables may be damaged 1 Refer to steps 1 to 4 in Chapter 2 1 3 Overview of Installation and Removal for preparations 2 Slide the top cover toward the front of the server while pressing the lock button on the cover 3...

Страница 58: ...1 Installing Internal Optional Devices Express5800 R120d 2E User s Guide 58 Chapter 2 Preparations 5 Lift the top cover rear and remove it ...

Страница 59: ...ory 1 7 1 Installation Install the Internal Flash Memory in the following procedure 1 Refer to steps 1 to 6 in Chapter 2 1 3 Overview of Installation and Removal for preparations 2 Remove the duct 3 Attach the Internal Flash Memory and fix it with the screw provided with this product 1 7 2 Removal To remove the Internal Flash Memory reverse the installation procedure Internal Flash Memory connecto...

Страница 60: ...r installing the TPM Kit 1 8 1 Installation Install the TPM Kit in the following procedure Note The TPM Kit once installed cannot be removed 1 Refer to steps 1 to 6 in Chapter 2 1 3 Overview of Installation and Removal for preparations 2 Remove the duct 3 Install TPM Kit and secure it by pushing the nylon rivet provided with TPM Kit TPM kit connector ...

Страница 61: ... of the processor as well as the motherboard Repair of the server due to failures or damage resulted from installing such a processor will be charged Tips If the different revision of the processor is installed in the multiprocessor system Windows logs the following information and displays it on System Viewer If this message is logged it is no problem for operation An additional fan attached to t...

Страница 62: ...tacts 6 Remove the protective cover from the CPU socket Tips Protective cover is sometimes installed on the plate of CPU socket Important Keep the protective cover for future use Always attach the CPU protective cover if the processor is removed from the socket 7 Put the additional processor on the CPU socket slowly and gently For easy installation hold edges of processor with your thumb and index...

Страница 63: ...raight without tilting or sliding it in the socket 8 Lightly push the processor to the CPU socket and close the plate 9 Close the socket lever to fix it 10 Put the heat sink on processor and fix the heat sink with four screws The direction where a heat sink is installed refar to illustration of step 11 Temporarily tighten the four screws diagonally then tighten them securely Make sure that the scr...

Страница 64: ...3 Install the components you removed in earlier steps 14 If the processor is additionally installed run SETUP select Advanced Processor Configuration Processor Information and confirm that CPU ID L2 Cache RAM and L3 Cache RAM are defined normally Refer to Chapter 2 1 2 2 Advanced Processor Information submenu in Maintenance Guide 1 9 2 Replacement Removal To remove processor reverse the installati...

Страница 65: ...memory sizes OS The maximum memory size supported on each OS The maximum memory size supported on the server 4 GB If using HW DEP function Default factory settings Windows Server 2003 R2 Standard Windows Server 2008 Standard x86 Edition 4 GB About 3 3 GB If not using HW DEP function Note If you are not using the HW DEP function set the Execute Disable Bit XD Bit to Disable in the BIOS setup It is ...

Страница 66: ...nd Memory LockStep feature x8 SDDC ECC memory and Memory Sparing feature To use the memory mirroring or LockStep feature refer to Chapter 2 1 10 7 Using Memory RAS Features Standard memory feature x4 SDDC ECC memory Memory Mirroring feature restrictions imposed on DIMM configuration Memory LockStep feature x8 SDDC ECC memory restrictions imposed on DIMM configuration Rank Sparing feature restricti...

Страница 67: ...e Memory Sparing feature DIMM number 1 CPU configuration 2 CPU configuration 1 CPU configuration 2 CPU configuration 1 CPU configuration 2 CPU configuration CPU1_DIMM1 1 1 N S N S 1 1 CPU1_DIMM4 4 7 N S N S 1 1 CPU1_DIMM2 2 3 1 1 2 3 CPU1_DIMM5 5 9 2 3 2 3 CPU1_DIMM3 3 5 1 1 3 5 CPU 1 CPU1_DIMM6 6 11 2 3 3 5 CPU2_DIMM1 2 N S 2 CPU2_DIMM4 8 N S 2 CPU2_DIMM2 4 2 4 CPU2_DIMM5 10 4 4 CPU2_DIMM3 6 2 6 ...

Страница 68: ...ptional devices mount and connect the server and turn it on 5 Confirm that no error messages are displayed in POST screen If any error messages are displayed refer to Chapter 3 1 POST Error Message in Maintenance Guide 6 Run the SETUP utility and select Memory Configuration and then Memory Information from the Advanced menu Make sure the capacity of added DIMM is displayed properly Refer to Chapte...

Страница 69: ...ng DIMMs 1 Confirm that no error messages are displayed on POST If any error message is displayed refer to Chapter 3 1 Post Error Message in Maintenance Guide 2 Run BIOS Setup Utility select Memory Configuration from the Advanced menu and then specify Yes for Memory Retest After that select Save Changes and Exit to reboot 3 Set the size of Paging File to the recommended value Total memory size x 1...

Страница 70: ...irroring Feature The memory mirroring feature writes the same data into two groups of DIMMs corresponding with each other between memory channels channels 2 and 3 to provide data redundancy Important The memory mirroring feature uses channels 2 and 3 In memory mirroring configuration the memory channel 1 of each CPU CPU1 DIMM1 4 CPU2 DIMM1 4 is disabled To use the Memory Mirroring feature addition...

Страница 71: ... additional memory board N8102 493 494 495 496 equipped with four DIMMs of same model is required The LockStep feature can be used under the following conditions Install two DIMMs that operate in parallel in memory socket All the installed DIMMs should have the same capacity Run SETUP refer to Chapter 2 1 System BIOS in Maintenance Guide change parameters appropriately in the LockStep menu selecte...

Страница 72: ...those with capacities less than the actual physical capacities The recognized capacities vary depending on the number of DIMMs and the physical capacity per DIMM The Memory Sparing feature can be used under the following conditions DIMMs to be installed should have the same capacity Run SETUP refer to Chapter 2 1 System BIOS in Maintenance Guide change parameters appropriately in the Sparing menu ...

Страница 73: ...icated to the RAID Controller you are using The extra battery is a very delicate electronic device Before installation touch the metal frame part of the server to discharge the static electricity from your body Do not drop or bump the extra battery For recycling and disposing of the extra battery refer to the User s Guide that comes with it 1 11 2 Installing N8103 153 162 extra battery This sectio...

Страница 74: ...to RAID Controller When connecting the cable orient the cable so that its marking will fit the connector 8 Attach the RAID Controller to the rise card For how to install RAID Controller refer to Chapter 2 1 13 PCI Card 9 Insert the riser card into the slot of the motherboard and fix the riser card with the screw which you removed in earlier step For how to install riser card refer to Chapter 2 1 1...

Страница 75: ... Important Install only a backup file device specified by NEC 1 12 1 Installation USB File Devices 1 Refer to Chapter 2 1 3 Overview of Installation and Removal for preparations 2 Remove the processor duct from the server 3 Push the lever of the cage to unlock it then take the device carrier out of front of the server 4 Remove the blank cover from cage Important Keep the removed blank cover for fu...

Страница 76: ...vice screw holes align with the screw holes in the device carrier If you feel difficult to connect the cable of the long device slide the device to the front and then connect the cable 7 Insert the device carrier into the backup file device bay Since power cable is not yet connected insert the device carrier halfway 8 Connect the power cable and interface cable to the backup file device Connect th...

Страница 77: ...d run BIOS SETUP and set the boot priority of removable device to lower than the boot device Boot Boot Option 2 Bus 08 Dev XX PCI RAID Adapter 11 Install the device driver for the backup file device Refer to the manual that comes with the backup file device 1 12 2 Removal Remove the backup file device in reverse order of the installation steps Important To maintain the cooling effect in the server...

Страница 78: ...may be recognized in different order from that described above depending on OS or RAID System BIOS utility Check the slot location of PCI device by PCI bus number device number and function number shown in Chapter4 Appendix 2 PCI Configuration Before removing the top cover be sure to disconnect cables from PCI card such as LAN adapter If not cables may be damaged If an additional LAN card is insta...

Страница 79: ...03 152 RAID Controller 1GB RAID 0 1 5 6 PCI Express 3 0 x8 c Dedicated to connect with internal hard disk drive 26 x2 5 inch Drive Model and 3 5 inch Drive Model require any one of RAID Controller Additional battery N8103 153 can be mounted Total of 3 internal 1 external 2 RAID Controller can be installed Only one additional battery can be mounted N8103 152 is included flash cache protection modul...

Страница 80: ...ss 2 0 x8 c c c c For additional LAN port Prepare SFP module N8104 129 if needed Teaming AFT SFT ALB and bonding with N8104 128 is supported N8104 131 10G Converged Network Adapter 2ch 10Gbps Optical PCI Express 2 0 x8 c c c c For additional DCB FcoE SFP module is factory installed Teaming bonding with LAN is not available N8117 01A Additional RS 232C connector kit 3 c c c c c For additional seria...

Страница 81: ...tall an extra battery for RAID Controller refer to Chapter 2 1 11 Extra Battery for RAID Controller Installing RAID Controller card in slot PCI 1A 1 Refer to Chapter 2 1 3 Overview of Installation and Removal for preparations 2 Remove the screw securing the rise card Hold the both ends of the riser card and lift it off Note Be careful not to contact with other parts 3 Confirm the installation posi...

Страница 82: ...ep 4 Important Do not touch the terminal part of riser cards or PCI cards and the signal pins of electric parts installed on the card Installing cards with dirt or oil can cause malfunction Note Make sure that the head of a PCI card bracket is seated into the fixed slot Depending on type of PCI cards the terminal part of the PCI card may be too large to fit in the connector If you have trouble in ...

Страница 83: ... on POST screen For details on POST error messages refer to Chapter 3 1 POST Error Message in Maintenance Guide 12 Start the BIOS Configuration utility on the mounted board to set up the board Availability or startup and operation procedure of the utility depends on board For details refer to the manual that comes with the board If a PCI card including RAID Controller SCSI controller and LAN card ...

Страница 84: ... number is set to Enabled When connecting a RAID Controller set the boot priority to 8th or higher in the Boot menu of the BIOS Setup utility If the setting is 9th or lower the configuration menu for RAID Controllers cannot be launched Installing optional PCI card in slot PCI 1B 2B 3B 1C or 2C 1 Refer to Chapter 2 1 3 Overview of Installation and Removal for preparations 2 Remove the two screws se...

Страница 85: ... in the connector If you have trouble installing the card remove the card once and try again If you apply excessive pressure on the card a PCI card or riser card might break Tips Connect a cable between connector on motherboard and PCI card before installing the riser card to the server 6 Secure the PCI card 7 Insert the riser card B into the slot on motherboard and secure the card with the three ...

Страница 86: ...ork with the procedure below For details refer to Chapter 2 1 2 Anti static Measures Do not change the mode to hibernate when building a RAID System Note When installing an optional RAID Controller start the BIOS Setup utility select PCI Configuration from the Advanced menu and then make sure that the parameter of PCI Slot xx ROM xx is PCI slot number is set to Enabled When connecting a RAID Contr...

Страница 87: ...lling additional hard disk drives 1 14 1 Installation Follow steps below to install an additional HDD cage 1 Refer to steps 1 to 6 in Chapter 2 1 3 Overview of Installation and Removal for preparations 2 Remove the six screws from protective cover and remove the protective cover 3 Remove the blank cover of 2 5 inch HDD cage bay by pulling it toward you Note Keep the removed blank cover for future ...

Страница 88: ...Preparations 4 Mount HDD Cage and join the projection of the server four places to the hole on back of HDD Cage four places 5 While pressing down on the HDD cage move it toward the rear of the server to fix The projection of the server four places The hole on back of HDD Cage four places ...

Страница 89: ...r s Guide 89 Chapter 2 Preparations Note Insert the edge of HDD Cage to edge of chassis carefully as shown in the following figure OK The edge of HDD cage is correctly inserted to edge of chassis The edge of HDD Cage is not correctly inserted to edge of chassis NG ...

Страница 90: ...de 90 Chapter 2 Preparations 6 Secure the protective cover with six screws you have removed in Step 2 7 Disconnect SAS SATA cable from the factory installed HDD cage 8 Install expander board to Expansion Bay and secure it with five screws provided with additional HDD cage ...

Страница 91: ...provided with the server to Expander Board SAS SATA cable factory installed additional HDD Backplane Board HDD Backplane Board Expander Board RAID Controller SAS 1 Port 0 3 or Port 1 4 RAID Controller SAS 2 Port 4 7 or Port 5 8 Power cable MB HDD Backplane Board power connector 3 MB HDD Backplane Board power connector 1 MB HDD Backplane Board power connector 2 HDD Backplane Board HDD Backplane Boa...

Страница 92: ...ry installed HDD cage and additional HDD cage 12 Attach the ID label to the front face of chassis 1 14 2 Removal To remove an additional HDD cage reverse the installation procedure Important To maintain the cooling effect in the server install the blank cover in the vacant slot SAS SATA cable factory installed additional HDD Backplane Board HDD Backplane Board Expander Board SGPIO cable ...

Страница 93: ...Model can have additional HDD cage rear for installing additional hard disk drives 1 15 1 Installation Follow steps below to install an additional HDD cage rear 1 Refer to steps 1 to 6 in Chapter 2 1 3 Overview of Installation and Removal for preparations 2 Remove the two screws and remove the blank cover from 2 5 inch HDD cage bay Note Keep the removed blank cover for future use Screws ...

Страница 94: ...aces on the cage Then fix them by the two screws removed by the Step 2 4 Connect the Power cable SGPIO cable and SAS SATA cable provided with additional HDD cage Express5800 R120d 2E 26x 2 5 inch Drive Model SAS SATA cable SGPIO cable HDD Backplane Board Power cable SAS_A SAS_B SAS_A SAS_B Connect to MB Additional HDD Cage Rear Power connector HDD cage rear Expander Board Upside Downside Screws ...

Страница 95: ...two fan units to the fan cage 6 After tearing off the seal put the Anti vibration rubber sheet on the fan units installed above Let the rubber sheet run off the edge approximately 2mm Cable SAS SATA cable SGPIO cable HDD Backplane Board Power cable SAS_A SAS_B SAS_A SAS_B Connect to MB Additional HDD Cage Rear Power connector HDD cage rear Upside Downside ...

Страница 96: ...pter 2 Preparations 7 After putting the catches two places on the bottom of the fan cage into the notch cuts of the server install the fan cage by adjusting the positioning pins to the positioning on the HDD cage Note Check that the fan cage is firmly fixed Notch Cuts Positioning ...

Страница 97: ...parations 8 Connect the cables of the fan units to the sockets FAN6R FAN7R on the motherboard 1 15 2 Removal To remove an additional HDD cage rear reverse the installation procedure Important To maintain the cooling effect in the server install the blank cover in the vacant slot FAN6R FAN7R ...

Страница 98: ...low shows the slot numbers assigned to the slots of standard cooling fans and optional cooling fans Express5800 R120d 2E 16x 2 5 inch Drive Model 1 Expansion FAN is installed in FAN 5R when Expansion CPU is installed 2 Redandunt FANs are installed in FAN1F 3F and 5F when one CPU is installed Redandunt FANs are installed in FAN1F 5F when two CPU are installed Redandunt FANs Option 2 Additional FAN ...

Страница 99: ...uide 99 Chapter 2 Preparations Express5800 R120d 2E 26x 2 5 inch Drive Model Express5800 R120d 2E 3 5 inch Drive Model Ex Express5800 R120d 2E 3 5 inch Drive Model FAN1F FAN2F FAN3F FAN4F FAN5F FAN5R FAN4R FAN3R FAN2R FAN1R Standard FANs Redandunt FANs Option Front Rear ...

Страница 100: ...the fan unit straight into the additional fan slot until it locks with clicking sound Important Keep the dummy fan for future use 2 Installing additional fan when configuring redundant fan system 1 Refer to Chapter 2 1 3 Overview of Installation and Removal for preparations 2 Locate the slot to install an additional fan With 16x 2 5 inch Drive Model In 1 CPU configuration Install redundant fan uni...

Страница 101: ...ver is powered on hot swappable You can identify the failing fan by using the management tool such as EXPRESSSCOPE Engine 3 While the system is powered on or running the LED of failed fan unit is lit CAUTION Be sure to observe the following precautions to use the server safely Failure to observe the precautions may cause burns injury and property damage For details refer to Safety precautions in P...

Страница 102: ...upported optical disk drive 1 17 1 Installation Install an optical disk drive in the following procedure 1 Refer to Chapter 2 1 3 Overview of Installation and Removal for preparations 2 Push the lock lever to unlock the drive tray and pull the cage toward you 3 Remove a single screw from the cage and remove the bracket and dummy cover Important Keep the screw and dummy tray in the optical disk dri...

Страница 103: ...a screw you removed in Step 3 6 Insert the cage installed optical disk drive until it locks with clicking sound 7 Connect the cable to optical disk drive 1 17 2 Removal To remove an optical disk drive reverse the installation procedure above Important To maintain the cooling effect in the server install the dummy cover in the vacant slot ...

Страница 104: ...150 151 is used If using internal Hard Disk Drives in RAID System with an optional RAID Controller N8103 149 150 151 installed in the server the SAS SATA cable needs to be rewired For more information refer to the manual provided with optional RAID Controller Important You must avoid static electricity to work with the procedure below For details refer to Chapter 2 1 2 Anti static Measures Do not ...

Страница 105: ...AID Controller the interface cable must be connected Refer to the figures below for how to connect cables 16x 2 5 inch Drive Model When using onboard RAID controller 1 to 4 drives MotherBoard HDD Backplane Board Hard Disk Drive Port 0 Port 1 Port 2 SATA0_3 SAS0_3 Port 3 MB SATA Connector SAS SATA Cable SGPIO Cable MB HDD Backplane Board Signal connector HDD Backplane Board ...

Страница 106: ... RAID controller 1 to 8 drives Option RAID Controller HDD Backplane Board Hard Disk Drive Port 0 Port 1 Port 2 SAS 1 Port 0 3 or Port1 4 SAS0_3 Port 3 Port 4 Port 5 Port 6 SAS 2 Port 4 7 or Port5 8 SAS4_7 Port 7 Option RAID Controller SAS SATA Cable SGPIO Cable Option RAID Controller MB HDD Backplane Board Signal connector HDD Backplane Board ...

Страница 107: ...oard 1 SAS0_3 Port 3 Port 4 Port 5 Port 6 SAS 1 Port 0 3 or Port 1 4 SAS0_3R SAS4_7H1 HDD BackPlane Board 1 SAS4_7 Port 7 Port 8 Port 9 Port 10 SAS0_3H2 HDD BackPlane Board 2 SAS0_3 Port 11 Port 12 Port 13 Port 14 SAS 2 Port 4 7 or Port 5 8 SAS4_7R SAS4_7H2 HDD BackPlane Board 2 SAS4_7 Port 15 SAS SATA Cable SGPIOCable Option RAID Controller Option RAID Controller HDD Backplane Board Expander Boar...

Страница 108: ...Expander Board Hard Disk Drive SAS 1 Port 0 3 or Port 1 4 SAS0_3 SAS 2 Port 4 7 or Port 5 8 SAS4_7 Port 0 23 Expander Board HDD Backplane Board Rear Hard Disk Drive SAS_A SAS_A Port 24 SAS_B SAS_B Port 25 Option RAID Controller SAS SATA Cable SGPIO Cable Option RAIDController HDD Backplane Board Additional HDD Cage Rear HDD Backplane Board Expander Board MB HDD Backplane Board Signal connector ...

Страница 109: ...plane Board Hard Disk Drive SAS 1 Port 0 3 or Port 1 4 SAS0_3 SAS 2 Port 4 7 or Port 5 8 SAS4_7 Port 0 11 HDD Backplane Board HDD Backplane Board Rear Hard Disk Drive SAS_A SAS_A Port 12 SAS_B SAS_B Port 13 SAS_C SAS_D No Use Option RAID Controller SAS SATA Cable SGPIO Cable Option RAID Controller HDD Backplane Board MB HDD Backplane Board Signal connector Additional HDD Cage Rear HDD Backplane Bo...

Страница 110: ...t have the same capacity and rotational speed If you intend to install the OS to the RAID System the process from RAID configuration to OS installation can be easily completed by using the EXPRESSBUILDER If you wish to install the OS manually use a RAID System Configuration utility WebBIOS or SuperBuild utility The utility can be run during POST which starts immediately after the server is turned ...

Страница 111: ...r PCI card such as LAN cable after installing Top Cover 1 19 1 Installation 1 Put the top cover rear straight on the server chassis so that it can be surely engaged with the chassis frame 2 Slide the top cover rear toward the front of the server 3 Tighten thumb nut on the rear panel 4 Put the top cover front straight on the server chassis so that it can be surely engaged with the chassis frame 5 S...

Страница 112: ...stall the hard disk drive on the server with it mounted in the drive carrier Important Use hard disk drives specified by NEC Installing a third party hard disk drive might cause a failure of the server and it Note the following precautions to install hard disk drives Hard disk drives having different capacities interface types or rotational speeds cannot be installed together In the specific RAID ...

Страница 113: ...ions Express5800 R120d 2E 26x 2 5 inch Drive Model Front view Express5800 R120d 2E 26x 2 5 inch Drive Model Rear View When additional HDD Cage Rear added Express5800 R120d 2E 3 5 inch Drive Model Rear View When additional HDD Cage Rear is added From Left Port 0 23 Port 12 port 13 Port 24 Port 25 ...

Страница 114: ... specifications capacity rotational speed and standard 1 Refer to Chapter 2 1 3 Overview of Installation and Removal for preparations 2 Locate the slot where you are going to install the Hard Disk Drive Install Hard Disk Drives in ascending port number order 3 Remove the dummy trays Important Keep the dummy trays for future use Dummy trays are intended to increase the cooling effect inside the ser...

Страница 115: ...ly with both hands 6 Slowly close the handle The drive carrier is locked making a clicking sound Note When you push the drive into the slot confirm the handle got hooked on the frame 7 Turn on the server run BIOS SETUP utility and then specify the boot order from the Boot menu For details about the Boot menu refer to Chapter 2 1 2 5 Boot in Maintenance Guide This process is required because the sa...

Страница 116: ... no liability for data leakage should the product be transferred to a third party without erasing the data Note If you have to remove a disk due to a hard disk drive failure check the slot with its DISK LED lit in amber Note Do not pull the handle to remove the hard disk drive Doing so may damage the handle Run SETUP utility and then specify the boot order from the Boot menu For details about the ...

Страница 117: ...e disk is automatically rebuilt when hot swapping replacing a disk while the power on a failed Hard Disk Drive During the auto rebuild the DISK LED on the Hard Disk Drive flashes green and amber alternately to indicate that the autorebuild is being performed Observe the following precautions whenever executing the auto rebuild Do not turn off the server until the auto build completes after a Hard ...

Страница 118: ... drives specified by NEC Installing a third party hard disk drive might cause a failure of the server and it Note the following precautions to install hard disk drives For onboard connection hard disk drives having different capacities interface types or rotational speeds cannot be installed together Bays can contain up to 12 hard disk drives A unique port number is pre assigned to each slot Expre...

Страница 119: ... cause a failure of the server and it 1 Refer to Chapter 2 1 3 Overview of Installation and Removal for preparations 2 Locate the slot where you install the Hard Disk Drive The server provides 12 slots Install Hard Disk Drives in ascending port number order 3 Remove the dummy trays Important Keep the dummy trays for future use Dummy trays are intended to increase the cooling effect inside the serv...

Страница 120: ...ive carrier firmly with both hands 6 Slowly close the handle The drive carrier is locked making a clicking sound Note When you push the drive into the slot confirm the handle got hooked on the frame 7 Turn on the server run SETUP utility and then specify the boot order from the Boot menu For details about the Boot menu refer to Chapter 2 1 2 5 Boot in Maintenance Guide Tips The saved boot order is...

Страница 121: ...ing a Hard Disk Drive in the RAID System In the RAID System you can use the auto rebuild feature to restore data back to the state before a failure occurred by writing the data saved before the replacement to a new Hard Disk Drive after replacing the broken Hard Disk Drive The auto rebuild feature is enabled in logic drives set to RAID 1 RAID 5 RAID 6 RAID 10 RAID 50 and RAID60 The disk is automat...

Страница 122: ...Drive Model 3 5 inch Drive Model 800 W 1 22 1 Cold Redundant Feature The server supports the feature to optimize power efficiency as described below Cold redundant feature can run the system with optimum power efficiency by raising operating efficiency of primary power supply unit and lowering that of redundant power supply unit in redundant power configuration If power efficiency of power units i...

Страница 123: ... Installation Follow steps below to install a power supply unit 1 Refer to steps 1 to 4 in Chapter 2 1 3 Overview of Installation and Removal for preparations 2 Remove the blank cover Important Keep the removed blank cover for future use 3 Insert the power supply unit until it is locked with clicking sound ...

Страница 124: ...Tips To prevent getting away of an AC cord unexpectedly while server working It s better to use AC cable tie 5 Power on the server The AC POWER LEDs go on green 6 Confirm by the STATUS LED or on the POST screen that there are no errors related to the power supply units Refer to Chapter 2 5 Troubleshooting of the Maintenance Guide for details on the error messages If the AC POWER LEDs are off reins...

Страница 125: ...ip steps 1 and 2 below 1 Locate the failing power supply unit by the AC POWER LED on the rear of each power supply unit The LED of the failing power supply unit is lit amber or blinking amber 2 Shutdown the system and press the POWER switch on the server to turn off the power 3 Disconnect the AC power cord from the failed power supply unit 4 Push the lever of the failing power supply unit toward i...

Страница 126: ...2E User s Guide 126 Chapter 2 Preparations 1 23 Installing Front Bezel When installing Front Bezel engage catches of front bezel with those on mounting ear After installing Front Bezel lock it with Bezel Lock Key Important Be careful not to press POWER Switch ...

Страница 127: ...d wire to a gas pipe CAUTION Be sure to observe the following precautions to use the server safely Failure to observe the precautions may cause burns injury and property damage For details refer to Safety precautions in Precautions for Use Do not carry or install the server only by a single person Do not install the server so that the load may be concentrated on a specific point Do not install any...

Страница 128: ... air or dust includes components accelerating corrosion ex sulfur sodium chloride or conductive metals Place where chemicals may be accidentally sprayed over Place where a carpet not subject to anti static process is laid Place where some objects may be fallen on the rack Place near a device generating intense magnetic field such as TVs radios broadcast communication antennas power transmission wi...

Страница 129: ...ecautions to use the server safely Failure to observe the precautions may cause burns injury and property damage For details refer to Safety precautions in Precautions for Use Do not drop Do not leave the server being pulled out Do not install with the cover removed Do not get your fingers caught Important Temperature increases and airflow in the rack If multiple devices are installed or if the in...

Страница 130: ...Checking inner rails Make sure the orientation of inner rails Inner rail L Inner rail R Installing inner rails Mount an inner rail marked as R to the right side of the server and L to the left side when viewed the server from front Align inner rail with three protrusions on side of server chassis and slide the inner rail toward rear of the server Make sure the lock at around the center of inner ra...

Страница 131: ...t the rail assembly is installed at the same height as the other slide rail assemblies already installed Important Confirm that the rail assemblies are securely locked so that they will not fall off Tips Although the rail assembly may be somewhat unsteady it is not defective Installing the Server CAUTION Be sure to observe the following precautions to use the server safely Failure to observe the p...

Страница 132: ...e rails from left and right outer rails until they are locked Note Make sure that locking mechanism work normally 2 With two or more persons firmly hold the server and mount it to the rack 3 When the server is pushed into the rack and is locked push the server to the end while pulling the release levers blue on both sides of the server 4 Push the server until its lock on front panel clicks Release...

Страница 133: ...buttons located on either side of the front of the server 4 Because there are stoppers the server will come to a stop halfway Press and hold the release levers on the rails and pull the server out of the rack Important Be careful not to get your fingers caught in the rails and levers 5 Hold the server firmly and remove it from the rack Important While more than one person is supporting the bottom ...

Страница 134: ...y using the following procedure 1 Refer to Chapter 2 2 1 2 3 Removal procedure to remove the server from the rack 2 Push the unlock lever on outer rail to the direction shown by arrow to house the slide rail 3 While pressing the lever on outer rail push the outer rail toward inside of the rack then remove it Front View Rear view Locking mechanism Unlock lever ...

Страница 135: ...use the server safety Failure to observe the precautions may cause death or serious injury For details refer to Safety precautions in Precautions for Use Do not hold the power plug with wet hands Do not connect the ground wire to a gas pipe CAUTION Be sure to observe the following precautions to use the server safely Failure to observe the precautions may cause burns injury and property damage For...

Страница 136: ...tion Express5800 R120d 2E User s Guide 136 Chapter 2 Preparations 1 Front View USB device USB device USB device Display unit 1 16x 2 5 inch Drive Model 26x 2 5 inch Drive Model 3 5 inch Drive Model 1 Either one can be connected ...

Страница 137: ...Tips A leased line cannot be directly connected to the serial port connector Display unit 1 Device with serial interface USB device USB device Finally connect the power cord to an outlet 2 For connecting with UPS refer to the next section 1 Either one can be connected 2 Connect the power cord to circuit breaker of up to 15 A Ports for data transmission 1000BASE T 100BASE TX 10BASE T Management LAN...

Страница 138: ... contact your sales representative to check if they can be used with the server beforehand SCSI devices can be connected once the optional SCSI controller is installed Make sure that the total length of the cable including the connection cable inside the SCSI device is within 3m Fix the power cord or interface cable with cable ties Make sure that no pressure is applied on the plug of power cord If...

Страница 139: ...a UPS the BIOS settings may need to be changed in order to link the server with the power supply from the UPS To change the settings select Server and then AC LINK in the BIOS setup utility and change the displayed parameters Select Power On to perform automatic operations by using the UPS For details refer to Chapter 2 1 2 4 Server in Maintenance Guide Option slot Overload protection reset button...

Страница 140: ...settings by following the instructions in this section 3 EXPRESSSCOPE Engine 3 EXPRESSSCOPE Engine 3 provides useful features through the Baseboard Management Controller BMC 4 EXPRESSBUILDER EXPRESSBUILDER helps you to install Windows and maintain the server 5 Installing Software Components You can install Windows and bundled software by following the instructions in Installation Guide Windows 6 T...

Страница 141: ...rver before amber POWER LED is unlit 1 Turn on the peripheral devices and the display unit Note If the power cord is connected to power control system such as an Uninterruptible Power Supply UPS make sure that the power control system is turned on 2 Remove the front bezel Option 3 Press the POWER switch at the front of the server The POWER LED is turned on green and after a while the logo appears ...

Страница 142: ...press5800 R120d 2E 26x 2 5 inch Drive Model Express5800 R120d 2E 3 5 inch Drive Model While the logo is being displayed the self diagnostic program POST runs and diagnoses the hardware For details refer to Chapter 3 1 1 1 POST sequence POWER switch M 1 2 3 4 POWER switch M 1 2 3 4 ...

Страница 143: ...logo appears 2 If Enabled is specified for Password On Boot in Security menu of SETUP you will be prompted to enter password after the logo is displayed If you enter the incorrect password three times consecutively POST aborts You can no longer proceed In this case power off the server and power it on Important Do not set a password before OS is installed 3 If Esc key is pressed the logo disappear...

Страница 144: ... Controller board is installed a message that prompts you to start the dedicated utility to set each board is displayed Example If an optional RAID Controller is installed Press Ctrl H for Web BIOS The utility starts by pressing Ctrl H keys For details on the utility refer to the manual supplied with each optional board Depending on the configuration the message Press Any Key might appear to promp...

Страница 145: ...POST following Chapter 3 1 1 1 POST sequence After a while the following message will be displayed on the lower left of the screen Press F2 SETUP F3 Internal Flash Memory F4 ROM Utility F12 Network If you press the F2 key at this time SETUP runs and displays the Main menu upon completion of POST You can also press the F2 key while the NEC logo appears to display the Main menu Important If password...

Страница 146: ...cannot use this key when a menu which has on the left is selected Enter key Press this key to confirm the selected parameter Esc key Press this key to cancel pop up menu In sub menu pressing this key takes you to the previous screen In top menu press this key takes the following window is displayed If you select Yes the SETUP closes without saving the changed parameters Quit without saving Yes No ...

Страница 147: ... s are restored Load Previous Values Yes No F3 key If you press this key the following window appears If you select Yes restore the parameters of the currently selected item to the default setting This might be different from the parameters configured before shipment Load Setup Defaults Yes No F4 key If you press this key the following window appears If you select Yes the parameter you configured ...

Страница 148: ...tion PCI Device Controller and Option ROM Settings PCIXX Slot Option ROM Enabled XX is PCI slot number of the option board Change the boot order of devices Change the boot priority Boot Boot Option Priorities When you use EXPRESSBUILDER set CD DVD to the highest priority Use remote power on feature via modem Advanced Advanced Chipset Configuration Wake On Ring Enabled Use remote power on feature v...

Страница 149: ...g password 3 times operation stops You cannot operate further Turn off the power Saving changes If you finish configuration select Save Exit and then Save Changes and Exit to save changes and exit If you wish to exit without saving the changed parameters select Save Exit and then Discard Changes and Exit Or if you wish to restore the setting to default values select Save Exit and then Load Setup D...

Страница 150: ... these functions virtual USB mass storage Remote FD Remote CD DVD Remote USB Memory or Virtual Flash is always connected as USB mass storage 3 2 EXPRESSSCOPE ENGINE 3 Network configuration To enable EXPRESSSCOPE Engine 3 to be used via network network configuration is required Below is an example of the configuration procedure which enables EXPRESSSCOPE Engine 3 to be used via a web browser 1 Run ...

Страница 151: ...r to use DHCP and if DHCP is not used configure IP Address Subnet Mask Tips If Shared BMC LAN is enabled Web feature remote media KVM feature or command line interface feature may be interrupted In this case wait for a while and connect with network again 6 Connect the LAN cable to the management LAN connector in order to connect to the network It will be available for use if you access EXPRESSSCO...

Страница 152: ...EC ESMPRO Agent Maintenance Diagnoses your server system To use this feature select Tool menu in the menu after boot Storage of documents Stores various documents including User s Guide Installation Guide and Maintenance Guide Documents and some software components are not stored in N8115 05 Internal Flash Memory option 4 2 Starting EXPRESSBUILDER If you want to install Windows start EXPRESSBUILDE...

Страница 153: ...oftware Components Express5800 R120d 2E User s Guide 153 Chapter 3 Setup 5 Installing Software Components Continue to install software components such as OS Refer to the instructions below Installation Guide Windows ...

Страница 154: ...the server is connected to a UPS refer to the documentation supplied with the UPS or the documentation for the application controlling the UPS 1 Shut down the OS 2 The server automatically turns off after the OS shuts down Confirm that POWER LED is OFF 3 Turn off peripheral devices Tips Hibernate function of Windows Server cannot be used Do not set Hibernate at Windows shutdown ...

Страница 155: ...Express5800 R120d 2E User s Guide 155 NEC Express5800 Series Express5800 R120d 2E Appendix 1 Specifications 2 PCI Configuration ...

Страница 156: ...sed up tp two ports in total 4x 1000BASE T LAN connector 1000BASE T 100BASE TX 10BASE T supported RJ 45 4x Rear 1x Management LAN connector 100BASE TX 10BASE T supported RJ 45 1x Rear Redundantpowersupply Supported option hot plug available Redundantfan Supported option hot plug available Externaldimensions widthxdepthx height 448 0mm 696 3mm 87 4mm Front bezel inner rails projections are excluded...

Страница 157: ...rial port RS 232C compliant D Sub 9 pin Serial port A 1xRear optional port can be used up tp two ports in total 4x 1000BASE T LAN connector 1000BASE T 100BASE TX 10BASE T supported RJ 45 4x Rear 1x Management LAN connector 100BASE TX 10BASE T supported RJ 45 1x Rear Redundantpowersupply Supported option hot plug available Redundantfan Supported option hot plug available Externaldimensions widthxde...

Страница 158: ...in slot PCI1C 96 60h 124 7Ch PCI card installed in slot PCI2C 125 7Dh Onboard VGA controller Hexadecimal notation If Disabled is specified for Advanced PCI Configuration PCI Bus Static Allocation in BIOS SETUP PCI bus numbers are not unique but assigned in the order as shown below Order Onboard PCI board 1 PCI board installed in slot PCI1A 2 PCI board installed in slot PCI1B 3 PCI board installed ...

Страница 159: ...al port 28 1Ch PCI1A INTB 5 05h 29 1Dh PCI1A INTC 6 06h 30 1Eh PCI1A INTD 7 07h 31 1Fh Primary IOAT 8 08h Realtime clock RTC 32 20h 9 09h Microsoft ACPI Compliant System SCI 33 21h 10 0Ah 34 22h 11 0Bh Motherboard resources BMC 35 23h 12 0Ch 36 24h 13 0Dh Numeric data processor 37 25h 14 0Eh 38 26h 15 0Fh 39 27h Primary IOAT 16 10h Onboard LAN1 3 PCI1C INTB PCI2C INTA 40 28h PCI1B INTA 17 11h Onbo...

Страница 160: ...nager Properties General tab correspond to actual PCI slot numbers as shown below Indication on Properties page PCI slot Windows Server 2003 Windows Server 2008 Windows Server 2008 R2 PCI1A PCI Slot 26 PCI Slot 1 PCI1B PCI Slot 27 PCI Slot 2 PCI2B PCI Slot 43 PCI Slot 3 PCI3B PCI Slot 59 PCI Slot 4 PCI1C PCI Slot 28 PCI Slot 5 PCI2C PCI Slot 44 PCI Slot 6 ...

Отзывы: