Release 6.0
251
User Guide
Chapter 8 Installing Optional Parts
8.3 Installation and Removal
Perform the following procedures to install or remove the concerned optional part of a disk array unit:
8.3.1 Front Bezel
Inserting a front bezel
The procedure for inserting a front bezel is as follows:
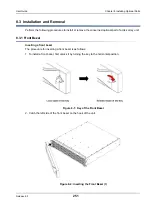
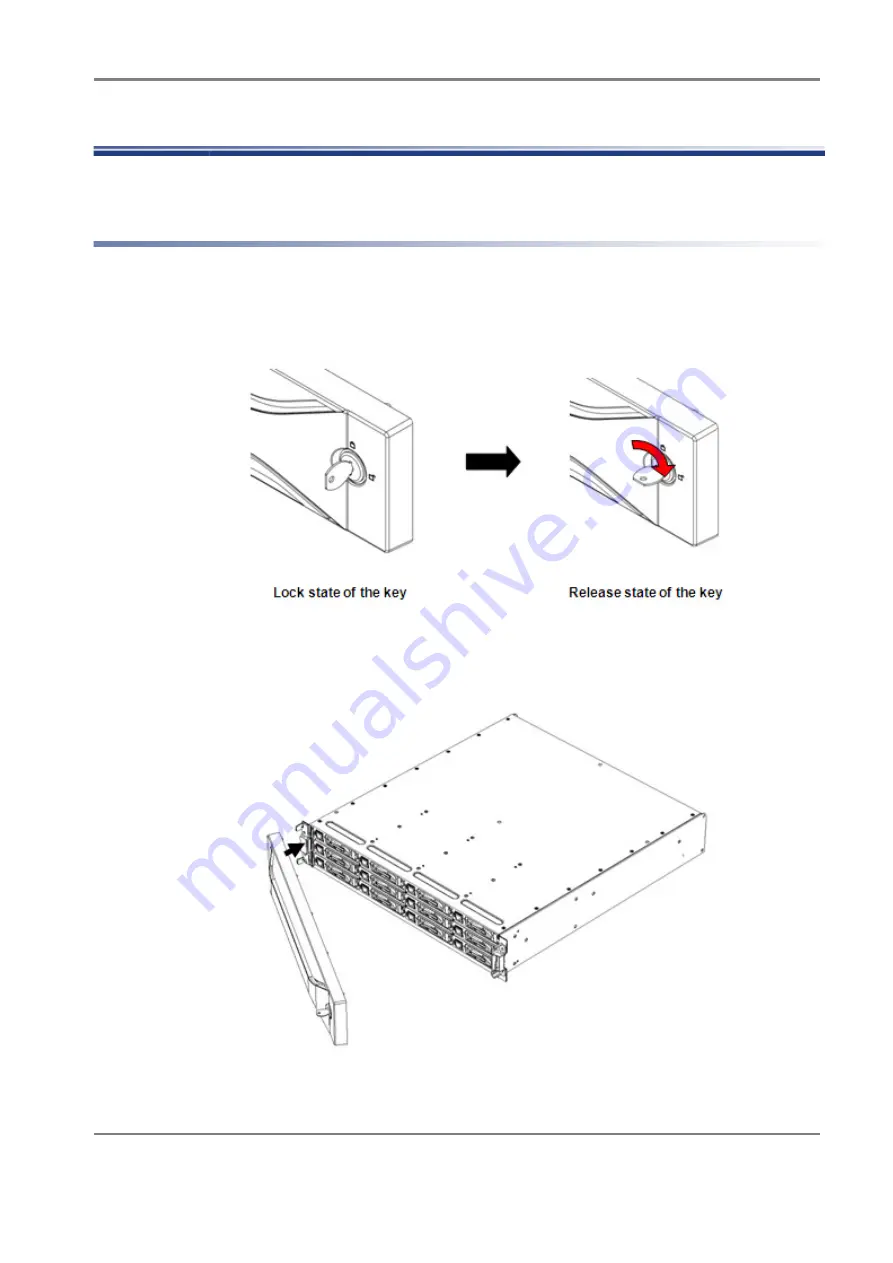
1. To install a front bezel, first unlock it by turning the key to the horizontal position.
Figure 8-1: Key of the Front Bezel
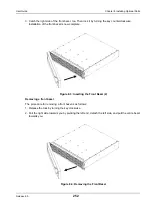
2. Catch the left side of the front bezel on the hook of the unit.
Figure 8-2: Inserting the Front Bezel (1)
Содержание M100
Страница 25: ...Release 6 0 25 User Guide About Warning Labels Power Supply AC Power Supply ...
Страница 27: ...Release 6 0 27 User Guide About Warning Labels Battery ...
Страница 29: ...Release 6 0 29 User Guide About Warning Labels Power Cable AC Power Supply ...
Страница 40: ...Release 6 0 40 User Guide Chapter 1 Overview 1 2 1 4 Controller CONT ...
Страница 48: ...Release 6 0 48 User Guide Chapter 1 Overview 1 2 3 3 Controller CONT ...
Страница 75: ...Release 6 0 75 User Guide Chapter 3 Installing the Disk Array System Figure 3 10 Securing Unit 2 ...
Страница 88: ...Release 6 0 88 User Guide Chapter 4 NEC Storage Manager Figure 4 1 Example of Recommended Configuration ...
Страница 125: ...Release 6 0 125 User Guide Chapter 4 NEC Storage Manager d Click Login to open the main screen Figure 4 26 Main Screen ...
Страница 194: ...Release 6 0 194 User Guide Chapter 6 Initializing a Disk Array iSCSI Figure 6 16 Hot Spare Bind View Display ...
Страница 260: ...Release 6 0 260 User Guide Chapter 8 Installing Optional Parts Figure 8 12 Removing the DIMMs ...
Страница 388: ...Release 6 0 388 User Guide Appendix F How to Set Check Application Server Linux iSCSI Figure F 3 Configuration Example ...
Страница 459: ...NEC Corporation 7 1 Shiba 5 chome Minato ku Tokyo 108 8001 Japan URL http www necstorage com ...

