78K0/Lx3 - See it!
User’s Manual
U18759EE2V0UM00
72
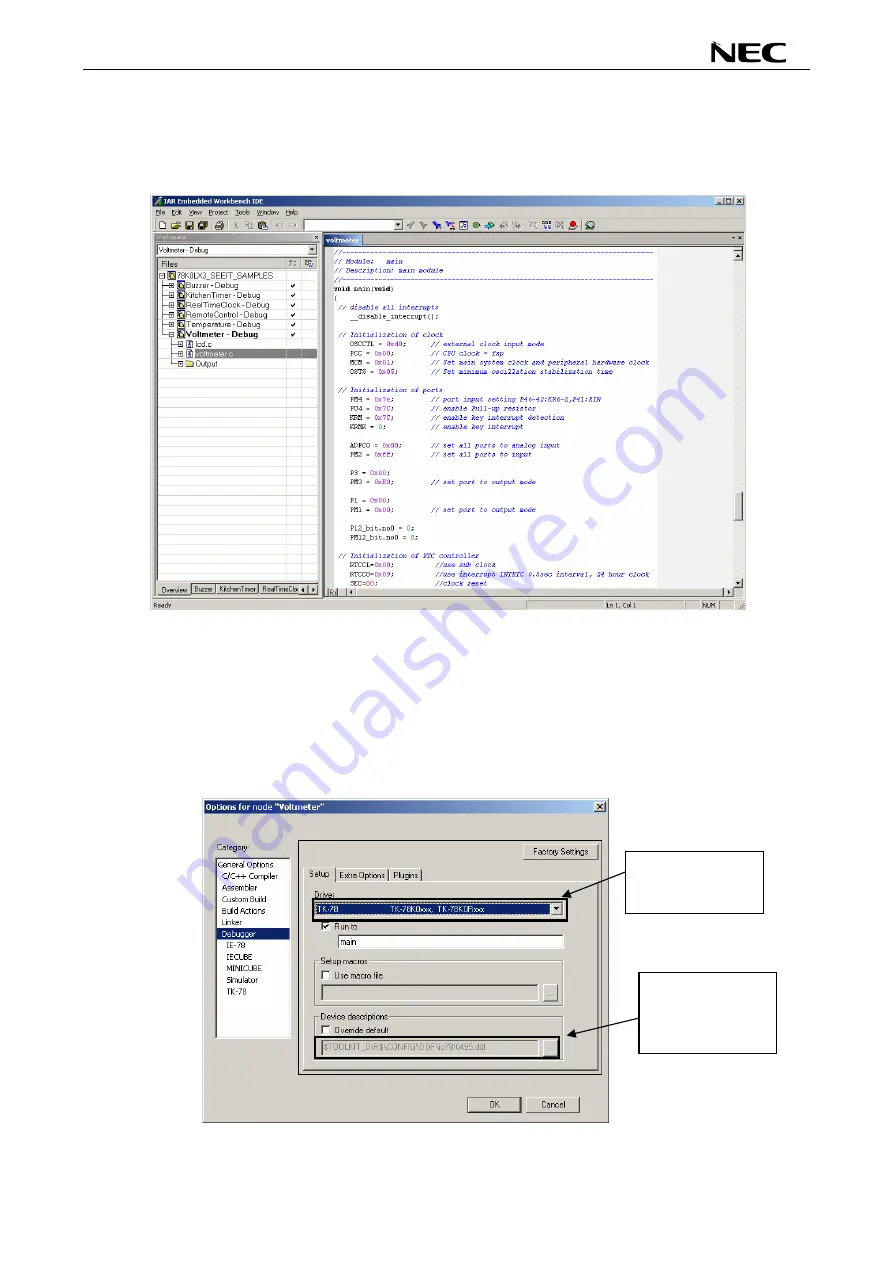
After the demo workspace has been opened the projects contained in the workspace are displayed. Now
select the “voltmeter” demo project within the workspace window. To do so, please use the pull down menu
within the workspace window and select “Voltmeter – Debug”. Click on the little “+” sign next to the
“Voltmeter” project to show files that were part of the project. The screen should now look similar to this:
Figure 68: IAR project workspace
As a next step check some settings of the IAR Embedded Workbench that have to be made for correct
operation and usage of the On-Board debug function of the
78K0/Lx3 - See it!
board. First highlight the
upper folder called “Voltmeter – Debug” in the workspace window. Then select “Project” > “Options” from the
pull-down menus. Next select the category “Debugger”. Make sure that the driver is set to “TK-78” in order to
use the On-Board debug function of the
78K0/Lx3 - See it!
board. The device description file must be set to
“io78F0495.ddf”.
Figure 69: IAR debugger options 1/2
Select “TK-78” to
use On-Board
debugging.
Check that device
description file
io78f0495.ddf
is selected
Содержание 78K0/L 3 - See it! Series
Страница 80: ...78K0 Lx3 See it User s Manual U18759EE2V0UM00 80 14 Schematics Figure 76 78K0 Lx3 See it schematics 1 2 ...
Страница 81: ...78K0 Lx3 See it User s Manual U18759EE2V0UM00 81 Figure 77 78K0 Lx3 See it schematics 2 2 ...
Страница 82: ...78K0 Lx3 See it User s Manual U18759EE2V0UM00 82 memo ...


