


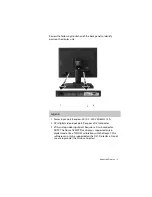


Installing the Display | 9
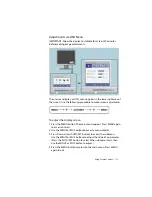
Install the Display Driver
Before you install the driver, remove any previously installed display
driver for the display controller from your system. After installation,
use the Display Properties dialog to makes changes to the video
settings or to set up a dual-display configuration.
To install the driver
1 Start the system. Click Cancel on the Found New Hardware Wizard.
Click No when the system prompts you restart the computer.
2 Insert the driver installation CD and run Setup.exe.
3 Click Next.
4 Click Yes to the license agreement. The installation starts.
5 Follow the onscreen instructions to complete the installation.
Dome recommends that you select the Express installation option.
6 When the Setup complete message appears, select Yes, I want to
restart my computer now, and click Finish.
7 If the Digital Signature Not Found message appears, click Yes or
Continue to complete the driver installation.
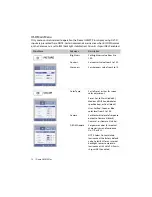
To configure the display
For Windows 7
1 Right-click the desktop and select Personalize.
2 Click Display on the left pane of the dialog.
3 Click Adjust Resolution on the left pane.
4 Pull down the Resolution box to make changes to the appearance
of a selected display. Use the native resolution of the display.
5 Click OK until you return to the desktop.
For Windows XP
1 Right-click the desktop and select Properties > Settings.
2 Use the native resolution of the display.
3 Click OK.


