www.h-v-c.com
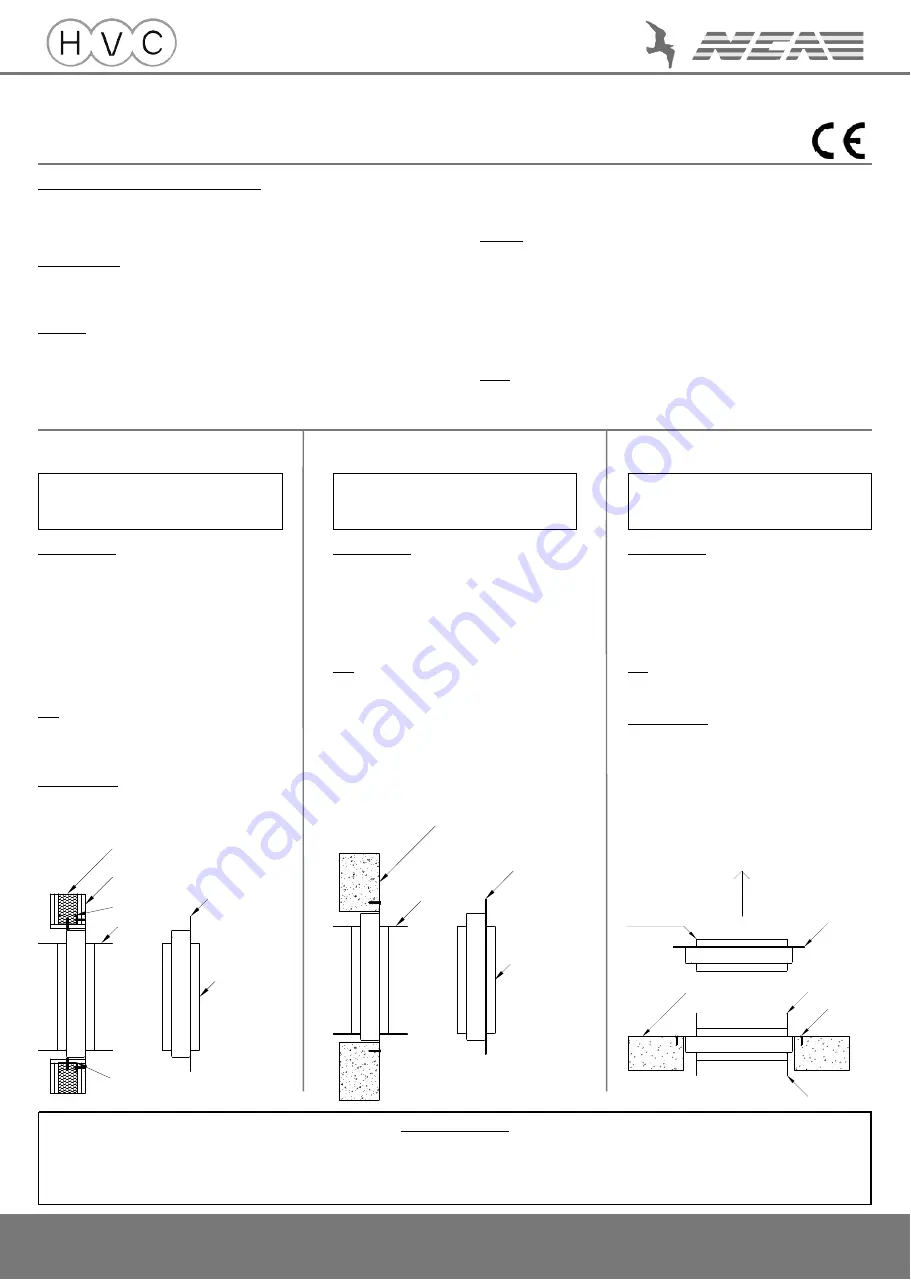
Plate frame
S100 fire damper
Loden anchors
or equivalent fire
rated fixings
Concrete of
minimum thickness 150mm
Ductwork
Ductwork
DIRECTION OF AIRFLOW
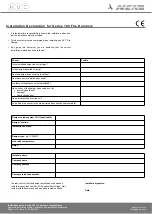
Installation guide
Series 100 fire damper c/w plate frame
Upon receipt of unit - Before signing for the delivery
• Flourescent yellow stickers are attached to every package we despatch detailing receipt
instructions and what to do if your goods are damaged.
• The instructions on this must be followed or HVC will not be able to assist with any claims for
damage.
Prior to installation
• If damper is to be stored on site, ensure it is stored in a clean and dry environment.
• Immediately prior to fitment, remove all packaging from the unit. Take particular care inspecting
the inside of the unit for any packing materials which may disrupt damper operation.
Installation
• Fire damper installation should only be carried out by competant persons. As life safety
devices, correct operation is reliant on correct installation.
• Damper edges can be sharp. PPE should be used when handling.
• Larger dampers can be very heavy, ensure suitable lifting methods are used to help prevent
injury.
• There should be a minimum of 200mm of supporting construction between fire dampers
installed in separate ducts.
Installation guide: Series 100 fire damper c/w plate frame
Approved installation method, operation and installation declaration
Page 1 of 2 - Issue D - 26/02/2018
• There should be a minimum of 75mm of supporting construction between the fire damper
and any adjacent construction element, e.g. a corner or adjacent wall.
• Remove the safety cable tie around the fusible link. Failure to remove this will render the
damper inoperable.
Operation
• Fusible link fire dampers are designed to operate without any command from an operator or
building maintenance system (unless equipped with an electromagnet or solenoid).
• Fusible links will release at the temperature embossed onto the link body.
• The use of electromagnets and solenoids enables the damper to be operated remotely, even
when the damper itself is not being exposed to elevated temperatures.
• The activation command may originate from an automated command or a human operator
through the building maintenance system.
• Once the damper has been shut, it can only be opened by hand.
• Once exposed to elevated temperatures/flames resulting in the damper closing, the damper
must be replaced.
Spares
• A spare amount of replacement fusible links should be kept on site.
BS EN 13501-3:2005 + A1:2009
Classification report numbers:
Galvanised units - P103718-1002/3
Stainless units - P103718-1002B/2
Multiple units - P103718-1002/2
I n s t a l l a t i o n F D - 2 V P
D r y w a l l p a r t i t i o n i n s t a l l a t i o n
Installation procedure
• Construct studwork aperture so that the space inside the steel
channels is 45mm larger than the overall size of the damper case.
e.g. Damper case 500mm x 200mm, studwork aperture size
545mm x 245mm.
• Clad one side of studwork with two layers of plasterboard.
•
Infill wall cavities with mineral wool.
• Clad second side of studwork with two layers of plasterboard.
• Line aperture with one layer of plasterboard.
• Offer damper into aperture and using 7.5mm thick spacers if
necessary to ensure correct positioning, affix damper into partition by
screwing through the plate frame and plasterboard into the steel
studwork
• Screws to be 10mm in from outer edge of plate frame, and pitch to
be not more than 125mm. Ensure the screws gain a positive fix on
the steelwork.
Notes
• The void at the non-access side of the damper does not require filling,
nor a pattress.
• No lugs are required when fitting this CE marked fire damper.
• Multiple assemblies are subject to the same installation.
• Air can flow through the damper in either direction.
Material specifications
Plasterboard:
15mm thick and 30 minute fire rated
e.g. GTEC Fire Board, Knauf Fireshield, Gyproc Fireline
Mineral wool:
Rockwool RW5, Knauf RS100 or equivalent
I n s t a l l a t i o n F D - 2 V M
M a s o n r y w a l l i n s t a l l a t i o n
Installation procedure
• Construct wall so that the aperture for the fire damper is 15mm larger
than overall size of the damper case.
e.g. Damper case 500mm x 200mm, wall aperture size 515mm x
215mm.
• Offer damper into aperture and using 7.5mm thick spacers if
necessary to ensure correct positioning, affix damper into partition by
screwing through the plate frame into the wall.
• Screws to be 10mm in from outer edge of plate frame, and pitch to
be not more than 125mm. Ensure the screws gain a positive fix on
the concrete/masonry.
Notes
• The void at the non-access side of the dampers does not require
filling, nor a pattress.
• No lugs are required when fitting this CE marked fire damper.
• Multiple assemblies are subject to the same installation.
• Air can flow through the damper in either direction.
I n s t a l l a t i o n F D - 2 H C
C o n c r e t e f l o o r i n s t a l l a t i o n
Installation procedure
• Construct floor so that the aperture for the fire damper is 15mm larger
than overall size of damper case.
e.g. Damper case 500mm x 200mm, floor aperture size
515mm x 215mm.
• Offer damper into aperture and using 7.5mm thick spacers if
necessary to ensure correct positioning, affix damper into partition
using fixings as detailed below, through the plate frame into the floor.
• Fixings to be 10mm in from outer edge of plate frame, and pitch to
be not more than 125mm. Ensure the fixings gain a positive fix on
the concrete/masonry.
Notes
• The void at the non-access side of the dampers does not require filling,
nor a pattress.
• Air must flow towards the lock guides - See arrow below.
Material specifications
Floor:
150mm (minimum) thick concrete.
Fixings:
Loden anchors, 5mm diameter x 50mm long
Equivalent fixing acceptable
Plate frame
S100 fire damper
Ductwork
Concrete/masonry wall
BS EN 13501-3:2005 + A1:2009
Classification report numbers:
Galvanised units - P103718-1002/3
Stainless units - P103718-1002B/2
Multiple units - P103718-1002/2
BS EN 13501-3:2005 + A1:2009
Classification report numbers:
P101275-1001/1
IMPORTANT NOTE
It is a legal requirement that fire dampers are installed in the way instructed by the manufacturer.
Any other installation is untested and therefore illegal.
Responsibility for ensuring correct installation lies with all parties in the supply chain.
Plate frame
S100 fire damper
2 x 15mm plasterboard sheets
each side of steel stud
Mineral wool infill
in wall cavities
Steel studs creating
aperture frame
15mm plasterboard lining aperture
fixed with appropriate fixings to
steelwork at pitch of not more than 300mm
Ductwork


