background image

B

EFB

EFB

PL1

PL1

DETAIL B

SCALE 1 : 16

Step 1


4

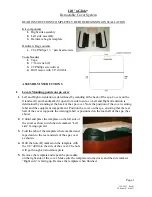
Attach Both 

EFB End Bars

 to 

PL1 Peveril Legs.

2 people recommended 

to fit this shelter.

Note: Move legs to desired location (shelter must be sub 

surfaced 800mm minimum). Fix the central post in place 

and build the rest of the shelter from this point.

Содержание Peveril

Страница 1: ...Assembly Instructions Email Sales nobutts co uk Web www nobutts co uk Tel 0800 1777 052 CVCS1ZC 01 27022017 UK Shelter type Peveril 4m...

Страница 2: ...Exploded View 3 6 2 3 4 5 2 1 6 5 5 5 1 2 Tools required Not supplied Drill Screwdriver Socket set...

Страница 3: ...80 Hex head bolt M10 Nuts M10 Standard Washers M12 Standard Washers 25mm Tech screws QTY 8 44 44 88 8 119 Image ITEM NO Part No PART NAME Part No Default QTY 1 PL1 Peveril Side Frame PL1 2 2 FRB 3950...

Страница 4: ...4 Attach Both EFB End Bars to PL1 Peveril Legs 2 people recommended to fit this shelter Note Move legs to desired location shelter must be sub surfaced 800mm minimum Fix the central post in place and...

Страница 5: ...tep 2 5 Step 3 Note Make sure allignment is correct Loosely fasten FRB Front Rear Bar to PL1Peveril legs this gives you the outside post positions Do the same for the rear of the shelter and secure th...

Страница 6: ...2 CBF1 6 Step 5 Secure all CFB1 Central Frame Bars to the CFB2 Central Frame Bars 2 EFB End Frame Bars Step 4 Bolt the CFB2 Central Frame Bar 2 to FRB Side Frame Bars Tighten all bolts at this point a...

Страница 7: ...RP RP Note A good spacing for Tec Screws is 200 300mm Peveril Frame 7 Step 6 Finally screw the RP Roof Panel to the top of the frame spacing each section evenly between front rear left and right...

Страница 8: ...panels regularly with soapy water Ensure all fittings are tight for example after a big storm Touch up any exposed metal should it get scratched CONTACT DETAILS Email Sales nobutts co uk Web www nobu...

Отзывы: