background image

2-10

|

ni.com

Chapter 2

Installation and Configuration

This section contains general installation instructions for installing a peripheral module in a 
PXIe-1066DC chassis. Refer to your peripheral module user manual for specific instructions and 
warnings. To install a module, complete the following steps:
1.

Ensure that the chassis is properly grounded to protect it from electrical damage while you 
install the module.

2.

Ensure that the chassis is powered off.

3.

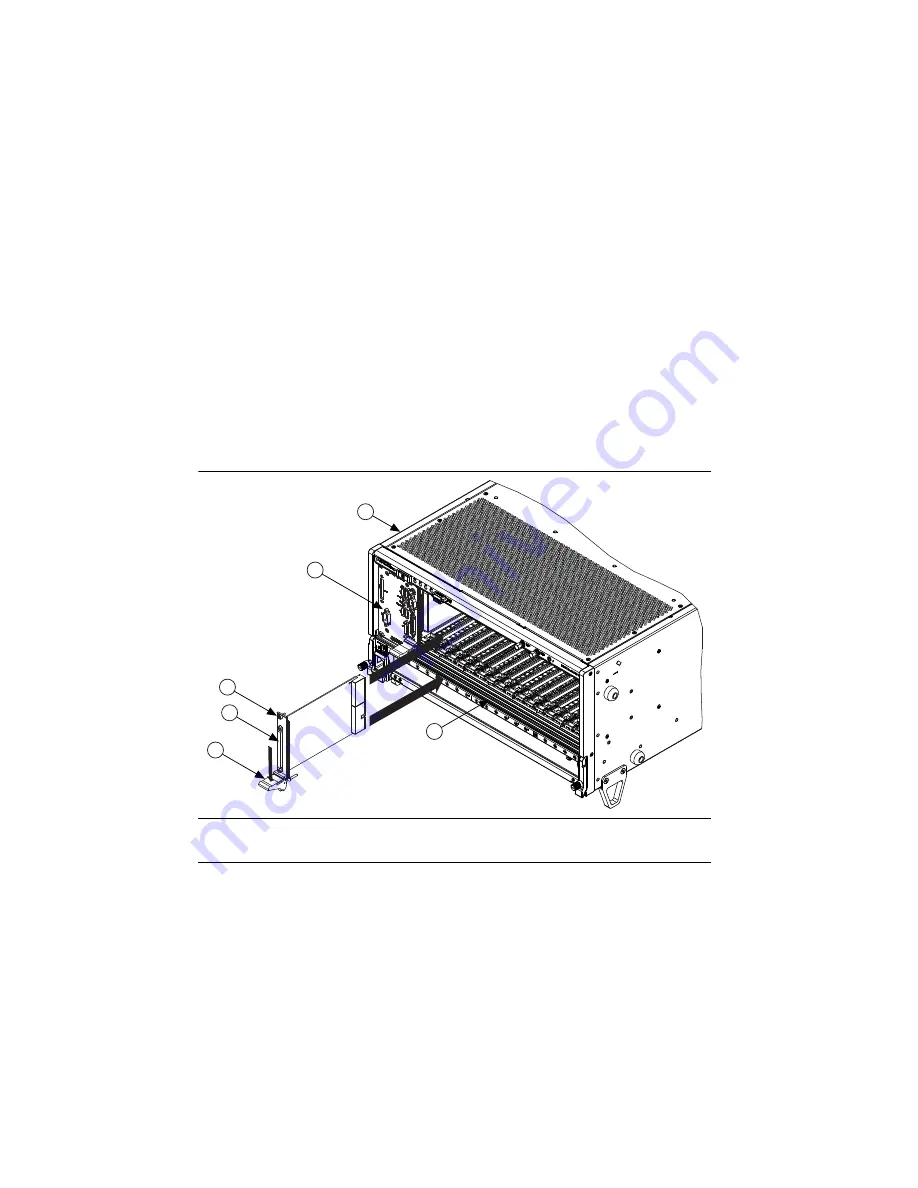
Install a module into a chassis slot by first placing the module card PCB into the front of 
the card guides (top and bottom), as shown in Figure 2-7. Slide the module to the rear of 
the chassis, making sure that the injector/ejector handle is pushed down as shown in 
Figure 2-7. 

4.

When you begin to feel resistance, push up on the injector/ejector handle to fully seat the 
module into the chassis frame. Secure the module front panel to the chassis using the 
module front-panel mounting screws.

Figure 2-7.  

Installing PXI, PXI Express, or CompactPCI Peripheral Modules

1

Injector/Ejector Handle

2

PXI Peripheral Module

3

Peripheral Module Front Panel Mounting Screws (2x)

4

PXI Express System Controller

5

PXIe-1066DC Chassis

6

Injector/Ejector Rail

3

2

1

5

4

6

Содержание PXI Express PXIe-1066DC

Страница 1: ...PXI Express TM PXIe 1066DC User Manual PXIe 1066DC User Manual August 2016 373547D 01...

Страница 2: ...email addresses and current events National Instruments Corporate Headquarters 11500 North Mopac Expressway Austin Texas 78759 3504 USA Tel 512 683 0100 For further support information refer to the N...

Страница 3: ...ESS FOR A PARTICULAR PURPOSE TITLE OR NON INFRINGEMENT AND ANY WARRANTIES THAT MAY ARISE FROM USAGE OF TRADE OR COURSE OF DEALING NI DOES NOT WARRANT GUARANTEE OR MAKE ANY REPRESENTATIONS REGARDING TH...

Страница 4: ...es independent from National Instruments and have no agency partnership or joint venture relationship with National Instruments Patents For patents covering National Instruments products technology re...

Страница 5: ...e encouraged to try to correct the interference by one or more of the following measures Reorient the antenna of the receiver the device suffering interference Relocate the transmitter the device gene...

Страница 6: ...eripheral Slots 1 6 PXI Express Peripheral Slots 1 6 System Timing Slot 1 6 PXI Local Bus 1 8 PXI Trigger Bus 1 9 System Reference Clock 1 9 PXIe_SYNC_CTRL 1 12 Chapter 2 Installation and Configuratio...

Страница 7: ...figuration 2 16 Trigger Configuration in MAX 2 17 PXI Trigger Bus Routing 2 17 Using System Configuration and Initialization Files 2 18 Chapter 3 Maintenance Service Interval 3 1 Preparation 3 1 Clean...

Страница 8: ...helpful as you read this manual IEEE 1101 1 1991 IEEE Standard for Mechanical Core Specifications for Microcomputers Using IEC 603 2 Connectors IEEE 1101 10 IEEE Standard for Additional Mechanical Sp...

Страница 9: ...r possible inspection and or reshipment What You Need to Get Started The PXIe 1066DC chassis kit contains the following items PXIe 1066DC chassis Filler panels DC power cable PXIe 1066DC User Manual S...

Страница 10: ...ce clock for PXI Express slots with 25 ppm stability Quiet operation for 0 to 30 C at 49 8 dBA Variable speed fan controller optimizes cooling and acoustic emissions Remote power inhibit control Compl...

Страница 11: ...Power Inhibit Switch 2 LEDs 3 Inhibit Fault Connector 4 Backplane Connectors 5 Clk10 Input 6 Clk10 Output 7 Earth Ground Termina 8 PXI Filler Panels Optional 9 Removable Feet 10 Fan Door Latch 11 PXI...

Страница 12: ...option is a pair of mounting brackets for use on the front of the chassis The second option is a rear rack mount kit The rear rack mount kit differs from the front kit to allow for easier installation...

Страница 13: ...t the system controller from using peripheral slots The backplane routes a x4 PCI Express link from the system controller slot to slots 7 and 8 and a x1 PCI Express link to a PCI Express to PCI Transl...

Страница 14: ...PXI peripheral slots which will accept PXI or CompactPCI peripherals slots 2 to 6 and slots 15 to 18 These slots are on the backplane s 32 bit PCI busses These slots offer full PXI functionality but h...

Страница 15: ...lock to which the backplane will phase lock Refer to the System Reference Clock section for details The system timing slot has a pin PXIe_SYNC_CTRL through which a system timing module can control the...

Страница 16: ...eed TTL signals to analog signals as high as 42 V Initialization software uses the configuration information specific to each adjacent peripheral module to evaluate local bus compatibility Figure 1 4...

Страница 17: ...certain National Instruments drivers like NI DAQmx Note Although any trigger line may be routed in either direction it cannot be routed in more than one direction at a time System Reference Clock The...

Страница 18: ...SYNC100 signal being driven on the pair to that slot Figure 1 5 Distribution of PXI_CLK10 PXIe_CLK100 and PXIe_SYNC100 PXI_CLK10 PXIe_CLK100 and PXIe_SYNC100 have the default timing relationship desc...

Страница 19: ...ions for the specification information for an external clock provided on the 10 MHz REF IN connector on the rear panel of the chassis If the 10 MHz clock is present on both the PXI_CLK10_IN pin of the...

Страница 20: ...lot has a control pin for PXIe_SYNC100 called PXIe_SYNC_CTRL for use when n 1 Refer to Table B 7 XP3 Connector Pinout for the System Timing Slot for system timing slot pinout Refer to Appendix A Speci...

Страница 21: ...uctions on connecting safety ground Live Circuits Operating personnel and service personnel must not remove protective covers when operating or servicing the chassis Adjustments and service to interna...

Страница 22: ...ters through a fan intake in the bottom of the chassis and exits through the top of the chassis Air for cooling the power supplies enters through the rear of the chassis and exits through the top of t...

Страница 23: ...National Instruments 2 3 PXIe 1066DC User Manual Figure 2 1 PXIe 1066DC Cooling Clearances 1 75 44 5 3 0 76 2 Dimensions are in inches millimeters 1 75 44 5...

Страница 24: ...o Fan Speed mode Because of this the chassis ambient temperature is defined as the temperature of the air just outside of the fan intake vents on the bottom of the chassis Note that this temperature m...

Страница 25: ...ling performance or Auto for improved acoustic performance When set to Auto the fan speed is determined by the chassis intake air temperature Installing Filler Panels To maintain proper module cooling...

Страница 26: ...chassis power supplies The DC Input connector is on the front panel as shown in Figure 1 1 Front View of the PXIe 1066DC Chassis with Optional Filler Panels The chassis ships with an PXIe 1066DC power...

Страница 27: ...0 402 in ID 225 100 MHz Power On Test Caution Do not install modules prior to performing the following power on test Caution To completely remove power you must disconnect all power cables The PXIe 10...

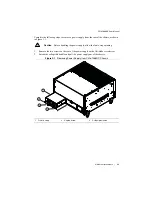
Страница 28: ...des top and bottom Slide the system controller to the rear of the chassis making sure that the injector ejector handle is pushed down as shown in Figure 2 5 Figure 2 5 Installing a PXI Express System...

Страница 29: ...Express System Controller Installed in an PXIe 1066DC Chassis Installing Peripheral Modules Caution The PXIe 1066DC chassis has been designed to accept a variety of peripheral module types in differe...

Страница 30: ...placing the module card PCB into the front of the card guides top and bottom as shown in Figure 2 7 Slide the module to the rear of the chassis making sure that the injector ejector handle is pushed...

Страница 31: ...rts DHCP If your network uses DHCP the network configuration is performed automatically To use the remote monitoring interface connect one end of an Ethernet cable to your PXIe 1066DC chassis Connect...

Страница 32: ...name as printed on the product label Chassis LED Indicators The PXIe 1066DC chassis has four main LEDs on the front panel next to the Power Inhibit switch Refer to Figure 1 1 Front View of the PXIe 10...

Страница 33: ...ssis fans are enabled and operating normally Blinking red One or more chassis fans have failed but chassis can continue to operate Steady red One or more chassis fans have failed and chassis must shut...

Страница 34: ...assis Inhibit Mode switch is in the Manual position you can use the Remote Inhibit signal to control the chassis power supplies Refer to Inhibit Mode Switch for more details The Remote Fault signal is...

Страница 35: ...must be in the Manual position PXI_CLK10 Connectors There are two SMA connectors on the front of the PXIe 1066DC chassis for PXI_CLK10 The connectors are labeled IN and OUT You can use them for supply...

Страница 36: ...chassis model through the Identify As submenu Further expanding the PXI System branch shows all devices in the system that can be recognized by NI VISA When your system controller and all your chassi...

Страница 37: ...the instruments from double driving the trigger lines possibly damaging devices in the chassis In the defaultconfiguration triggerlinesoneachbusareindependent Forexample if triggerline3isasserted on t...

Страница 38: ...ut the system controller to create a single system initialization file called pxisys ini PXI System Initialization The system controller manufacturer either provides a pxisys ini file for the particul...

Страница 39: ...procedures in this chapter Caution Many components within the chassis are susceptible to static discharge damage Service the chassis only in a static free environment Observe standard handling precau...

Страница 40: ...s Replacing a Modular Power Supply This section describes how to remove and install a modular power supply for the PXIe 1066DC chassis Caution Do not use a power supply from another chassis Doing so m...

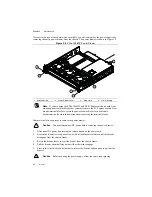
Страница 41: ...1 Caution Before handling the power supply allow the fan to stop spinning 1 Remove the two screws on the rear of the power supply with a flat blade screwdriver 2 Extend the collapsible handle and pull...

Страница 42: ...ng the terminal blocks Complete the following steps to remove the power drawer Caution You must disconnect DC power before removing the power drawer 1 Disconnect DC power by pressing the release butto...

Страница 43: ...nector facing toward the chassis until it engages 2 Fold down the collapsible handle on the power supply 3 Tighten the two captive screws on the rear of the power supply to 11 5 lb in torque with a fl...

Страница 44: ...1066DC chassis Caution Do not use a fan assembly from another chassis Doing so may damage your chassis and the fan assembly Removal The PXIe 1066DC fan assembly part number 782107 01 is a replacement...

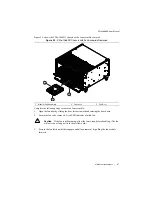
Страница 45: ...pen the fan door by sliding the door latches inward and rotating the door down 2 Locate the fan to be removed A red LED indicates a failed fan Caution If the fan is still spinning allow the fan to sto...

Страница 46: ...h main DC power connected to the system Complete the following steps to install a fan assembly 1 Open the fan door by sliding the door latches inward and rotating the door down 2 Slide the fan module...

Страница 47: ...Power disconnect The DC power cable provides main power disconnect The front panel power switch causes the internal chassis power supply to provide DC power to the CompactPCI PXI Express backplane You...

Страница 48: ...ated in a peripheral slot should not exceed 38 25 W Load regulation Maximum ripple and noise 20 MHz bandwidth Slot 5 V V I O 3 3 V 12 V 12 V 5 VAUX System Controller Slot 15 A 15 A 30 A 1 A System Tim...

Страница 49: ...t Along top of chassis Power supply cooling system Forced air circulation through integrated fan Power supply cooling intake Rear of chassis Power supply cooling exhaust Top of chassis Environmental M...

Страница 50: ...e a power supply filler panel NI part number 784057 01 in the empty slot to meet operational shock and vibration specifications Acoustic Emissions Sound Pressure Level at Operator Position Tested in a...

Страница 51: ...fications and additional information refer to the Online Product Certification section CE Compliance This product meets the essential requirements of applicable European Directives as follows 2006 95...

Страница 52: ...ant Accepts both PXI Express and CompactPCI PICMG 2 0 R 3 0 3U modules Backplane bare board material UL 94 V 0 Recognized Backplane connectors Conforms to IEC 917 and IEC 1076 4 101 and are UL 94 V 0...

Страница 53: ...Note For other specifications refer to the PXI 5 PXI Express Hardware Specification External 10 MHz Reference Out SMA on front panel of chassis Accuracy 25 ppm max guaranteed over the operating temper...

Страница 54: ...s slot to PXI_DSTAR mapping refer to the System Timing Slot section of Chapter 1 Getting Started For other specifications the PXIe 1066DC complies with the PXI 5 PXI Express Hardware Specification Mec...

Страница 55: ...on which end of the chassis you want to face toward the front of the instrument cabinet Notice that the front and rear chassis mounting holes size M4 are symmetrical Figure A 1 PXIe 1066DC Chassis Dim...

Страница 56: ...A 10 ni com Appendix A Specifications Figure A 2 PXIe 1066DC Chassis Dimensions Bottom Dimensions are in inches millimeters 0 18 4 7...

Страница 57: ...mount kit components Figure A 3 NI Chassis Rack Mount Kit Components Note For more information about rack mounting the PXIe 1066DC chassis refer to the printed installation guide included with your ra...

Страница 58: ...TP2 connector pinout for the System Timing slot Table B 7 shows the XP3 connector pinout for the System Timing slot Table B 8 shows the XP4 connector pinout for the System Timing slot Table B 9 shows...

Страница 59: ...1 3PETp1 3PETn1 GND 3PERp1 3PERn1 GND 3PETp2 3PETn2 GND 2 3PETp3 3PETn3 GND 3PERp3 3PERn3 GND 3PERp2 3PERn2 GND 3 4PETp0 4PETn0 GND 4PERp0 4PERn0 GND 4PETp1 4PETn1 GND 4 4PETp2 4PETn2 GND 4PERp2 4PERn...

Страница 60: ...1PERp1 1PERn1 GND 7 1PETp3 1PETn3 GND 1PERp3 1PERn3 GND 2PETp0 2PETn0 GND 8 2PETp1 2PETn1 GND 2PERp1 2PERn1 GND 2PERp0 2PERn0 GND 9 2PETp2 2PETn2 GND 2PERp2 2PERn2 GND 2PETp3 2PETn3 GND 10 3PETp0 3PE...

Страница 61: ...C GND NC NC GND 8 PXIe_ DSTARC6 PXIe_DSTARC6 GND PXI_ STAR16 RSV GND NC NC GND 9 PXIe_ DSTARB6 PXIe_DSTARB6 GND NC NC GND NC NC GND 10 PXIe_ DSTARA6 PXIe_ DSTARA6 GND NC NC GND NC NC GND Table B 6 TP2...

Страница 62: ...SMBDA T SMBCLK GND RSV RSV GND RSV RSV GND 4 MPWR GD PERST GND RSV RSV GND 1RefClk 1RefClk GND 5 1PETp0 1PETn0 GND 1PERp0 1PERn0 GND 1PETp1 1PETn1 GND 6 1PETp2 1PETn2 GND 1PERp2 1PERn2 GND 1PERp1 1PER...

Страница 63: ...6 AD 5 GND 21 GND 3 3V AD 9 AD 8 M66EN C BE 0 GND 20 GND AD 12 GND V I O AD 11 AD 10 GND 19 GND 3 3V AD 15 AD 14 GND AD 13 GND 18 GND SERR GND 3 3V PAR C BE 1 GND 17 GND 3 3V IPMB_SCL IPMB_SDA GND PE...

Страница 64: ...I_LBR5 PXI_LBL0 GND PXI_LBL1 GND 19 GND PXI_ LBL2 GND PXI_LBL3 PXI_LBL4 PXI_LBL5 GND 18 GND PXI_ TRIG3 PXI_ TRIG4 PXI_ TRIG5 GND PXI_ TRIG6 GND 17 GND PXI_ TRIG2 GND RSV PXI_ STAR PXI_ CLK10 GND 16 GN...

Страница 65: ...B C D E F 25 GND 5V REQ64 ENUM 3 3V 5V GND 24 GND AD 1 5V V I O AD 0 ACK64 GND 23 GND 3 3V AD 4 AD 3 5V AD 2 GND 22 GND AD 7 GND 3 3V AD 6 AD 5 GND 21 GND 3 3V AD 9 AD 8 M66EN C BE 0 GND 20 GND AD 12...

Страница 66: ...K100 PXIe_ CLK100 GND PXIe_SY NC100 PXIe_SY NC100 GND PXIe_DS TARC PXIe_DS TARC GND 2 PRSNT PWREN GND PXIe_DS TARB PXIe_DS TARB GND PXIe_DS TARA PXIe_DS TARA GND 3 SMBDAT SMBCLK GND RSV RSV GND RSV RS...

Страница 67: ...A3 GA2 GA1 GA0 GND 2 GND 5Vaux GND SYSEN WAKE ALERT GND 3 GND 12V 12V GND GND GND GND 4 GND GND GND 3 3V 3 3V 3 3V GND 5 GND PXI_TRIG3 PXI_TRIG4 PXI_TRIG5 GND PXI_TRIG6 GND 6 GND PXI_TRIG2 GND ATNLED...

Страница 68: ...you identify your systems accuracy and reliability requirements and provides warranty sparing and calibration services to help you maintain accuracy and minimize downtime over the life of your system...

Страница 69: ...tions Engineers make sure every question submitted online receives an answer Software Support Service Membership The Standard Service Program SSP is a renewable one year subscription included with alm...

Страница 70: ...10 9 micro 10 6 m milli 10 3 k kilo 103 M mega 106 G giga 109 T tera 1012 Symbols Degrees Equal or greater than Equal or less than Percent A A Amperes AC Alternating current ANSI American National St...

Страница 71: ...robust mechanical form factor than desktop PCI It uses industry standard mechanical components and high performance connector technologies to provide an optimized system intended for rugged applicati...

Страница 72: ...anel used to fill empty slots in the chassis G g 1 grams 2 a measure of acceleration equal to 9 8 m s2 GPIB General Purpose Interface Bus IEEE 488 gRMS A measure of random vibration The root mean squa...

Страница 73: ...regulation The maximum steady state percentage that a DC voltage output will change as a result of a specified change in input AC voltage step change from 90 to 132 VAC or 180 to 264 VAC load regulati...

Страница 74: ...S s Seconds skew Deviation in signal transmission times slot blocker An assembly installed into an empty slot to improve the airflow in adjacent slots standby The backplane is unpowered off but the ch...

Страница 75: ...s in a measurement or control system The 10 MHz REF IN and OUT BNC connectors on the rear of the chassis can be used to synchronize multiple chassis to one reference clock The PXI backplane specificat...

Страница 76: ...ar connectors 2 15 CompactPCI interoperability with PXIe 1066DC backplane 1 5 configuration in MAX figure 2 16 configuration See installation configuration and operation cooling air cooling of PXIe 10...

Страница 77: ...ipment 1 4 P peripheral module installation 2 9 figure 2 10 peripheral slot pinouts P1 connector table B 6 P2 connector table B 7 pinouts B 1 power drawer figure 3 4 power source connecting to 2 6 pow...

Страница 78: ...A 4 service interval 3 1 setting fan speed 2 5 slot blocker installation 2 5 kit 1 4 specifications A 1 acoustic emissions sound power A 4 sound pressure level at operator position A 4 backplane A 6...

Страница 79: ...4 ni com system timing slot description 1 6 pinouts TP1 connector table B 4 TP2 connector table B 4 XP3 connector table B 5 XP4 connector table B 5 T trigger bus 1 8 U unpacking the PXIe 1066DC chass...

Отзывы: