background image

© National Instruments

|

2-1

2

Installation and Configuration

This chapter describes how to prepare and operate the PXIe-1078 chassis.

Before connecting the chassis to a power source, read this chapter and the 

Read Me First: Safety 

and Electromagnetic Compatibility 

document included with your kit.

Safety Information

Caution

Before undertaking any troubleshooting, maintenance, or exploratory 

procedure, carefully read the following caution notices.

This equipment contains voltage hazardous to human life and safety, and is capable of inflicting 
personal injury.

Chassis Grounding

—The chassis requires a connection from the premise wire safety 

ground to the chassis ground. The earth safety ground must be connected during use of this 
equipment to minimize shock hazards. Refer to the 

Connecting Safety Ground

 section for 

instructions on connecting safety ground.

Live Circuits

—Operating personnel and service personnel 

must

 not remove protective 

covers when operating or servicing the chassis. Adjustments and service to internal 
components must be undertaken by qualified service technicians. During service of this 
product, the mains connector to the premise wiring must be disconnected. Dangerous 
voltages may be present under certain conditions; use extreme caution.

Explosive Atmosphere

—Do 

not

 operate the chassis in conditions where flammable gases 

are present. Under such conditions, this equipment is unsafe and may ignite the gases or gas 
fumes.

Part Replacement

—Only service this equipment with parts that are exact replacements, 

both electrically and mechanically. Contact National Instruments for replacement part 
information. Installation of parts with those that are not direct replacements may cause 
harm to personnel operating the chassis. Furthermore, damage or fire may occur if 
replacement parts are unsuitable.

Modification

—Do 

not

 modify any part of the chassis from its original condition. 

Unsuitable modifications may result in safety hazards.

PXIe1078UM.book  Page 1  Monday, December 23, 2019  10:44 AM

Содержание NI PXIe-1078

Страница 1: ...PXI Express PXIe 1078 User Manual PXIe 1078 User Manual December 2019 373204D 01 PXIe1078UM book Page i Monday December 23 2019 10 44 AM...

Страница 2: ...resses and current events National Instruments Corporate Headquarters 11500 North Mopac Expressway Austin Texas 78759 3504 USA Tel 512 683 0100 For further support information refer to the NI Services...

Страница 3: ...NY WARRANTIES THAT MAY ARISE FROM USAGE OF TRADE OR COURSE OF DEALING NI DOES NOT WARRANT GUARANTEE OR MAKE ANY REPRESENTATIONS REGARDING THE USE OF OR THE RESULTS OF THE USE OF THE PRODUCTS IN TERMS...

Страница 4: ...agency partnership or joint venture relationship with NI Patents For patents covering NI products technology refer to the appropriate location Help Patents in your software the patents txt file on yo...

Страница 5: ...ct the interference by one or more of the following measures Reorient the antenna of the receiver the device suffering interference Relocate the transmitter the device generating interference with res...

Страница 6: ...ystem Reference Clock 1 9 Chapter 2 Installation and Configuration Safety Information 2 1 Chassis Cooling Considerations 2 2 Providing Adequate Clearance 2 2 Chassis Ambient Temperature Definition 2 5...

Страница 7: ...hapter 3 Maintenance Service Interval 3 1 Preparation 3 1 Cleaning 3 2 Interior Cleaning 3 2 Exterior Cleaning 3 2 Appendix A Pinouts Appendix B NI Services Index PXIe1078UM book Page viii Monday Dece...

Страница 8: ...might find helpful as you read this manual IEEE 1101 1 1991 IEEE Standard for Mechanical Core Specifications for Microcomputers Using IEC 603 2 Connectors IEEE 1101 10 IEEE Standard for Additional Me...

Страница 9: ...ner chassis for any possible damage debris or detached components If damage appears to have been caused during shipment file a claim with the carrier Retain the packing material for possible inspectio...

Страница 10: ...hybrid peripheral slots connected as x1 links to a PCI Express switch which is connected to the system through a x4 link 32 bit 33 MHz PCI connected to each hybrid slot Accepts 4 slot wide PXI Expres...

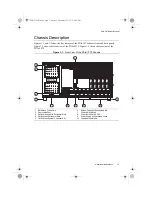
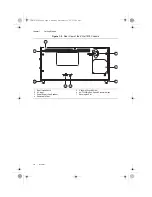
Страница 11: ...8 Figure 1 1 Front View of the PXIe 1078 Chassis 1 Backplane Connectors 2 Removable Feet 3 PXI Express Hybrid Peripheral Slots 4 PXI Express Peripheral Slots 5 PXI Express System Controller Slot 6 Sys...

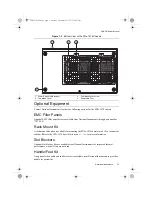
Страница 12: ...ew of the PXIe 1078 Chassis 1 Rear Intake Vents 2 AC Input 3 Power Supply Fan Exhaust 4 Removable Feet 5 Chassis Ground Screw 6 AUTO HIGH Fan Speed Selector Switch 7 Kensington Slot 6 4 4 5 6 3 2 7 1...

Страница 13: ...ble for mounting the PXIe 1078 chassis into a 19 in instrument cabinet Refer to the PXIe 1078 Specifications on ni com for more information Slot Blockers Optional slot blocker kits are available from...

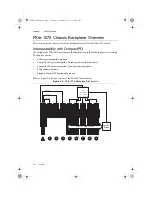
Страница 14: ...ible products CompactPCI Express compatible 4 Link system controller products CompactPCI Express compatible Type 2 peripheral products PXI peripheral products Standard CompactPCI peripheral products R...

Страница 15: ...system controller to have control of the power supply Refer to the Inhibit Mode Switch section of Chapter 2 Installation and Configuration for details about the Inhibit Mode switch Hybrid Peripheral...

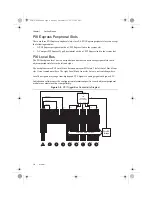
Страница 16: ...right The backplane routes PXI Local Bus 6 between adjacent PXI slots The left Local Bus 6 from slot 1 is not routed anywhere The right Local Bus 6 from slot 9 also is not routed anywhere Local bus s...

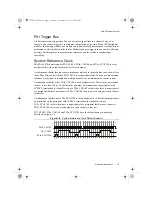
Страница 17: ...k signal to synchronize multiple modules in a measurement or control system An independent buffer drives PXIe_CLK100 to each peripheral slot These clocks are matched in skew to less than 100 ps The di...

Страница 18: ...personnel must not remove protective covers when operating or servicing the chassis Adjustments and service to internal components must be undertaken by qualified service technicians During service of...

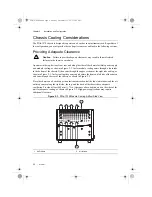
Страница 19: ...n intake in the bottom of the chassis It then exits through the upper sections at the right side and top as shown in Figure 2 1 Air for cooling the power supply enters the front and left side of the c...

Страница 20: ...ents 1 Power Supply Cooling Intake Vent 2 Module Cooling Exhaust Vent 3 Module Cooling Intake Vent 4 Backplane Cooling Exhaust Vent 5 Power Supply Cooling Exhaust Vent 2 1 NATIO NAL IN STRUM ENTS NI P...

Страница 21: ...on Figure 2 3 PXIe 1078 Cooling Clearances 1 75 in 44 45 mm 1 75 in 44 45 mm 1 75 in 44 45 mm 1 75 in 44 45 mm In Electronics Rack 0 625 in 15 89 mm On Desktop NATIONAL INSTRUMENTS NI PXIe 1078 PXIe10...

Страница 22: ...locate the fan speed selector switch Select HIGH for maximum cooling performance recommended or AUTO for quieter operation When set to AUTO the chassis intake air temperature determines the fan speed...

Страница 23: ...cable supplied Refer to Figure 1 2 Rear View of the PXIe 1078 Chassis to locate the AC inlet Installing a PXI Express System Controller This section contains general installation instructions for ins...

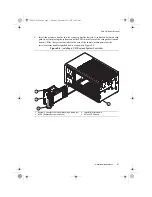
Страница 24: ...de the system controller to the rear of the chassis making sure that the injector ejector handle is pushed down as shown in Figure 2 4 Figure 2 4 Installing a PXI Express System Controller 1 System Co...

Страница 25: ...tion 6 Power on the chassis Verify that the system controller boots If the system controller does not boot refer to your system controller user manual Figure 2 5 shows a PXI Express system controller...

Страница 26: ...he chassis backplane for any bending or damage prior to installation 2 Connect the AC power source to the PXI Express chassis before installing the module The AC power cord grounds the chassis and pro...

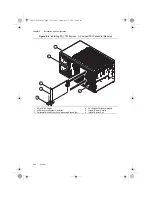
Страница 27: ...pheral Modules 1 PXIe 1078 Chassis 2 NI PXI Express System Controller 3 Peripheral Module Front Panel Mounting Screws 2x 4 PXI Express Peripheral Module 5 Injector Ejector Handle 6 Injector Ejector Ra...

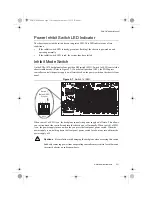
Страница 28: ...witch on the chassis front panel Figure 2 7 Switch 1 of SW1 When switch 1 of SW1 is on the backplane controls the power supply on off state This allows you to circumvent the controller and turn the ch...

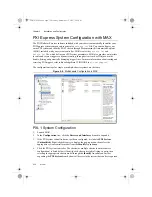
Страница 29: ...refer to KnowledgeBase 3TJDOND8 at ni com support The configuration steps for single or multiple chassis systems are the same Figure 2 8 Multichassis Configuration in MAX PXI 1 System Configuration 1...

Страница 30: ...Files The PXI Express specification allows many combinations of PXI Express chassis and system modules To assist system integrators the manufacturers of PXI Express chassis and system modules must doc...

Страница 31: ...The information in this section is designed for use by qualified service personnel Read the Read Me First Safety and Electromagnetic Compatibility document included with your kit before attempting any...

Страница 32: ...assis with a dry lint free cloth or a soft bristle brush If any dirt remains wipe with a cloth moistened in a mild soap solution Remove any soap residue by wiping with a cloth moistened with clear wat...

Страница 33: ...able A 4 shows the XP4 Connector Pinout for the System Controller slot Table A 5 shows the P1 connector pinout for the Hybrid peripheral slots Table A 6 shows the XP3 Connector Pinout for the PXI Expr...

Страница 34: ...3PERn1 GND 3PETp2 3PETn2 GND 2 3PETp3 3PETn3 GND 3PERp3 3PERn3 GND 3PERp2 3PERn2 GND 3 4PETp0 4PETn0 GND 4PERp0 4PERn0 GND 4PETp1 4PETn1 GND 4 4PETp2 4PETn2 GND 4PERp2 4PERn2 GND 4PERp1 4PERn1 GND 5...

Страница 35: ...PETn3 GND 1PERp3 1PERn3 GND 2PETp0 2PETn0 GND 8 2PETp1 2PETn1 GND 2PERp1 2PERn1 GND 2PERp0 2PERn0 GND 9 2PETp2 2PETn2 GND 2PERp2 2PERn2 GND 2PETp3 2PETn3 GND 10 3PETp0 3PETn0 GND 3PERp0 3PERn0 GND 2PE...

Страница 36: ...E 1 GND 17 GND 3 3 V IPMB_SCL IPMB_SDA GND PERR GND 16 GND DEVSEL GND V I O STOP LOCK GND 15 GND 3 3 V FRAME IRDY BD_SEL TRDY GND 12 14 Key Area 11 GND AD 18 AD 17 AD 16 GND C BE 2 GND 10 GND AD 21 GN...

Страница 37: ...1 1PERn1 GND 7 1PETp3 1PETn3 GND 1PERp3 1PERn3 GND 1PETp4 1PETn4 GND 8 1PETp5 1PETn5 GND 1PERp5 1PERn5 GND 1PERp4 1PERn4 GND 9 1PETp6 1PETn6 GND 1PERp6 1PERn6 GND 1PETp7 1PETn7 GND 10 RSV RSV GND RSV...

Страница 38: ...reliability requirements and provides warranty sparing and calibration services to help you maintain accuracy and minimize downtime over the life of your system Visit ni com services for more informat...

Страница 39: ...ery question submitted online receives an answer Software Support Service Membership The Standard Service Program SSP is a renewable one year subscription included with almost every NI software produc...

Страница 40: ...nstallation 2 5 D documentation related documentation ix E EMC filler panel kit 1 5 F fan setting speed 2 5 filler panel installation 2 5 G ground connecting 2 5 H handle feet kit 1 5 hybrid periphera...

Страница 41: ...chassis optional equipment 1 5 rack mounting 2 5 safety ground connecting 2 5 unpacking 1 1 PXIe 1078 backplane hybrid peripheral slots 1 7 interoperability with CompactPCI 1 6 overview 1 6 PXI Expre...

Отзывы: