Chapter 2
Configuration and Installation
© National Instruments Corporation
2-11
SCXI-1100 User Manual
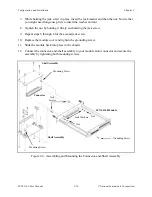
3. Insert the SCXI-1100 into the board guides. Gently guide the module into the back of the
slot until the connectors make good contact. If you have already installed a cable assembly
in the rear of the chassis, you must firmly engage the module and cable assembly; however,
do not force the module into place.
4. Screw the front mounting panel of the SCXI-1100 to the top and bottom threaded strips of
your SCXI chassis.
5. If you will connect this module to any MIO data acquisition board except the AT-MIO-16D
and the AT-MIO-64F-5, attach the connector at the metal end of an SCXI-1340 cable
assembly to the rear signal connector on the SCXI-1100 module. Screw the rear panel to the
rear threaded strip. Attach the loose end of the cable to the MIO board.
Note: If you already have another module in your chassis that is cabled to your data
acquisition board, you generally do not need to connect additional cabling to the
SCXI-1100. Typically, only one module in a chassis is cabled to a data acquisition
board.
For installation procedures with other SCXI accessories and data acquisition boards, consult
Appendix E, SCXI-1100 Cabling.
6. Check the installation.
7. Turn on the SCXI chassis.
8. Turn on the computer or reconnect the data acquisition board to your chassis.
The SCXI-1100 module is installed and ready for operation.
Signal Connections
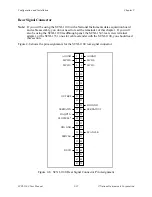
This section describes the input and output signal connections to the SCXI-1100 board via the
SCXI-1100 front connector and rear signal connector, and includes specifications and connection
instructions for the signals given on the SCXI-1100 connectors.
Warning: Connections to any terminal that exceed any of the maximum ratings of input or
output signals on the SCXI-1100 can damage the SCXI-1100 module and the
SCXIbus backplane. Maximum input ratings for each signal are given in this chapter
under the discussion of that signal. National Instruments is not liable for any
damages resulting from signal connections that exceed these ratings.
Front Connector
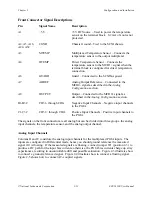
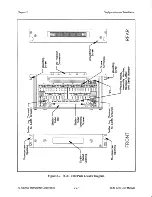
Figure 2-2 shows the pin assignments for the SCXI-1100 front connector.

