60 Setup 1: User Type
Standard or Custom Adjustment Methods
1.
Print a confirm pattern and check it for printing errors.
2.
Print “Rough pattern” and look for a place that is properly adjusted in the printing results of print head 1.
•
If you selected “Adjust Print 2: Custom”, select “ALL” or “A” to “F”.
•
The number printed under the pattern without alignment errors is the adjustment value.
3.
Enter the adjustment values.
4.
Follow the same procedure to adjust print head 2.
5.
Print “Fine pattern” and look for a place that is properly adjusted in the printing results of print head 1.
•
If you selected “Adjust Print 2: Custom”, select “ALL” or “A” to “F”.
•
The number printed under the pattern without alignment errors is the adjustment value.
6.
Enter the adjustment values.
7.
Follow the same procedure to adjust print head 2.
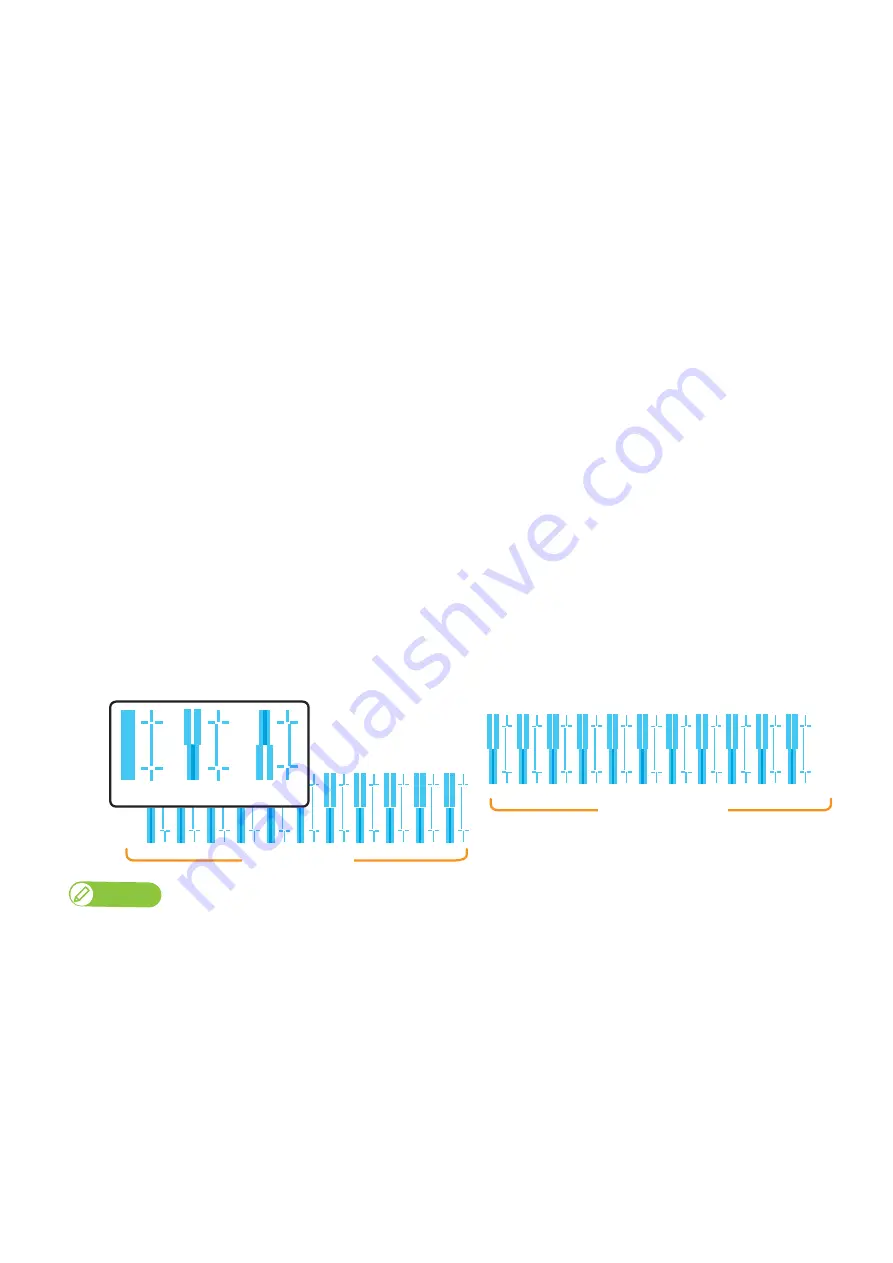
Confirm pattern
• Press the [Enter] key to carry out printing.
• Check the printing results. If there are shifting problems, proceed to rough adjustment pattern printing.
• In the picture below, there are misalignments.
Note
Because this printer has 2 Print heads, 2 rows of confirmation pattern will be printed.
・
・
・
・
・
・
Print Head 2
Print Head 1
Good
Not good
Not good
Содержание XPJ-1682WR
Страница 8: ...8 ...
Страница 136: ...136 Performing initial charging after head cleaning ...
Страница 152: ...152 The media is jammed Note ...
Страница 157: ...List of specifications 157 ...
Страница 158: ...XPJ16xxWRE A 01 ...


