background image

1

 MTI P/N 063-00259 rev A ©2019 MTI All Rights Reserved

www.mobiletechinc.com  |  T:800.426.6844

MTI PLUNGER LOCKS

™ 

PRODUCT MANUAL

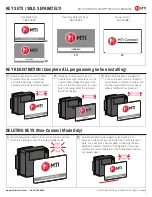
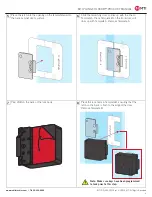
PLUNGER LOCK PARTS

Plunger  

Lock Body

Mounting  

Template A

Mounting  
Template B

Latch VHB

Latch Spacer Screws

Latch Spacer E

Latch Spacer D

Latch Spacer F

Latch

Battery

Keys not included. See Page 4.

Battery installation on page 8.

Содержание Plunger Lock

Страница 1: ...om T 800 426 6844 MTI PLUNGER LOCKS PRODUCT MANUAL PLUNGER LOCK PARTS Plunger Lock Body Mounting Template A Mounting Template B Latch VHB Latch Spacer Screws Latch Spacer E Latch Spacer D Latch Spacer F Latch Battery Keys not included See Page 4 Battery installation on page 8 ...

Страница 2: ...ock A double beep tone indicates a card is now enrolled Repeat for each user card up to 250 user cards If a card fails to be recognized the lock will emit 4 fast beeps Swipe Authorization Card again to lock within 10 seconds to clear all keys returning lock to a factory reset state Lock will emit a double beep confirming the key whitelist is cleared It will stop ticking after 10 seconds and resume...

Страница 3: ...nnect Hub to disable the mesh network This will ensure the lock is not trying to locate a mesh 2 Hold Connect card to lock for 10 seconds Lock will emit a fast double confirmation beep After 5 seconds it will emit four fast beeps Lock has reverted to a non Connect operating mode 3 Keys previously whitelisted in Connect mode will still continue to work Factory Reset There are several methods to res...

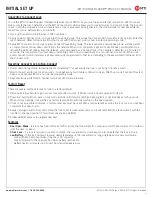
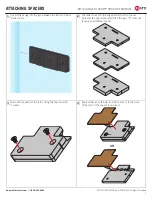
Страница 4: ...the gauge into the gap between the front and back panel doors The letter closest to the edge behind the front panel indicates the spacer required to fill the gap A does not require an additional spacer Secure the spacer to the latch using the two included screws Apply adhesive to the back of the spacer or to the back of the latch if the spacer is not used OR ...

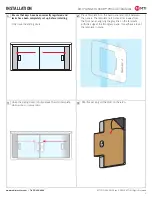
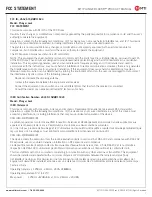
Страница 5: ... face away from the front panel aligning the gray line on the template with the edge of the front glass pane Use adhesive to set the template in place Ensure that keys have been correctly registered and locks have been completely set up before installing Fully close the sliding doors INSTALLATION Open the sliding doors to fully expose the latch template which will aid in placement Peel the backing...

Страница 6: ...k cabinet door s surface Slide the remaining door so lines up with the line on Template A Place Template B on the front door so it lines up with Template A Remove Template A Place the lock body in Template B ensuring that the latch on the back is flush to the edge of the door Remove Template B Peel VHB on the back of the lock body Note Make sure keys have been programmed to lock prior to this step...

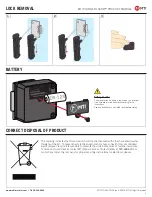
Страница 7: ...om that to which the receiver is connected Consult the dealer or an experienced radio TV technician for help ISED Certification Number 24439 15ØØØ11824 Model Plunger Lock ISED Statement This device complies with Innovation Science and Economic Development Canada licence exempt RSS standard s Operation is subject to the following two conditions 1 this device may not cause interference and 2 this de...

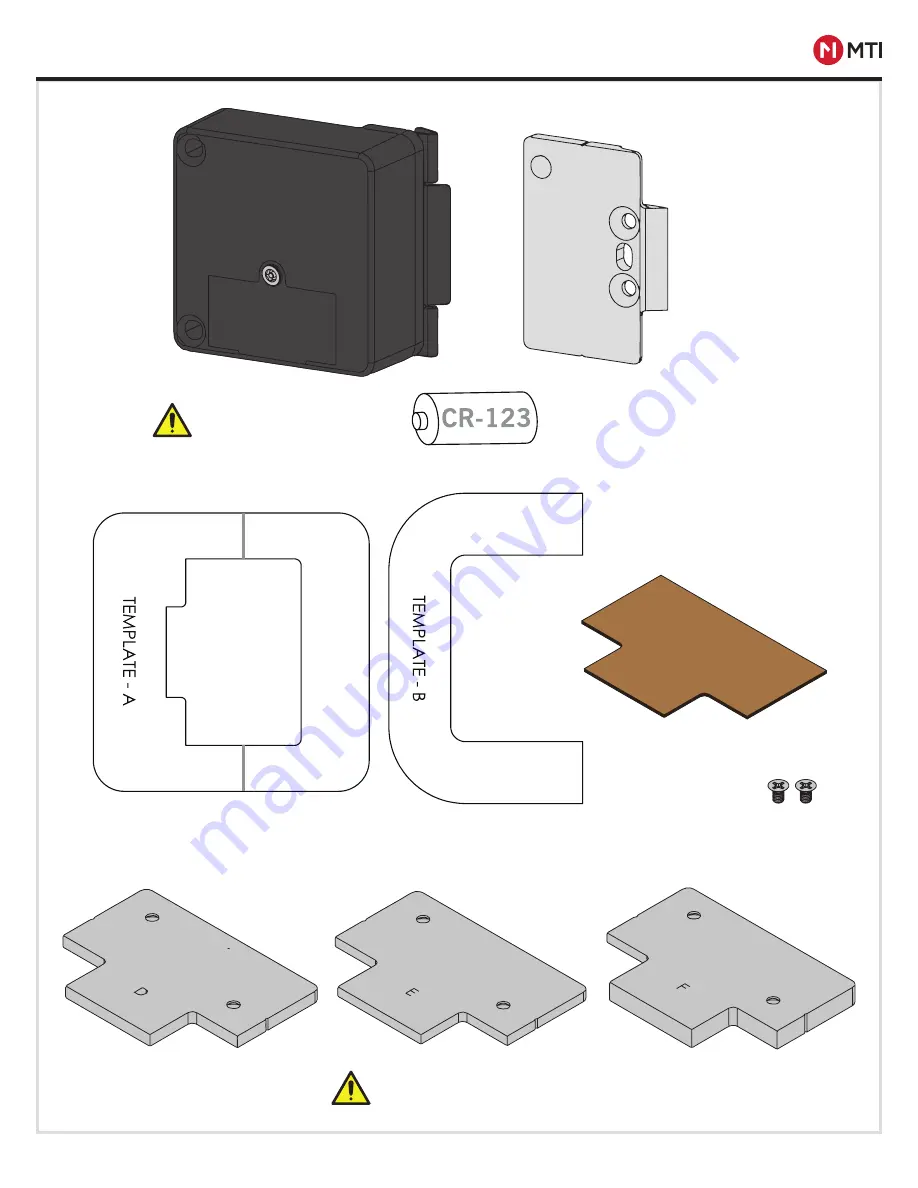
Страница 8: ...ctions Remove batteries of uninstalled locks before storing This marking indicates that this product should not be disposed with other household wastes throughout the EU To prevent harm to the environment or human health from uncontrolled waste disposal recycle it responsibly to promote the sustainable reuse of material resources To dispose of used devices contact MTI Global Services Contact Cente...

Отзывы: