background image

6 - 18 RS507 Hands-Free Imager Product Reference Guide

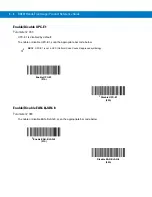
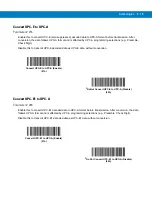
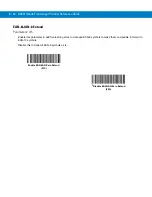
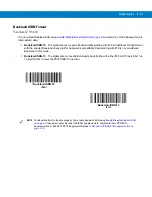
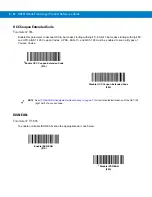
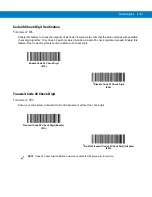
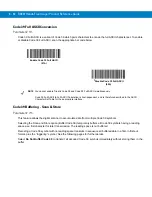
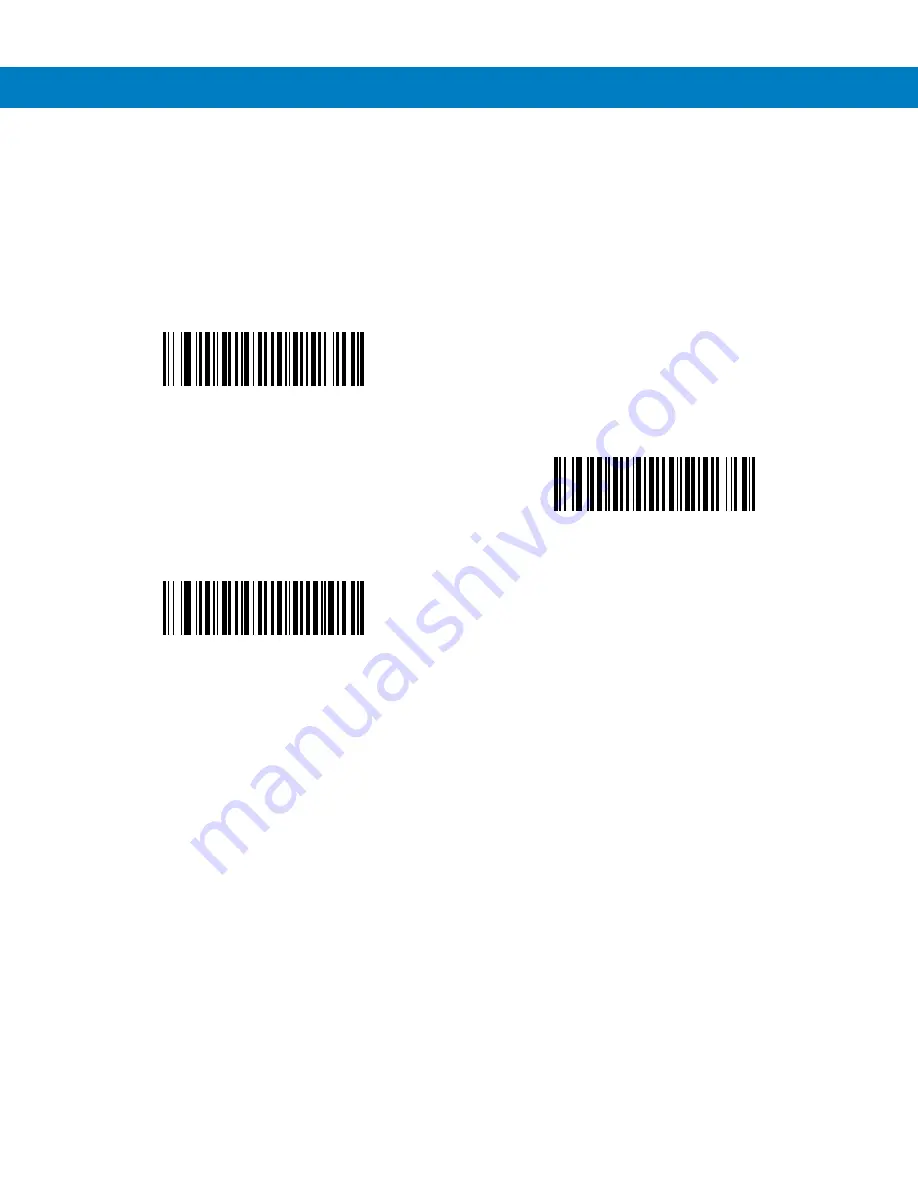
UPC-E1 Preamble

Parameter # 24h

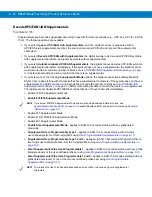
Preamble characters are part of the UPC symbol, and include Country Code and System Character. There are 
three options for transmitting a UPC-E1 preamble to the host device: transmit System Character only, transmit 
System Character and Country Code (“0” for USA), and transmit no preamble. Select the appropriate option to 
match the host system. 

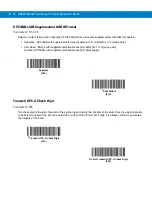
No Preamble (<DATA>)

(00h)

*

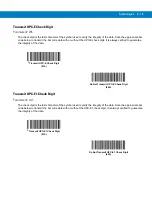
System Character (<SYSTEM CHARACTER> <DATA>)

(01h)

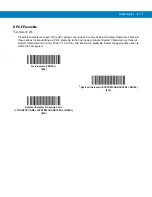
System Character & Country Code

(< COUNTRY CODE> <SYSTEM CHARACTER> <DATA>)

(02h)

Содержание RS507 Series

Страница 1: ...RS507 Hands Free Imager Product Reference Guide ...

Страница 2: ...RS507 Hands Free Imager Product Reference Guide 72E 120802 01 Rev B September 2011 ...

Страница 3: ...ogram with other program material create a derivative work from a licensed program or use a licensed program in a network without written permission from Motorola The user agrees to maintain Motorola s copyright notice on the licensed programs delivered hereunder and to include the same on any authorized copies it makes in whole or in part The user agrees not to decompile disassemble decode or rev...

Страница 4: ... 2 Cordless Configuration Features 1 3 Corded Configuration Features 1 4 Trigger Swivel Assembly Change Trigger Position 1 5 Getting Started Cordless Configuration 1 6 Charge the Battery 1 6 Install the Battery 1 6 Remove the Battery 1 6 Wearing the Imager 1 6 Getting Started Corded Configuration 1 7 Connect the Corded Adapter 1 7 Remove the Corded Adapter 1 7 Connect to a WT4090 Wearable Terminal...

Страница 5: ... the Charger 2 2 Installation 2 3 Tabletop Shelf Set Up 2 3 Wall Mount 2 4 Inserting the Imager Battery in the Charger 2 5 Charge the Battery 2 5 Battery Age Test 2 6 Charge Status LED 2 6 Chapter 3 Troubleshooting Maintenance Introduction 3 1 Troubleshooting 3 1 Imager 3 1 Charger 3 2 Maintenance 3 3 Maintaining the Imager 3 3 Comfort Pad Replacement 3 3 Trigger Swivel Assembly Replacement 3 4 Tr...

Страница 6: ...scellaneous Options Parameter Defaults 5 2 User Preferences 5 4 Set Default Parameter 5 4 Parameter Bar Code Scanning 5 5 Beep After Good Decode 5 5 Beeper Tone 5 6 Beeper Volume 5 7 Beeper Duration 5 8 Imager Activity Modes 5 9 Picklist Mode 5 10 Fuzzy 1D Processing 5 11 Decoding Illumination 5 12 Low Battery Indication Cycle 5 12 Bluetooth Disconnection Alert Control 5 13 Miscellaneous Scanner P...

Страница 7: ... 6 21 UCC Coupon Extended Code 6 22 ISSN EAN 6 22 Code 128 6 23 Enable Disable Code 128 6 23 Set Lengths for Code 128 6 23 Enable Disable GS1 128 formerly UCC EAN 128 6 24 Enable Disable ISBT 128 6 25 ISBT Concatenation 6 26 Check ISBT Table 6 27 ISBT Concatenation Redundancy 6 27 Code 39 6 28 Enable Disable Code 39 6 28 Enable Disable Trioptic Code 39 6 28 Convert Code 39 to Code 32 6 29 Code 32 ...

Страница 8: ...Matrix 2 of 5 6 54 Enable Disable Matrix 2 of 5 6 54 Set Lengths for Matrix 2 of 5 6 55 Matrix 2 of 5 Redundancy 6 56 Matrix 2 of 5 Check Digit 6 56 Transmit Matrix 2 of 5 Check Digit 6 57 Inverse 1D 6 57 Postal Codes 6 58 US Postnet 6 58 US Planet 6 58 Transmit US Postal Check Digit 6 59 UK Postal 6 59 Transmit UK Postal Check Digit 6 60 Japan Postal 6 60 Australian Postal 6 61 Netherlands KIX Co...

Страница 9: ...s 7 2 Refreshing Boot Choices 7 3 HID Human Interface Device Mode 7 3 How to change to HID mode 7 3 How to format the scanned data 7 4 How to pair and connect with a computer running Windows 7 SP1 7 4 How to pair and connect with a computer running Windows XP SP3 and Bluetooth 2 1 7 6 How to pair and connect with other devices 7 10 Reconnecting 7 10 How to demonstrate HID connection with a compute...

Страница 10: ...ontrol 7 47 Bell Indication Control 7 49 Bluetooth Profile Control 7 54 Bluetooth Pairing Control 7 55 Chapter 8 Specifications Technical Specifications 8 1 Imager 8 1 Charger 8 4 Appendix A Standard Default Parameters Standard Default Parameters Table A 1 Appendix B Programming Reference Symbol Code Identifiers B 1 AIM Code Identifiers B 3 Appendix C Sample Bar Codes Code 39 C 1 UPC EAN C 1 UPC A...

Страница 11: ...xii RS507 Hands Free Imager Product Reference Guide Glossary Index ...

Страница 12: ...et for the RS507 is divided into guides that provide information for specific user needs RS507 Hands Free Imager Quick Start Guide describes how to use the Imager SAC5070 8 Bay Battery Charger Quick Reference Guide describes how to use the Imager charger EMDK Help File provides API information for writing applications Advanced Data Formatting Programmer Guide describes how to customiz data before ...

Страница 13: ...on Using HID and SPP Profiles describes the Bluetooth connection modes of the RS507 to a personal computer and non Motorola terminals Chapter 8 Specifications provides Imager and charger technical specifications Appendix A Standard Default Parameters provides a sample of bar codes used for configuring the Imager Appendix B Programming Reference provides symbol code characters Appendix C Sample Bar...

Страница 14: ... equipment contact Motorola Enterprise Mobility Support for your region Contact information is available at http www motorola com enterprisemobility contactsupport When contacting Enterprise Mobility Support please have the following information available Serial number of the unit Model number or product name Software type and version number The following information should be available when repor...

Страница 15: ...E mail telephone or fax within the time limits set forth in support agreements If your problem cannot be solved by Motorola Enterprise Mobility Support you may need to return your equipment for servicing and will be given specific directions Motorola is not responsible for any damages incurred during shipment if the approved shipping container is not used Shipping the units improperly can possibly...

Страница 16: ...lowing Inspect the equipment for damage If you are missing any equipment or if you find any damaged equipment contact the Motorola Enterprise Mobility Support immediately See Service Information on page xv for contact information Table 1 1 RS507 Shipping Configuration Model Options Model Description Standard Battery Extended Battery Corded Adapter Trigger Quick Reference Guide RS507 IM2xxxxSTWR Tr...

Страница 17: ...lity to processing prescription drugs at the pharmaceutical distribution center The Imager uses camera based scanning technology designed to offer flexible hands free operation with ergonomic comfort for right or left hand users The Imager can be operated in both manual and auto triggering modes Auto triggering is a patent pending Interactive Sensing Technology combining motion and proximity sensi...

Страница 18: ...tion Features Imager Window Battery Battery Release Latch Finger Strap Scan Trigger Strap Buckle Beeper Restore Key Left Scan LED Finger Strap Right Scan LED Comfort Pad Trigger Swivel Assembly Asset Control Label Triggerless Strap Holder Triggered Configuration Triggerless Configuration ...

Страница 19: ... Figure 1 2 RS507 Corded Configuration Features Release Latch Imager Window Finger Strap Scan Trigger Comfort Pad Corded Adapter Strap Buckle Beeper Restore Key Left Scan LED Finger Strap Right Scan LED Trigger Swivel Assembly Interface Cable Connector to WT4090 Asset Control Label ...

Страница 20: ...r Swivel Assembly Position 3 Rotate the Trigger Swivel Assembly so that the Scan Trigger is positioned next to the thumb when the Imager is placed on the index and middle fingers 4 Position the Comfort Pad onto the Imager 5 Press the Comfort Pad onto the Imager When properly installed the Comfort Pad locks into place 6 Insert the Finger Strap into the Strap Buckle NOTE When removing the Comfort Pa...

Страница 21: ...e way into the Locking Slots of the Imager 3 Firmly press the battery into the Imager until a click is heard ensuring the Battery Release Latch is fully engaged with the Imager Figure 1 5 Install the Battery Remove the Battery 1 Hold the Imager in one hand 2 Press the Battery Release Latch 3 Pull up the battery to release it from the Locking Slots of the Imager Wearing the Imager 1 Slide the Image...

Страница 22: ... a click is heard ensuring the Adapter Release Latch is fully engaged with the Imager Figure 1 7 Connect Corded Adapter Remove the Corded Adapter To remove the Corded Adapter 1 Hold the Imager in one hand 2 Press the Adapter Release Latch 3 Pull up the Corded Adapter to release it from the Locking Slots of the Imager aaaaaaaaaaaaaaa aaaaaaaaaaaaaaa aaaaaaaaaaaaaaa aaaaaaaaaaaaaaa aaaaaaaaaaaaaaa a...

Страница 23: ...nect the Interface Cable Connector of the Imager to the WT4090 Interface Connector To disconnect the Imager from the terminal 1 Press the Disconnect Button on the Interface Cable Connector 2 Pull the Interface Cable Connector out of the WT4090 Interface Connector Wearing the Imager To wear the Imager 1 Slide the Imager onto the index and middle fingers with the Scan Trigger next to the thumb see F...

Страница 24: ...aaaaaaaaaa aaaaaaaaaaaaaaaaa aaaaaaaaaaaaaaaaa aaaaaaaaaaaaaaaaa aaaaaaaaaaaaaaaaa aaaaaaaaaaaaaaaaa aaaaaaaaaaaaaaaaa aaaaaaaaaaaaaaaaa aaaaaaaaaaaaaaaaa aaaaaaaaaaaaaaaaa aaaaaaaaaaaaaaaaa aaaaaaaaaaaaaaaaa 4t Q Finger Strap NOTE When using the Imager for the first time press and release the Scan Trigger to enable the manual triggering mode this operation disables the default auto triggering mod...

Страница 25: ...ns No LED Beep Indication Description 1 None High low Bluetooth communication is disconnected 2 Short green flashes None Attempting to connect over Bluetooth 3 None Low high Imager is connected over Bluetooth 4 None High low Bluetooth communication is disconnected Imager is out of range 5 None High low high low Properly decoded scan of Bluetooth pairing bar code 6 None Long low long high Bluetooth...

Страница 26: ...ddress Application 4 Scan the pairing bar code on the mobile computer screen see Figure 1 12 or a provided pairing label When scanning the Imager emits one string of high low high low beeps NOTE To find the BD address application tap the Start button and select Programs Display_BD_Address or Start Programs BT Information and then tap the Generate Local BD Address Barcode button to display the BD a...

Страница 27: ...ls verify that the Imager is within Bluetooth range and briefly press the Restore Key on the Imager to reconnect 4 The Scan LED starts flashing green indicating that the Imager is attempting to establish connection with a mobile computer The Scan LED turns off and the Imager emits one string of low high beeps indicating that the Imager is connected and ready for scanning Remove Bluetooth Connectio...

Страница 28: ...y_BD_Address application on the mobile computer or create and print a pairing bar code label To create a pairing bar code label the Bluetooth address of the mobile computer should be available refer to the mobile computer user guide Pairing bar codes are Code 128 or Data Matrix symbologies formatted as follows Fun3 Bxxxxxxxxxxxx Where xxxxxxxxxxxx represents the 12 character Bluetooth address Pair...

Страница 29: ... both motion and proximity sensors are used to trigger the Imager when the user intends to scan a bar code With auto triggering activated the Imager automatically scans when motion stops and a bar code is placed within the depth of field of the Imager The Imager scans the bar code and turns off to conserve power To scan a bar code in auto triggering mode 1 Position the Imager approximately 22 8 cm...

Страница 30: ...ny orientation within the virtual rectangle made by the cross hair laser beam making use of its omnidirectional reading capability within the entire field of view Figure 1 16 Symbol Scan Orientation The Imager can also read a bar code presented within the aiming pattern but not centered see the top bar codes on Figure 1 17 The bar codes marked with X in Figure 1 17 however show bar code aiming tha...

Страница 31: ... code density 2 Press the Scan trigger The aiming pattern illuminates red indicating that the laser is on One green flash of the Scan LED and a high beep indicates that a bar code was properly decoded Customize the Imager Changing from Triggered to Triggerless Configuration To change from Triggered to Triggerless configuration 1 Remove the Comfort Pad see Comfort Pad Replacement on page 3 3 2 Remo...

Страница 32: ... configuration Warm Boot To perform warm boot press and hold the Restore Key for more than six seconds Cold Boot Cold boot restores the Imager s operation by resetting its software To perform cold boot remove and re insert the battery into the Imager When using a corded Imager model with WT4090 remove and reconnect the interface cable that connects between the Imager and the WT4090 Clean Boot Clea...

Страница 33: ...nded capacity batteries The Charger may only be used indoors Unpacking the Charger After opening the shipping box inspect the contents You should have received the following For AC line cord contact the Motorola representative in your country Inspect the equipment for damage If you are missing any equipment or if you find any damaged equipment contact Motorola Enterprise Mobility Support immediate...

Страница 34: ...n Power Supply Connector Charge Status LED Charging Bay RS507 Imager Rest Compartment Power Supply Cable Duct Service Port Door Do not open for service use only Wall Mount Hole X4 Charger Front Charger Back Power Supply Cable Duct Asset Control Label M4 Screw Inserts X4 Screws not Included M4 Screw Inserts X4 Screws not Included ...

Страница 35: ...r 3 Use the Power Supply Cable Duct on the back of the Charger to route the Power Supply Cable to the left or right side of the Charger 4 Connect the AC plug of the AC Power Cord to a standard electrical outlet Figure 2 2 Charger Installation NOTE When required use the screw inserts at the back and base to secure the Charger to the tabletop or shelf surface AC Power Cord Power Supply Cable Power S...

Страница 36: ... the Charger see Figure 2 3 4 Use the Power Supply Cable Duct on the back of the Charger to route the Power Supply Cable to the left or right side of the Charger 5 Place the Power Supply Unit on a shelf or tabletop 6 Connect the AC plug of the AC Power Cord to a standard electrical outlet Figure 2 3 Wall Mounting of Charger WARNING For safe mounting it is essential to use wall anchors appropriate ...

Страница 37: ...automatically On each bay the flashing amber Charge Status LED see Figure 2 1 indicates the charge status A full charge of a depleted battery takes up to four hours The Charge Status LED lights solid amber when the battery is fully charged Standard Battery Charger Bay CAUTION Only Lithium ion batteries that have been designed for use with the RS507 Hands free Imager can be recharged by the Charger...

Страница 38: ... flashes green 3 Refer to the table below when the indication of the Charge Status LED changes Charge Status LED The Charge Status LEDs show the charge status of each Charging Bay NOTE A battery removed during test and re inserted is excluded from the test but continues normal charging Table 2 1 Charge LED Status Indications LED Indication Status Flashing amber Charging in progress Solid amber Cha...

Страница 39: ...ed Interface cable is not secure Verify that the interface cable is properly connected Cordless Battery is not charged Replace or charge battery Power is not applied to Imager Corded Verify that the mobile computer has a fully charged battery installed Cordless Replace or charge Imager battery Scan application on the mobile computer is not functioning Restart the scanning application on the mobile...

Страница 40: ... the end of the Power Supply Cable is plugged into the Charger s power connector Plug the Power plug of the Power Supply Unit into another outlet Replace the Power Supply Unit Contact a service representative see Service Information on page xv The battery takes too long to recharge Ensure that room battery temperatures are within charging range 0 ºC to 40 ºC 32 ºF to 104 ºF Clean the contacts on t...

Страница 41: ...he window using a tissue moistened with ammonia water Do not spray water or other cleaning liquids directly into the window Maintaining the Imager Comfort Pad Replacement Removal To remove the Comfort Pad from the bottom of the Imager hold and pull the Comfort Pad out of the Imager Figure 3 1 Removal of Comfort Pad NOTE It is not necessary to remove the Finger Strap from the Trigger Swivel Assembl...

Страница 42: ...ed the Comfort Pad locks into place Trigger Swivel Assembly Replacement Removal To remove the Trigger Swivel Assembly 1 Turn the Imager upside down 2 Remove the Comfort Pad 3 Use a paper clip or similar object to press the Release Latch Figure 3 3 Removal of Trigger Swivel Assembly 4 Rotate the Trigger Swivel Assembly to align with the back of the Imager 5 Lift the Trigger Swivel Assembly off the ...

Страница 43: ... Assembly to align with the back of the Imager 3 Lower the Trigger Swivel Assembly onto the scan assembly Figure 3 4 Installation of Trigger Swivel Assembly 1 Rotate the Trigger Swivel Assembly 1 4 turn counterclockwise 2 Press the Comfort Pad onto the Imager When properly installed the Comfort Pad locks into place 1 Trigger Swivel Assembly 2 ...

Страница 44: ...older to align with the back of the Imager 5 Lift the Triggerless Strap Holder off the Imager Installation To install the Triggerless Strap Holder 1 Position the Triggerless Strap Holder to align with the back of the Imager Figure 3 6 Turn the Imager upside down Installation of Triggerless Strap Holder NOTE The Triggerless Strap Holder should be installed when the Imager is intended to be used in ...

Страница 45: ...ckle 2 Pull the Finger Strap out of the Trigger Swivel Assembly Installation 1 Align a new Finger Strap with the Slots in the Trigger Swivel Assembly Figure 3 7 Finger Strap Replacement Trigger Swivel Assembly 2 Gently press the Strap Pins to engage with the Slots of the Trigger Swivel Assembly The Strap Pins snap into the slots 3 Slip the Finger Strap through the Strap Buckle Strap Pins Slots Str...

Страница 46: ...p the Finger Strap through the Strap Buckles Strap Buckle Replacement Figure 3 9 Strap Buckle Replacement Removal 1 Remove the Trigger Swivel Assembly see Trigger Swivel Assembly Replacement on page 3 4 2 Press the Strap Buckle off the Trigger Swivel Assembly Pin Installation 1 Align the pin slot of Strap Buckle with the pin of the Trigger Swivel Assembly Figure 3 10 Strap Buckle Replacement Strap...

Страница 47: ... 3 11 Imager Field Replaceable Parts No Part Description 1 KT CLMPT RS507 01R Trigger Swivel Assembly 2 KT BKL RS507 10R Set of 10 Strap Buckles 3 KT CLMPN RS507 01R Triggerless Strap Holder 4 KT PAD RS507 10R Set of 10 Comfort Pads 5 KT STRPN RS507 10R Set of 10 Triggerless Finger Strap with Finger Support 6 KT STRPT RS507 10R Set of 10 Trigger Finger Strap with Finger Support 7 KTBTRYRS50EAB00 0...

Страница 48: ... can be operated at temperatures between 0 C 32 F and 40 C 104 F Handling the Charger Do not attempt to open the Charger No user serviceable parts are inside Charge only Lithium ion batteries that have been designed for use with the Imager Do not attempt to recharge other types of rechargeable batteries or any type of primary batteries Do not place objects other than Imager batteries inside the Ch...

Страница 49: ...lities and gain maximum efficiency There are several ways to configure the Imager The best way is to set the parameters for each application allowing the required degrees of freedom In some cases it is recommended to allow the user to select between the various operational modes or use cases each with its own set of parameters Motorola mobile computers using the EMDK may utilize the SCAN and or RS...

Страница 50: ...r that do not have the Control Panel application installed can download the application CtlPanelWM exe and related documentation from the Support Central site at http www motorola com enterprisemobility contactsupport The following example describes how to read and configure new values of the Imager attributes To set new attribute values 1 When using the WT4090 from the App Launcher screen open th...

Страница 51: ...values The RSMSample application also enables one to retrieve and display the current setting of each attribute Users with mobile computer that do not have the RSMSample application installed can download the application and related documentation from the Support Central site at http www motorola com enterprisemobility contactsupport NOTE Before you select SCN2 make sure to pair and connect the Im...

Страница 52: ...t new attribute values 1 From the mobile computer Application folder run the RSMSample application Figure 4 5 Mobile Computer Application Folder RSMSample Application Icon 2 From the Dialog window select Bluetooth SSI Scanner Driver Figure 4 6 Dialog Window Bluetooth SSI Scanner Driver Windows Mobile RSMSample Application WT4090 RSMSample Application ...

Страница 53: ...The Attribute scroll window displays all supported attributes see Table 4 1 on page 4 7 and an operation success indication Figure 4 8 RSMSample Application Attribute Scroll Window 5 Select the attribute you wish to change and press the Get button to display the current value of the attribute Figure 4 9 RSMSample Application Get Button Operation Success Indication Attribute Scroll Window ...

Страница 54: ... an attribute see Table 4 1 enter the new value and press the Set button Figure 4 11 RSMSample Application Setting an Attribute In the following example after setting the ATTR_BT_DISCONNECT attribute to 0 disconnect the Bluetooth radio of the Imager is turned off successfully as indicated by the change of the Bluetooth icon from Bluetooth Connection icon to Bluetooth Disabled icon Figure 4 12 RSMS...

Страница 55: ...umber ATTR_DATE_OF_MANUFACTURE R N A N A Date of manufacture ATTR_DATE_OF_SERVICE R N A N A Last date of repair by Motorola ATTR_BT_ADDR R N A N A Imager Bluetooth address ATTR_BT_AUTHENTICATION R W 1 Enabled 0 Disabled 1 Enable Bluetooth authentication Permanently saved ATTR_BT_ENCRYPTION R W 1 Enabled 0 Disabled 1 Enable encryption over Bluetooth Permanently saved ATTR_BT_PINCODE R W Up to six c...

Страница 56: ...mager finds only an associated device General The Imager finds all the visible devices ATTR_EXCLUSIVE_CODE128_EN R W 1 Enabled 0 Disabled 0 Ignore Code 128 beginning with 420 and 421 ATTR_MEMS_ENABLE R W 1 Enabled 0 Disabled Trigger Model 0 Triggerl ess Model 1 Motion trigger feature ATTR_PROXIMITY_ENABLE R W 1 Enabled 0 Disabled Trigger Model 0 Triggerl ess Model 1 Proximity feature ATTR_PROXIMIT...

Страница 57: ...ITY_CONTINUOUS _EN R W 1 Enabled 0 Disabled 0 Proximity continuous mode for scanning packages off conveyer belt ATTR_GOOD_SCANS_DELAY R W Values 0 150 in 100 msec intervals 0 No delay 1 150 100 15000 msec 0 Delay between good scans in proximity continuous mode msec ATTR_FORCE_PAIRING_SAVE R W 0 Disabled 1 Enabled 1 Force BD_Address saving when pairing fails Permanently saved ATTR_PAGING_ACTIVATE W...

Страница 58: ...ging full rate 5 Charging half rate 6 Charging Trickle 7 Discharging Battery Cycle in progress Battery Status ATTR_BATTERY_CAPACITY R 0 100 battery percent 9999 if error no battery Battery capacity ATTR_BATTERY_ID R 0 Simple 1 Double 2 Cabled 9999 Error Battery ID Attribute Access Values Factory Default Description ...

Страница 59: ...peration Modes NOTE Once configured the motion and or proximity attributes are retained in the Imager memory following warm or cold boot Mode Number Parameter States Motion Proximity Continuous Scan Description 1 Motion enabled Proximity enabled Continuous scan disabled The Imager performs a single scan when moved and positioned in proximity to an object Scanning resumes when the Imager is moved a...

Страница 60: ... Enable Motion Trigger Proximity Sensing Control Disable Proximity Enable Proximity Proximity Continuous Enable The Proximity Continuous Enable parameter enables disables the proximity continuous feature Disable Proximity Continues Enable Proximity Continues NOTE Scanning bar codes for configuring motion and or proximity is enabled only when the Imager is in cordless Bluetooth configuration NOTE T...

Страница 61: ... Range Long Range Good Scan indication delay Control The Good Scan Delay parameter sets a delay between good scans when scanning is in continuous mode This delay is effective when Motion detection Enabled Proximity Enabled Proximity continues Enabled Or Motion detection Disabled Proximity Enabled 0 msec 200 msec 400 msec ...

Страница 62: ...4 14 RS507 Hands Free Imager Product Reference Guide 600 msec 800 msec 1000 msec 1200 msec 1400 msec 1600 msec 1800 msec 2000 msec ...

Страница 63: ...B and operates in a cyclic way Figure 4 13 shows the Real Time Logger file content as shown on a host computer screen Figure 4 13 Real Time Logger Content Screen ScannerLog Application 1 Perform a warm boot see Warm Boot on page 1 17 2 Select the Imager ScannerLog application from the Application folder Figure 4 14 ScannerLog Application Icon NOTE When ScannerLog Application is used with a corded ...

Страница 64: ...nd press the OK button Figure 4 15 Dialog Screen Bluetooth SSI Scanner Driver 4 Define the name and download location of the log file and press the OK button Figure 4 16 ScannerLog Application Log File Name and Download Location 5 Press Start to begin downloading Figure 4 17 ScannerLog Application Starting Download ...

Страница 65: ...e 4 18 ScannerLog Application Download in Progress 7 Verify that the log file download is completed and press the OK button Figure 4 19 ScannerLog Application Download Completed 8 On the mobile computer open the log file to see the content Figure 4 20 ScannerLog Application Log File Content ...

Страница 66: ...application is used for downloading the firmware file from the mobile computer to the Imager Updating the RS507 Firmware Before using the FirmwareUpdate application 1 Exit all scanning applications running on the mobile computer 2 Verify that the mobile computer battery is fully charged or that the mobile computer is connected to an external power source 3 When using a corded Imager verify that th...

Страница 67: ...4 23 Firmware Update Screen 5 Copy the DAT file to the mobile computer using ActiveSync connection 6 Press the Firmware button to select the new firmware DAT file and the OK button Figure 4 24 Firmware Update Screen Selection of DAT File NOTE The following screen is displayed only when using the WT4090 In other mobile computers Bluetooth mode is selected by default Press Yes Bluetooth mode to pair...

Страница 68: ...ssage is displayed Figure 4 26 Firmware Update Screen Starting Firmware Download Message 9 Pair the Imager with the mobile computer see Restore Lost Bluetooth Connection on page 1 12 10 Verify that the firmware download is completed by looking at the Initial software version number and the new software version number Figure 4 27 Firmware Update Screen 11 Press the Esc key on the mobile computer or...

Страница 69: ... be captured by many Imagers The AirBeam package can be downloaded from the Support Central web site Service Information on page xv The package includes Mobile computer s RS507 enhancement APF file Compatible RS507 Firmware APF file The APF file is used for management and distribution of the AirBeam package when the file is transferred from the MSP to the Imager connected to the mobile computer ov...

Страница 70: ...s for Imagers Press the Pair button displayed on the screen Figure 4 29 Rapid Deployment Client Application Bluetooth Connection Screen 5 The Display BD Address utility is displayed Use the Imager to scan the pairing bar code from the mobile computer screen and press the ESC button on the mobile computer Figure 4 30 Display BD Address Utility Pairing Bar Code Rapid Deployment Client Application Ic...

Страница 71: ...tration to start the update process Figure 4 31 Scan Bar Code to Deploy Screen During the update process reports are display on the screen and the Imager LEDs show the following indications Flashing red firmware file is downloading Steady red firmware file is extracted inside the Imager Steady Green and a single beep firmware update is completed ...

Страница 72: ... shown in Table 5 1 on page 5 2 also see Appendix A Standard Default Parameters for host device and miscellaneous defaults If the default values suit the requirements programming is not necessary To return all features to default values scan the Set Default Parameter on page 5 4 Throughout the programming bar code menus asterisks indicate default values NOTE Imager parameters set by scanning confi...

Страница 73: ... defaults for user preferences parameters Scan the appropriate bar codes in this guide These new values replace the standard default values in memory To recall the default parameter values scan the Set Default Parameter on page 5 4 NOTE See Appendix A Standard Default Parameters for all user preferences hosts symbologies and miscellaneous default parameters Table 5 1 User Preferences Parameter Def...

Страница 74: ...h 69h 7013 CR LF 5 17 Suffix 1 Value Suffix 2 Value 62h 68h 64h 6Ah 7013 CR LF 5 17 Scan Data Transmission Format EBh Data as is 5 18 FN1 Substitution Values 67h 6Dh Set 5 19 Transmit No Read Message 5Eh Disabled 5 20 Bluetooth Pairing Bar Code None 1 12 Bluetooth Un pairing Bar Code None 1 13 Table 5 1 User Preferences Parameter Defaults Continued Parameter Parameter Number Default Page Number ...

Страница 75: ...propriate bar code below to reset the decoder to its default settings and or set its current settings as custom defaults Set Defaults Scan this bar code to reset all parameters to custom default settings Set Factory Defaults Scan this bar code to restore the factory default values listed in Table A 1 This deletes any custom defaults set Set Defaults Set Factory Defaults ...

Страница 76: ...r bar codes scan Enable Parameter Scanning Beep After Good Decode Parameter 38h Scan a bar code below to select whether or not the Imager beeps after a good decode If selecting Do Not Beep After Good Decode the beeper still operates during parameter menu scanning and to indicate error conditions Enable Parameter Bar Code Scanning 01h Disable Parameter Bar Code Scanning 00h Beep After Good Decode E...

Страница 77: ...07 Product Reference Guide Beeper Tone Parameter 91h To select a decode beep frequency tone scan one of the following bar codes Off 03h Low Tone 02h Medium Tone 01h High Tone 00h Medium to High Tone 2 tone 04h ...

Страница 78: ...Miscellaneous Imager Options 5 7 Beeper Volume Parameter 8Ch To select a beeper volume scan the Low Volume Medium Volume or High Volume bar code Low Volume 02h Medium Volume 01h High Volume 00h ...

Страница 79: ...5 8 RS507 Product Reference Guide Beeper Duration Parameter F1 74h To select the duration for the beeper scan one of the following bar codes Short 00h Medium 01h Long 02h ...

Страница 80: ...ast one of the following events Scan trigger Motion activity Bluetooth activity Press of the Restore key Real time clock a system inside the Imager Deep Sleep Critical Off Mode The deep sleep mode is only applicable when the Imager is connected to a mobile computer in cordless mode When the battery power of the Imager is below 3V the Imager turns off and enters Standby mode To recover from Deep Sl...

Страница 81: ...e of the following picklist modes for the Imager Disabled Always Picklist mode is always disabled Enabled Always Picklist mode is always enabled NOTE For the DS9808 LR if you configure Trigger B for Imager Decoding and enable Picklist Mode activating Trigger B turns on the imager aiming pattern and releasing the trigger activates decoding Disabled Always 00h Enabled Always 02h ...

Страница 82: ...ion is enabled by default to optimize decode performance on 1D bar codes including damaged and poor quality symbols Disable this only if you experience time delays when decoding 2D bar codes or in detecting a no decode Enable Fuzzy 1D Processing 01h Disable Fuzzy 1D Processing 00h ...

Страница 83: ...using decoding illumination Enabling illumination usually results in superior images The effectiveness of the illumination decreases as the distance to the target increases Low Battery Indication Cycle The Low Battery Indication Cycle parameter sets low battery indication recurrence Every 10 seconds Every 20 seconds Every 30 seconds Every 40 seconds Every 50 seconds Enable Decoding Illumination 01...

Страница 84: ...ion When this parameter is enabled the RS507 plays a beep every 10 sec when the RS507 BT is disconnected Disable Enable Bluetooth Disconnect Indication After Battery Insert Time delay for BT disconnect indication after battery installed 60 Seconds 120 Seconds 180 seconds 240 Seconds 300 Seconds ...

Страница 85: ...ation After Bluetooth Disconnection Time delay for BT disconnect indication after BT disconnection 30 Seconds 60 Seconds 90 Seconds 120 Seconds Bluetooth Disconnect Indication Beep Duration 3 High Short Beeps 3 Low Short Beeps 3 High Long beep High Low High Beep ...

Страница 86: ...Miscellaneous Imager Options 5 15 Bluetooth Disconnect Indication LED Indication Green LED turns on for 600ms Green LED turns on for 1000ms Red LED turns on for 600ms Red LED turns on for 600ms ...

Страница 87: ...ode ID character is inserted between the prefix and the decoded symbol Select no Code ID character a Symbol Code ID character or an AIM Code ID character For Code ID Characters see Symbol Code Identifiers on page B 1 and AIM Code Identifiers on page B 3 NOTE If you enable Symbol Code ID Character or AIM Code ID Character and enable Transmit No Read Message on page 5 20 the Imager appends the code ...

Страница 88: ...ffix scan a four digit number i e four bar codes from Appendix D Numeric Bar Codes that corresponds to that value When using host commands to set the prefix or suffix set the key category parameter to 1 then set the 3 digit decimal value To correct an error or change a selection scan Cancel on page D 2 NOTE To use Prefix Suffix values first set the Scan Data Transmission Format on page 5 18 Scan P...

Страница 89: ... of the following eight bar codes corresponding to the desired format To set values for the prefix and or suffix see Prefix Suffix Values on page 5 17 NOTE If using this parameter do not use ADF rules to set the prefix suffix Data As Is 00h DATA SUFFIX 1 01h DATA SUFFIX 2 02h DATA SUFFIX 1 SUFFIX 2 03h PREFIX DATA 04h ...

Страница 90: ...acter Set table for the current host interface for the desired value To select a FN1 substitution value via bar code menus 1 Scan the bar code below 2 Locate the keystroke desired for FN1 Substitution in the ASCII Character Set table for the current host interface Enter the 4 digit ASCII Value by scanning each digit in Appendix D Numeric Bar Codes To correct an error or change the selection scan C...

Страница 91: ...nsmit the characters NR when a bar code does not decoded Disable this to send nothing to the host if a symbol does not decode NOTE If you enable Transmit No Read and also enable Symbol Code ID Character or AIM Code ID Character for Transmit Code ID Character on page 5 16 the Imager appends the code ID for Code 39 to the NR message Enable No Read 01h Disable No Read 00h ...

Страница 92: ...t cases scanning one bar code sets the parameter value For example to transmit bar code data without the UPC A check digit simply scan the Do Not Transmit UPC A Check Digit bar code under Transmit UPC A Check Digit on page 6 14 The Imager issues a fast warble beep and the LEDs turn green signifying a successful parameter entry NOTE When the Imager is connected to a mobile computer configuration by...

Страница 93: ...r numbers appear in this chapter below the parameter title and options appear in parenthesis beneath the accompanying bar codes Refer to the Simple Serial Interface SSI Programmer s Guide for detailed instructions for changing parameters using this method NOTE See Appendix A Standard Default Parameters for all user preferences hosts and miscellaneous default parameters Table 6 1 Parameter Defaults...

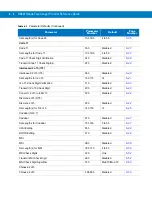
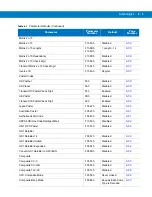
Страница 94: ... 128 formerly UCC EAN 128 0Eh Enabled 6 24 ISBT 128 54h Enabled 6 25 ISBT Concatenation F1h 41h Disabled 6 26 Check ISBT Table F1h 42h Enabled 6 27 ISBT Concatenation Redundancy DFh 10 6 27 Code 39 Code 39 00h Enabled 6 28 Trioptic Code 39 0Dh Disabled 6 28 Convert Code 39 to Code 32 Italian Pharmacy Code 56h Disabled 6 29 Code 32 Prefix E7h Disabled 6 29 Set Length s for Code 39 12h 13h 2 to 55 6...

Страница 95: ...f 5 Check Digit 2Ch Disabled 6 43 Convert I 2 of 5 to EAN 13 52h Disabled 6 44 Discrete 2 of 5 DTF Discrete 2 of 5 05h Disabled 6 44 Set Length s for D 2 of 5 14h 15h 12 6 45 Codabar NW 7 Codabar 07h Disabled 6 47 Set Lengths for Codabar 18h 19h 5 to 55 6 47 CLSI Editing 36h Disabled 6 49 NOTIS Editing 37h Disabled 6 49 MSI MSI 0Bh Disabled 6 50 Set Length s for MSI 1Eh 1Fh 4 to 55 6 50 MSI Check ...

Страница 96: ...l F0h 22h Disabled 6 60 Australian Postal F0h 23h Disabled 6 61 Netherlands KIX Code F0h 46h Disabled 6 61 USPS 4CB One Code Intelligent Mail F1h 50h Disabled 6 62 UPU FICS Postal F1h 63h Disabled 6 62 GS1 DataBar GS1 DataBar 14 F0h 52h Disabled 6 63 GS1 DataBar Limited F0h 53h Disabled 6 63 GS1 DataBar Expanded F0h 54h Disabled 6 64 Convert GS1 DataBar to UPC EAN F0h 8Dh Disabled 6 64 Composite C...

Страница 97: ...ular 6 70 Maxicode F0h 26h Disabled 6 71 QR Code F0h 25h Enabled 6 71 QR Inverse F1h 4Bh Regular 6 72 MicroQR F1h 3Dh Enabled 6 72 Aztec F1h 3Eh Enabled 6 73 Aztec Inverse F1h 4Dh Regular 6 73 Symbology Specific Security Levels Redundancy Level 4Eh 1 6 74 Security Level 4Dh 0 6 76 Intercharacter Gap Size F0h 7Dh Normal 6 77 Report Version 6 77 Macro PDF Flush Macro PDF Buffer 6 78 Abort Macro PDF ...

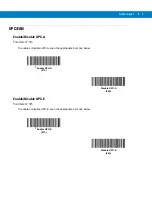
Страница 98: ... Parameter 01h To enable or disable UPC A scan the appropriate bar code below Enable Disable UPC E Parameter 02h To enable or disable UPC E scan the appropriate bar code below Enable UPC A 01h Disable UPC A 00h Enable UPC E 01h Disable UPC E 00h ...

Страница 99: ...o enable or disable UPC E1 scan the appropriate bar code below Enable Disable EAN 8 JAN 8 Parameter 04h To enable or disable EAN 8 JAN 8 scan the appropriate bar code below NOTE UPC E1 is not a UCC Uniform Code Council approved symbology Enable UPC E1 01h Disable UPC E1 00h Enable EAN 8 JAN 8 01h Disable EAN 8 JAN 8 00h ...

Страница 100: ...Bookland EAN scan the appropriate bar code below Enable EAN 13 JAN 13 01h Disable EAN 13 JAN 13 00h Enable Bookland EAN 01h Disable Bookland EAN 00h NOTE If you enable Bookland EAN select a Bookland ISBN Format on page 6 21 Also select either Decode UPC EAN Supplementals Autodiscriminate UPC EAN Supplementals or Enable 978 979 Supplemental Mode in Decode UPC EAN JAN Supplementals on page 6 10 ...

Страница 101: ...ting its data to confirm that there is no supplemental The digital scanner transmits UPC EAN bar codes that do not have that prefix immediately Enable 378 379 Supplemental Mode Enable 978 979 Supplemental Mode Enable 977 Supplemental Mode Enable 414 419 434 439 Supplemental Mode Enable 491 Supplemental Mode Enable Smart Supplemental Mode applies to EAN 13 bar codes starting with any prefix listed ...

Страница 102: ...mentals continued Decode UPC EAN JAN Only With Supplementals 01h Ignore Supplementals 00h Autodiscriminate UPC EAN JAN Supplementals 02h Enable 378 379 Supplemental Mode 04h Enable 978 979 Supplemental Mode 05h Enable 977 Supplemental Mode 07h ...

Страница 103: ...ble 414 419 434 439 Supplemental Mode 06h Enable 491 Supplemental Mode 08h Enable Smart Supplemental Mode 03h Supplemental User Programmable Type 1 09h Supplemental User Programmable Type 1 and 2 0Ah Smart Supplemental Plus User Programmable 1 0Bh Smart Supplemental Plus User Programmable 1 and 2 0Ch ...

Страница 104: ...D 1 UPC EAN JAN Supplemental Redundancy Parameter 50h If you selected Autodiscriminate UPC EAN JAN Supplementals this option adjusts the number of times to decode a symbol without supplementals before transmission The range is from two to thirty times Five or above is recommended when decoding a mix of UPC EAN JAN symbols with and without supplementals The default is 10 Scan the bar code below to ...

Страница 105: ...h supplementals transmit as E4 data E 1 or 2 supp data All other UPC EAN with supplementals transmit as E3 data supps Transmit UPC A Check Digit Parameter 28h The check digit is the last character of the symbol used to verify the integrity of the data Scan the appropriate bar code below to transmit the bar code data with or without the UPC A check digit It is always verified to guarantee the integ...

Страница 106: ...to guarantee the integrity of the data Transmit UPC E1 Check Digit Parameter 2Ah The check digit is the last character of the symbol used to verify the integrity of the data Scan the appropriate bar code below to transmit the bar code data with or without the UPC E1 check digit It is always verified to guarantee the integrity of the data Transmit UPC E Check Digit 01h Do Not Transmit UPC E Check D...

Страница 107: ...r There are three options for transmitting a UPC A preamble to the host device transmit System Character only transmit System Character and Country Code 0 for USA and transmit no preamble Select the appropriate option to match the host system No Preamble DATA 00h System Character SYSTEM CHARACTER DATA 01h System Character Country Code COUNTRY CODE SYSTEM CHARACTER DATA 02h ...

Страница 108: ...options for transmitting a UPC E preamble to the host device transmit System Character only transmit System Character and Country Code 0 for USA and transmit no preamble Select the appropriate option to match the host system No Preamble DATA 00h System Character SYSTEM CHARACTER DATA 01h System Character Country Code COUNTRY CODE SYSTEM CHARACTER DATA 02h ...

Страница 109: ...r There are three options for transmitting a UPC E1 preamble to the host device transmit System Character only transmit System Character and Country Code 0 for USA and transmit no preamble Select the appropriate option to match the host system No Preamble DATA 00h System Character SYSTEM CHARACTER DATA 01h System Character Country Code COUNTRY CODE SYSTEM CHARACTER DATA 02h ...

Страница 110: ... data as UPC E data without conversion Convert UPC E1 to UPC A Parameter 26h Enable this to convert UPC E1 decoded data to UPC A format before transmission After conversion the data follows UPC A format and is affected by UPC A programming selections e g Preamble Check Digit Disable this to transmit UPC E1 decoded data as UPC E1 data without conversion Convert UPC E to UPC A Enable 01h Do Not Conv...

Страница 111: ... JAN 8 Extend Parameter 27h Enable this parameter to add five leading zeros to decoded EAN 8 symbols to make them compatible in format to EAN 13 symbols Disable this to transmit EAN 8 symbols as is Enable EAN JAN Zero Extend 01h Disable EAN JAN Zero Extend 00h ...

Страница 112: ...bility Data starting with 979 is not considered Bookland in this mode Bookland ISBN 13 The digital scanner reports Bookland data starting with either 978 or 979 as EAN 13 in 13 digit format to meet the 2007 ISBN 13 protocol Bookland ISBN 10 00h Bookland ISBN 13 01h NOTE For Bookland EAN to function properly first enable Bookland EAN using Enable Disable Bookland EAN on page 6 9 then select either ...

Страница 113: ...oupon Codes UPCA EAN 13 and GS1 128 must be enabled to scan all types of Coupon Codes ISSN EAN Parameter F1h 69h To enable or disable ISSN EAN scan the appropriate bar code below Enable UCC Coupon Extended Code 01h Disable UCC Coupon Extended Code 00h NOTE See UPC EAN JAN Supplemental Redundancy on page 6 13 to control autodiscrimination of the GS1 128 right half of a coupon code Enable ISSN EAN 0...

Страница 114: ... 128 symbols containing either of two selected lengths Select lengths using the numeric bar codes in Appendix D Numeric Bar Codes For example to decode only Code 128 symbols containing either 2 or 14 characters select Code 128 Two Discrete Lengths then scan 0 2 1 and then 4 To correct an error or change the selection scan Cancel on page D 2 Length Within Range Select this option to decode a Code 1...

Страница 115: ...continued Enable Disable GS1 128 formerly UCC EAN 128 Parameter 0Eh To enable or disable GS1 128 scan the appropriate bar code below Code 128 One Discrete Length Code 128 Two Discrete Lengths Code 128 Length Within Range Code 128 Any Length Enable GS1 128 01h Disable GS1 128 00h ...

Страница 116: ...8 Parameter 54h ISBT 128 is a variant of Code 128 used in the blood bank industry Scan a bar code below to enable or disable ISBT 128 If necessary the host must perform concatenation of the ISBT data Enable ISBT 128 01h Disable ISBT 128 00h ...

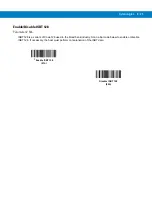
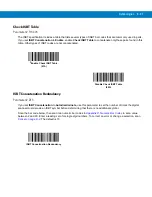
Страница 117: ...scanner to decode and perform concatenation The digital scanner does not decode single ISBT symbols If you select Autodiscriminate ISBT Concatenation the digital scanner decodes and concatenates pairs of ISBT codes immediately If only a single ISBT symbol is present the digital scanner must decode the symbol the number of times set via ISBT Concatenation Redundancy on page 6 27 before transmitting...

Страница 118: ...ndancy Parameter DFh If you set ISBT Concatenation to Autodiscriminate use this parameter to set the number of times the digital scanner must decode an ISBT symbol before determining that there is no additional symbol Scan the bar code below then scan two numeric bar codes in Appendix D Numeric Bar Codes to set a value between 2 and 20 Enter a leading zero for single digit numbers To correct an er...

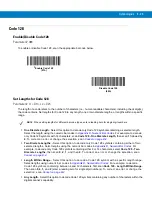
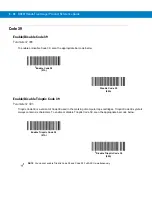
Страница 119: ...meter 0Dh Trioptic Code 39 is a variant of Code 39 used in the marking of computer tape cartridges Trioptic Code 39 symbols always contain six characters To enable or disable Trioptic Code 39 scan the appropriate bar code below Enable Code 39 01h Disable Code 39 00h Enable Trioptic Code 39 01h Disable Trioptic Code 39 00h NOTE You cannot enable Trioptic Code 39 and Code 39 Full ASCII simultaneousl...

Страница 120: ...ode 32 Code 32 Prefix Parameter E7h Scan the appropriate bar code below to enable or disable adding the prefix character A to all Code 32 bar codes NOTE Code 39 must be enabled for this parameter to function Enable Convert Code 39 to Code 32 01h Disable Convert Code 39 to Code 32 00h NOTE Convert Code 39 to Code 32 must be enabled for this parameter to function Enable Code 32 Prefix 01h Disable Co...

Страница 121: ...g either of two selected lengths Select lengths using the numeric bar codes in Appendix D Numeric Bar Codes For example to decode only Code 39 symbols containing either 2 or 14 characters select Code 39 Two Discrete Lengths then scan 0 2 1 and then 4 To correct an error or change the selection scan Cancel on page D 2 Length Within Range Select this option to decode a Code 39 symbol with a specific...

Страница 122: ...k digit are decoded Enable this feature if the Code 39 symbols contain a Modulo 43 check digit Transmit Code 39 Check Digit Parameter 2Bh Scan a bar code below to transmit Code 39 data with or without the check digit Enable Code 39 Check Digit 01h Disable Code 39 Check Digit 00h Transmit Code 39 Check Digit Enable 01h Do Not Transmit Code 39 Check Digit Disable 00h NOTE Code 39 Check Digit Verific...

Страница 123: ...s having a leading space as a first character for later transmission The leading space is not buffered Decoding a Code 39 symbol with no leading space transmits in sequence all buffered data in a first in first out format plus the triggering symbol See the following pages for further details Select Do Not Buffer Code 39 to transmit all decoded Code 39 symbols immediately without storing them in th...

Страница 124: ...9 symbol with a space immediately following the start pattern Unless the data overflows the transmission buffer the digital scanner issues a low high beep to indicate successful decode and buffering For overflow conditions see Overfilling Transmission Buffer on page 6 34 The digital scanner adds the decoded data excluding the leading space to the transmission buffer No transmission occurs Clear Tr...

Страница 125: ...nner transmits and clears the buffer Overfilling Transmission Buffer The Code 39 buffer holds 200 characters If the symbol just read overflows the transmission buffer The digital scanner indicates that it rejected the symbol by issuing three long high beeps No transmission occurs The data in the buffer is not affected Attempt to Transmit an Empty Buffer If you scan the Transmit Buffer symbol and t...

Страница 126: ...ete Lengths Select this option to decode only Code 93 symbols containing either of two selected lengths Select lengths using the numeric bar codes in Appendix D Numeric Bar Codes For example to decode only Code 93 symbols containing either 2 or 14 characters select Code 93 Two Discrete Lengths then scan 0 2 1 and then 4 To correct an error or to change the selection scan Cancel on page D 2 Length ...

Страница 127: ...6 36 RS507 Hands Free Imager Product Reference Guide Set Lengths for Code 93 continued Code 93 One Discrete Length Code 93 Two Discrete Lengths Code 93 Length Within Range Code 93 Any Length ...

Страница 128: ...engths Select this option to decode only Code 11 symbols containing either of two selected lengths Select lengths using the numeric bar codes in Appendix D Numeric Bar Codes For example to decode only Code 11 symbols containing either 2 or 14 characters select Code 11 Two Discrete Lengths then scan 0 2 1 and then 4 To correct an error or to change the selection scan Cancel on page D 2 Length Withi...

Страница 129: ...6 38 RS507 Hands Free Imager Product Reference Guide Set Lengths for Code 11 continued Code 11 One Discrete Length Code 11 Two Discrete Lengths Code 11 Length Within Range Code 11 Any Length ...

Страница 130: ... with the specified check digit algorithm This selects the check digit mechanism for the decoded Code 11 bar code The options are to check for one check digit check for two check digits or disable the feature To enable this feature scan the bar code below corresponding to the number of check digits encoded in the Code 11 symbols Disable 00h One Check Digit 01h Two Check Digits 02h ...

Страница 131: ...Interleaved 2 of 5 Parameter 06h To enable or disable Interleaved 2 of 5 scan the appropriate bar code below and select an Interleaved 2 of 5 length from the following pages Transmit Code 11 Check Digit s Enable 01h Do Not Transmit Code 11 Check Digit s Disable 00h NOTE Code 11 Check Digit Verification must be enabled for this parameter to function Enable Interleaved 2 of 5 01h Disable Interleaved...

Страница 132: ...eric Bar Codes For example to decode only I 2 of 5 symbols containing either 2 or 14 characters select I 2 of 5 Two Discrete Lengths then scan 0 2 1 and then 4 To correct an error or to change the selection scan Cancel on page D 2 Length Within Range Select this option to decode an I 2 of 5 symbol with a specific length range Select lengths using numeric bar codes in Appendix D Numeric Bar Codes F...

Страница 133: ...42 RS507 Hands Free Imager Product Reference Guide Set Lengths for Interleaved 2 of 5 continued I 2 of 5 One Discrete Length I 2 of 5 Two Discrete Lengths I 2 of 5 Length Within Range I 2 of 5 Any Length ...

Страница 134: ...ied Uniform Symbology Specification USS or the Optical Product Code Council OPCC check digit algorithm Transmit I 2 of 5 Check Digit Parameter 2Ch Scan the appropriate bar code below to transmit I 2 of 5 data with or without the check digit Disable 00h USS Check Digit 01h OPCC Check Digit 02h Transmit I 2 of 5 Check Digit Enable 01h Do Not Transmit I 2 of 5 Check Digit Disable 00h ...

Страница 135: ...3 To accomplish this the I 2 of 5 code must be enabled and the code must have a leading zero and a valid EAN 13 check digit Discrete 2 of 5 DTF Enable Disable Discrete 2 of 5 Parameter 05h To enable or disable Discrete 2 of 5 scan the appropriate bar code below Convert I 2 of 5 to EAN 13 Enable 01h Do Not Convert I 2 of 5 to EAN 13 Disable 00h Enable Discrete 2 of 5 01h Disable Discrete 2 of 5 00h...

Страница 136: ...c Bar Codes For example to decode only D 2 of 5 symbols containing either 2 or 14 characters select D 2 of 5 Two Discrete Lengths then scan 0 2 1 and then 4 To correct an error or to change the selection scan Cancel on page D 2 Length Within Range Select this option to decode a D 2 of 5 symbol with a specific length range Select lengths using numeric bar codes in Appendix D Numeric Bar Codes For e...

Страница 137: ...6 46 RS507 Hands Free Imager Product Reference Guide Set Lengths for Discrete 2 of 5 continued D 2 of 5 One Discrete Length D 2 of 5 Two Discrete Lengths D 2 of 5 Length Within Range D 2 of 5 Any Length ...

Страница 138: ...Discrete Lengths Select this option to decode only Codabar symbols containing either of two selected lengths Select lengths using the numeric bar codes in Appendix D Numeric Bar Codes For example to decode only Codabar symbols containing either 2 or 14 characters select Codabar Two Discrete Lengths then scan 0 2 1 and then 4 To correct an error or to change the selection scan Cancel on page D 2 Le...

Страница 139: ...6 48 RS507 Hands Free Imager Product Reference Guide Set Lengths for Codabar continued Codabar One Discrete Length Codabar Two Discrete Lengths Codabar Length Within Range Codabar Any Length ...

Страница 140: ...le this feature if the host system requires this data format NOTIS Editing Parameter 37h Enable this parameter to strip the start and stop characters from a decoded Codabar symbol Enable this feature if the host system requires this data format NOTE Symbol length does not include start and stop characters Enable CLSI Editing 01h Disable CLSI Editing 00h Enable NOTIS Editing 01h Disable NOTIS Editi...

Страница 141: ... on page D 2 Two Discrete Lengths Select this option to decode only MSI symbols containing either of two selected lengths Select lengths using the numeric bar codes in Appendix D Numeric Bar Codes For example to decode only MSI symbols containing either 2 or 14 characters select MSI Two Discrete Lengths then scan 0 2 1 and then 4 To correct an error or to change the selection scan Cancel on page D...

Страница 142: ...can line covering only a portion of the code to transmit as a complete scan yielding less data than is encoded in the bar code To prevent this select specific lengths MSI One Discrete Length Two Discrete Lengths for MSI applications MSI One Discrete Length MSI Two Discrete Lengths MSI Length Within Range MSI Any Length ...

Страница 143: ...k digits scan the Two MSI Check Digits bar code to enable verification of the second check digit See MSI Check Digit Algorithm on page 6 53 for the selection of second digit algorithms Transmit MSI Check Digit s Parameter 2Eh Scan a bar code below to transmit MSI data with or without the check digit One MSI Check Digit 00h Two MSI Check Digits 01h Transmit MSI Check Digit s Enable 01h Do Not Trans...

Страница 144: ... check digit Select the bar code below corresponding to the algorithm used to encode the check digit Chinese 2 of 5 Enable Disable Chinese 2 of 5 Parameter F0h 98h To enable or disable Chinese 2 of 5 scan the appropriate bar code below MOD 10 MOD 11 00h MOD 10 MOD 10 01h Enable Chinese 2 of 5 01h Disable Chinese 2 of 5 00h ...

Страница 145: ...Free Imager Product Reference Guide Matrix 2 of 5 Enable Disable Matrix 2 of 5 Parameter F1h 6Ah To enable or disable Matrix 2 of 5 scan the appropriate bar code below Enable Matrix 2 of 5 01h Disable Matrix 2 of 5 00h ...

Страница 146: ... lengths Select lengths using the numeric bar codes in Appendix D Numeric Bar Codes For example to decode only Matrix 2 of 5 symbols containing either 2 or 14 characters select Matrix 2 of 5 Two Discrete Lengths then scan 0 2 1 and then 4 To correct an error or to change the selection scan Cancel on page D 2 Length Within Range Select this option to decode a Matrix 2 of 5 symbol with a specific le...

Страница 147: ... of 5 Check Digit Parameter F1h 6Eh The check digit is the last character of the symbol used to verify the integrity of the data Scan the appropriate bar code below to transmit the bar code data with or without the Matrix 2 of 5 check digit Enable Matrix 2 of 5 Redundancy 01h Disable Matrix 2 of 5 Redundancy 00h Enable Matrix 2 of 5 Check Digit 01h Disable Matrix 2 of 5 Check Digit 00h ...

Страница 148: ...ets the 1D inverse decoder setting Options are Regular Only the digital scanner decodes regular 1D bar codes only Inverse Only the digital scanner decodes inverse 1D bar codes only Inverse Autodetect the digital scanner decodes both regular and inverse 1D bar codes Transmit Matrix 2 of 5 Check Digit 01h Do Not Transmit Matrix 2 of 5 Check Digit 00h Regular 00h Inverse Only 01h Inverse Autodetect 0...

Страница 149: ... Postnet Parameter 59h To enable or disable US Postnet scan the appropriate bar code below US Planet Parameter 5Ah To enable or disable US Planet scan the appropriate bar code below Enable US Postnet 01h Disable US Postnet 00h Enable US Planet 01h Disable US Planet 00h ...

Страница 150: ...tal data which includes both US Postnet and US Planet with or without the check digit UK Postal Parameter 5Bh To enable or disable UK Postal scan the appropriate bar code below Transmit US Postal Check Digit 01h Do Not Transmit US Postal Check Digit 00h Enable UK Postal 01h Disable UK Postal 00h ...

Страница 151: ...Select whether to transmit UK Postal data with or without the check digit Japan Postal Parameter F0h 22h To enable or disable Japan Postal scan the appropriate bar code below Transmit UK Postal Check Digit 01h Do Not Transmit UK Postal Check Digit 00h Enable Japan Postal 01h Disable Japan Postal 00h ...

Страница 152: ...n Postal scan the appropriate bar code below Netherlands KIX Code Parameter F0h 46h To enable or disable Netherlands KIX Code scan the appropriate bar code below Enable Australian Postal 01h Disable Australian Postal 00h Enable Netherlands KIX Code 01h Disable Netherlands KIX Code 00h ...

Страница 153: ...e USPS 4CB One Code Intelligent Mail scan the appropriate bar code below UPU FICS Postal Parameter F1h 63h To enable or disable UPU FICS Postal scan the appropriate bar code below Enable USPS 4CB One Code Intelligent Mail 01h Disable USPS 4CB One Code Intelligent Mail 00h Enable UPU FICS Postal 01h Disable UPU FICS Postal 00h ...

Страница 154: ...mited and expanded versions have stacked variants Scan the appropriate bar codes to enable or disable each variant of GS1 DataBar GS1 DataBar 14 Parameter F0h 52h GS1 DataBar Limited Parameter F0h 53h Enable GS1 DataBar 14 01h Disable GS1 DataBar 14 00h Enable GS1 DataBar Limited 01h Disable GS1 DataBar Limited 00h ...

Страница 155: ...ding a single zero as the first digit and report the bar code as EAN 13 For bar codes beginning with two or more zeros but not six zeros this parameter strips the leading 0100 and reports the bar code as UPC A The UPC A Preamble parameter that transmits the system character and country code applies to converted bar codes Note that neither the system character nor the check digit can be stripped En...

Страница 156: ...h Scan a bar code below to enable or disable Composite bar codes of type CC C Composite CC A B Parameter F0h 56h Scan a bar code below to enable or disable Composite bar codes of type CC A B Enable CC C 01h Disable CC C 00h Enable CC A B 01h Disable CC A B 00h ...

Страница 157: ...ymbol Select UPC Never Linked to transmit UPC bar codes regardless of whether a 2D symbol is detected Select UPC Always Linked to transmit UPC bar codes and the 2D portion If 2D is not present the UPC bar code does not transmit If you select Autodiscriminate UPC Composites the digital scanner determines if there is a 2D portion then transmits the UPC as well as the 2D portion if present Enable TLC...

Страница 158: ...de GS1 128 Emulation Mode for UCC EAN Composite Codes Parameter F0h ABh Select whether to enable or disable this mode Single Beep after both are decoded 00h Beep as each code type is decoded 01h Double Beep after both are decoded 02h Enable GS1 128 Emulation Mode for UCC EAN Composite Codes 01h Disable GS1 128 Emulation Mode for UCC EAN Composite Codes 00h ...

Страница 159: ...le PDF417 Parameter 0Fh To enable or disable PDF417 scan the appropriate bar code below Enable Disable MicroPDF417 Parameter E3h To enable or disable MicroPDF417 scan the appropriate bar code below Enable PDF417 01h Disable PDF417 00h Enable MicroPDF417 01h Disable MicroPDF417 00h ...

Страница 160: ... codeword is 903 905 C2if the first codeword is 908 or 909 C0if the first codeword is 910 or 911 Disable Code 128 Emulation to transmit these MicroPDF417 symbols with one of the following prefixes L3if the first codeword is 903 905 L4if the first codeword is 908 or 909 L5if the first codeword is 910 or 911 Scan a bar code below to enable or disable Code 128 Emulation NOTE Linked MicroPDF codewords...

Страница 161: ...er sets the Data Matrix inverse decoder setting Options are Regular Only the digital scanner decodes regular Data Matrix bar codes only Inverse Only the digital scanner decodes inverse Data Matrix bar codes only Inverse Autodetect the digital scanner decodes both regular and inverse Data Matrix bar codes Enable Data Matrix 01h Disable Data Matrix 00h Regular 00h Inverse Only 01h Inverse Autodetect...

Страница 162: ... 26h To enable or disable Maxicode scan the appropriate bar code below QR Code Parameter F0h 25h To enable or disable QR Code scan the appropriate bar code below Enable Maxicode 01h Disable Maxicode 00h Enable QR Code 01h Disable QR Code 00h ...

Страница 163: ...anner decodes regular QR bar codes only Inverse Only the digital scanner decodes inverse QR bar codes only Inverse Autodetect the digital scanner decodes both regular and inverse QR bar codes MicroQR Parameter F1h 3Dh To enable or disable MicroQR scan the appropriate bar code below Regular 00h Inverse Only 01h Inverse Autodetect 02h Enable MicroQR 01h Disable MicroQR 00h ...

Страница 164: ...he Aztec inverse decoder setting Options are Regular Only the digital scanner decodes regular Aztec bar codes only Inverse Only the digital scanner decodes inverse Aztec bar codes only Inverse Autodetect the digital scanner decodes both regular and inverse Aztec bar codes Enable Aztec 01h Disable Aztec 00h Regular 00h Inverse Only 01h Inverse Autodetect 02h ...

Страница 165: ... Redundancy Level 2 The following code types must be successfully read twice before being decoded Redundancy Level 3 Code types other than the following must be successfully read twice before being decoded The following codes must be read three times Table 6 2 Redundancy Level 1 Codes Code Type Code Length Codabar 8 characters or less MSI 4 characters or less D 2 of 5 8 characters or less I 2 of 5...

Страница 166: ...he following code types must be successfully read three times before being decoded Table 6 5 Redundancy Level 4 Codes Code Type Code Length All All Redundancy Level 1 01h Redundancy Level 2 02h Redundancy Level 3 03h Redundancy Level 4 04h ...

Страница 167: ...n its most aggressive state while providing sufficient security in decoding most in spec bar codes Security Level 1 This default setting eliminates most misdecodes Security Level 2 Select this option if Security level 1 fails to eliminate misdecodes Security Level 3 If you selected Security Level 2 and misdecodes still occur select this security level Be advised selecting this option is an extreme...

Страница 168: ...can grow larger than the maximum size allowed preventing the digital scanner from decoding the symbol If this problem occurs scan the Large Intercharacter Gaps parameter to tolerate these out of specification bar codes Report Version Scan the bar code below to report the version of software installed in the digital scanner Normal Intercharacter Gaps 06h Large Intercharacter Gaps 0Ah Report Softwar...

Страница 169: ...ts from Macro PDF mode Abort Macro PDF Entry This clears all currently stored Macro PDF data in the buffer without transmission and aborts from Macro PDF mode CAUTION When printing keep each Macro PDF sequence separate as each sequence has unique identifiers Do not mix bar codes from several Macro PDF sequences even if they encode the same data When scanning Macro PDF sequences scan the entire Mac...

Страница 170: ...on page 7 3 HID Human Interface Device Mode on page 7 3 Serial Port Profile SPP Mode on page 7 18 Firmware upgrade on page 7 38 Retrieving the RS507 log file on page 7 43 Bluetooth Bar Codes on page 7 47 RS507 to Computer Bluetooth Connection Modes The RS507 can connect to a computer over Bluetooth BT using the Serial Port Profile SPP or Human Interface Device HID BT modes SSI SCAN Mode SSI Simple...

Страница 171: ...ed by any Windows application that accepts keyboard data The scanned data can also be processed to suit particular requirements before transmitted to a computer application using Advanced Data Formatting ADF For information and programming bar codes for ADF refer to the Advanced Data Formatting Programmer Guide p n 72E 69680 xx refer only to the programming bar codes that relate to bar code imager...

Страница 172: ...ow in its factory default configuration Warm Boot Warm boot restores the RS507 operation by resetting its software but retains the RAM content Warm boot is used when a log file has to be retrieved from the RS507 during application debugging To perform warm boot press and hold the Restore Key for more than six seconds HID Human Interface Device Mode How to change to HID mode 1 Perform Clean Boot to...

Страница 173: ...680 xx refer only to the programming bar codes that relate to bar code imagers not Laser bar code scanners How to pair and connect with a computer running Windows 7 SP1 To pair and connect the RS507 1 Right click on BT icon and select Open Setting Add a Device Figure 7 2 HID Open Setting Screen Windows 7 SP1 NOTES For best user experience it is recommend using Secure Simple Pairing SSP Windows 7 S...

Страница 174: ... the Add a device screen select the RS507 shown as Bluetooth Keyboard and click Next Figure 7 3 HID Add Device Screen Windows 7 SP1 The computer connects to the RS507 and the following screen is displayed Figure 7 4 HID Device Successfully Added Screen Windows 7SP1 ...

Страница 175: ...pport bluetooth update php and install the WIDCOMM stack 4 Purchasing an off the shelf USB Bluetooth dongle that supports BT V2 1 and installing the provided BT V2 1 drivers Using USB Bluetooth dongle is the only option if the computer does not include an integrated BT module When using earlier BT versions you will need to enter passkey 12345 or disable authentication by scanning Pair and connect ...

Страница 176: ... and click Next Figure 7 7 HID Bluetooth Setup Screen Windows XP SP3 and Bluetooth V2 1 3 Verify that the RS507 is found by the Host in the Bluetooth Device Selection screen Select the RS507 and click Next to start the SSP process Figure 7 8 HID Bluetooth Device Selection Screen Windows XP SP3 and Bluetooth V2 1 ...

Страница 177: ... Disable BT Authentication bar code and click Next The pairing process completes and the RS507 connects without any further intervention Figure 7 10 HID Bluetooth Pairing Success Screen Windows XP SP3 and Bluetooth V2 1 Upon successful BT pairing the BT icon in the computer desktop tray turns green Figure 7 11 HID BT Icon In Computer Desktop Tray Windows 7SP1 BT Icon NOTE The next time you explore...

Страница 178: ...ooth Places Entire Bluetooth Neighborhood screen right click and select Disable Figure 7 13 HID Entire Bluetooth Neighborhood Screen Windows XP SP3 and Bluetooth V2 1 5 Scan the Un Pairing bar code 6 The RS507 emits one string of high low beeps indicating that BT communication with the PC is removed 7 If that does not help perform Clean Boot see Clean Boot on page 7 3 the RS507 and start the BT pa...

Страница 179: ...flash green indicating that the RS507 is attempting to establish connection with the computer 2 The Scan LEDs turn off and the RS507 emits one string of low high beeps indicating that the RS507 is connected and ready for scanning How to demonstrate HID connection with a computer Following a successful connection data can be scanned into any Windows application field that accepts keyboard data for ...

Страница 180: ...eyboard type change While in HID mode the RS507 supports several keyboard layouts To change the North American Standard Keyboards layout see bar code marked by below to a different country code layout scan the required bar code corresponding to the country keyboard type ...

Страница 181: ...7 12 RS507 Product Reference Guide ...

Страница 182: ...IN code To establish a BT connection with a computer using a random PIN code 1 Scan the bar code of the Variable PIN code Variable PIN Code bar code 2 On the Windows Explorer screen click the My Bluetooth Places icon 3 From the Bluetooth Tasks bar click on Add a Bluetooth Device to start the Bluetooth Setup wizard Figure 7 15 HID Using Random PIN Code My Bluetooth Places Screen 4 On Bluetooth Setu...

Страница 183: ...icon MXA4NH80 is the serial number of the RS507 and click the Next button Figure 7 17 HID Using Random PIN Code Bluetooth Device Selection Screen The RS507 beeps once indicating that it is waiting for an alphanumeric passkey entry Figure 7 18 HID Using Random PIN Code Bluetooth Security Alphanumeric Passkey Entry Screen ...

Страница 184: ...RS507 Bluetooth Connection Using HID and SPP Profiles 7 15 6 Enter the provided passkey by scanning the alphanumeric bar codes shown below Alphanumeric Keyboard Bar Codes 0 1 2 3 4 5 6 7 8 9 CANCEL ...

Страница 185: ...tooth Security Screen Passkey Scanned Successfully 8 Click Next to complete the association The RS507 emits a short string of low high beeps to indicate a successful pairing When the connection is completed the color of the BT icon on the quick launch bar of the PC is blue and green Figure 7 20 HID Using Random PIN Code Successful Pairing BT Icon How to return to SSI SCAN mode To return to SSI mod...

Страница 186: ...a chirp is heard and the Scan LEDs flash green 2 Scan the SSI SCAN bar code SSI SCAN bar code 3 Perform a Cold Boot by removing and re installing the battery onto the RS507 see Cold Boot on page 7 3 The RS507 starts to operate using SSI SCAN mode NOTE The SCAN SCAN bar code can also be scanned directly from a computer screen ...

Страница 187: ...serial device like a camera How to format the scanned data the data Advanced Data Formatting ADF The scanned bar code data can be processed and formatted before the RS507 sends it to an application using Advanced Data Formatting ADF For information and programming bar codes for ADF refer to the Advanced Data Formatting Programmer Guide p n 72E 69680 xx refer only to the programming bar codes that ...

Страница 188: ...pplication by using a 3rd party data wedge application Such wedge applications are available for free download from 3rd party providers sites How to pair and connect with a computer running Windows 7 SP1 SPP connection with RS507 as a Master 1 Right click on the BT icon and select Open Setting to add a COM port Figure 7 21 SPP Open Setting Screen Windows 7 SP1 ...

Страница 189: ...0 RS507 Product Reference Guide 2 Select the COM Ports tab and click Add Figure 7 22 SPP Bluetooth Settings Com Ports Tab 3 Check the Incoming box and click OK 4 SPP Bluetooth Settings Add Com Port Screen ...

Страница 190: ... Profiles 7 21 5 Click the Hardware tab to retrieve the BT radio BD address Figure 7 23 SPP Bluetooth Settings BT Radio BD Address 6 Run the PC Tool application Figure 7 24 SPP PC Tool application 7 Click the Show Bluetooth Address barcode button ...

Страница 191: ...tion After the COM port is opened the computer connects to the RS507 and a beep will sound For demonstration refer to How to demonstrate SPP connection with a computer on page 7 34 10 To start the connection process Aim the RS507 at about 7 18 cm away from the computer screen and scan the bar code of the BD address of the computer or the other target device NOTE If the COM port is not opened prior...

Страница 192: ... The following notifications are displayed upon successful connection Figure 7 26 SPP Device Successfully Added Screen SPP connection with RS507 as a Slave 1 Right click the BT icon and select Open Settings Add Device Figure 7 27 SPP connection with RS507 as a Slave Open Settings NOTE In case you do not hear the connected beep on the RS507 press on the RS507 Restore key to connect ...

Страница 193: ...RS507 see Bluetooth Camera icon below and click Next Figure 7 28 SPP connection with RS507 as a Slave Add Device Screen 3 The computer attempts to connect to the RS507 Figure 7 29 SPP connection with RS507 as a Slave Device Successfully Added Screen ...

Страница 194: ...t assigned for example COM7 in the application After the COM port is opened the computer connects to the RS507 and a beep will sound For demonstration refer to How to demonstrate SPP connection with a computer on page 7 34 NOTE Make sure the same COM port is closed in other applications ...

Страница 195: ...er running Windows XP SP3 SPP connection with RS507 as a Master To pair the RS507 with a computer 1 Find the Bluetooth Device BD address of the computer or the target device in Bluetooth Configuration Diagnostics tab Figure 7 30 Bluetooth Configuration Screen Windows XP SP3 ...

Страница 196: ...reen 3 Click the Show Bluetooth Address barcode button 4 Manually enter the computer BD address and click the Generate button Figure 7 32 PC Tool Application Bar Code Generator NOTE The PC Tool application retains the last BD address entered To recreate a new bar code image enter the BD address and click the Generate button ...

Страница 197: ... computer desktop tray turns green Figure 7 34 BT Icon In Computer Desktop Tray Windows XP SP3 At this point the RS507 is ready to scan and send bar codes over the assigned serial port 9 Find the assigned serial incoming port right click the BT icon and select Bluetooth Configuration Client Applications tab NOTE When using an earlier BT version that is not equipped with Secure Simple Pairing a pas...

Страница 198: ... COM port allocation through the Control Panel 1 From the Control Panel screen open the Bluetooth Devices screen on the computer Figure 7 36 Bluetooth Devices screen Windows XP SP3 2 Click the COM Ports tab and verify that a COM port is assigned If no COM port is assigned click the Add button and select Incoming device initiates the connection to set the RS507 as Master and the computer as Slave ...

Страница 199: ... to demonstrate SPP connection with a computer on page 7 34 SPP connection with RS507 as a Slave 1 Right click the BT icon on the computer desktop tray Figure 7 38 BT Icon In Computer Desktop Tray SPP connection with RS507 as a Slave Or From My Bluetooth Places screen select Bluetooth Tasks bar and select Add a Bluetooth Device Figure 7 39 My Bluetooth Places Screen SPP connection with RS507 as a ...

Страница 200: ...ready to be found box and click Next Figure 7 40 Bluetooth Setup Screen SPP connection with RS507 as a Slave 3 Verify that the RS507 is found by the Host select the RS507 that you want to add and click Next Figure 7 41 Bluetooth Device Selection Screen SPP connection with RS507 as a Slave ...

Страница 201: ...ortcut will be created Click OK 6 Bluetooth Shortcut Confirmation Box SPP connection with RS507 as a Slave 7 Once completed click Finish Figure 7 43 Bluetooth Setup Wizard SPP connection with RS507 as a Slave NOTE When using an earlier BT version that is not equipped with Secure Simple Pairing a passkey is required only for the first connection Check the Let me choose my own passkey button enter 1...

Страница 202: ...r and connect as a serial port device using the Bluetooth SPP profile to other devices that support SPP using the device either the RS507 as a Master recommended or the device discovery feature The PC Tool application can be used to generate the Bluetooth Device BD address of the target device for testing Otherwise this bar code can be printed on a label and affixed to the device NOTE Do not confu...

Страница 203: ... with the computer The Scan LEDs turn off and the RS507 emits one string of low high beeps indicating that the RS507 is connected and ready for scanning How to demonstrate SPP connection with a computer Once SPP connection is established an application is required to demonstrate the RS507 To scan a bar code 1 If the RS507 is still connected to the PC Tool application close the COM port on the PC T...

Страница 204: ...be connected a single computer running an application that accepts more than one RS507 each with its own assigned COM port The number of RS507 units concurrently connected is depended on the computer s BT stack How to return to SSI SCAN mode To change the RS507 to SSI SCAN mode 1 Perform Clean Boot to the RS507 Remove the battery from the RS507 Press and hold the Restore key Install the Battery on...

Страница 205: ...ry onto the RS507 Keep holding the Restore key pressed for about five seconds until a chirp is heard and the Scan LEDs flash green 2 Scan the required profile bar code see the following bar codes 3 Perform a Cold Boot by removing and re installing the battery onto the RS507 see Cold Boot on page 7 3 The RS507 starts to operate and is also discoverable as a keyboard HID or serial device SPP IMPORTA...

Страница 206: ...omputer BT stack by right clicking the BT icon and selecting Show Bluetooth Devices Figure 7 47 Computer BT Stack Screen Switching Between SSI SCAN HID and SPP 5 Right click the RS507 icon camera icon and select Remove device Figure 7 48 Device Screen Switching Between SSI SCAN HID and SPP ...

Страница 207: ...grading using a computer and the PC Tool application Older RS507 devices can be upgraded and re flashed with a new firmware The update is performed by downloading the firmware to the RS507 flash memory If download fails the previous firmware remains operational The firmware remains inside the RS507 memory even when powering the RS507 off on removing and re installing the battery To update the firm...

Страница 208: ...onto the RS507 The RS507 starts to operate under SSI mode using an SPP connection with the computer Notice the COM port that was assigned to the RS507 5 On the computer run the PC Tool application Figure 7 50 PC Tool Application Firmware Upgrade 6 Follow the instructions for SPP connection with RS507 as a Master on page 7 19 under Windows 7 SP1 or SPP connection with RS507 as a Master on page 7 26...

Страница 209: ...7 40 RS507 Product Reference Guide 8 Click the Open button The RS507 information is displayed on the Device Info fields Figure 7 51 PC Tool Application Device Info fields Firmware Upgrade ...

Страница 210: ...s the Browse button select the RS507 firmware dat file for example PAAACS00 004 N09D0 dat and press the Open button Figure 7 52 Firmware Update dat File 10 Press the Update Firmware button to start the firmware update process Figure 7 53 Firmware Update Start Process ...

Страница 211: ...Perform Clean Boot to the RS507 Remove the battery from the RS507 Press and hold the Restore key Install the battery onto the RS507 Keep holding the Restore key pressed for about five seconds until a chirp is heard and the Scan LEDs flash green At this point the RS507 firmware is updated and ready for connection with the updated firmware Upgrading with a Motorola terminal Firmware update utility a...

Страница 212: ...g and holding the Restore Key for more than six seconds 2 Establish SSI connection by scanning the SSI SCAN bar code to change the RS507 mode to SSI SCAN mode The SSI SCAN mode allows the RS507 to communicate with the computer through SPP during the firmware update session The SSI SCAN bar code can also be scanned directly from a computer screen 3 Perform a Warm Boot by pressing and holding the Re...

Страница 213: ...sh connection with the computer 9 If the following Windows pops up check the box Always allow this device to access this service and click OK 10 The RS507 bleeps establishes the SSI over SPP connection and is ready log file retrieval 11 Select BT COM port assigned to the RS507 NOTE The PC Tool application retains the last BD address entered so next time press the Generate button to recreate the ba...

Страница 214: ...tus information Figure 7 57 RS507 Status Information PC Tool Application 13 Click the Get Log button to download the RS507 log file 14 When you expect a large log file check the Enable compress log to get a compressed log file in zip format The log file is saved on the computer at the same folder of the PC Tool application ...

Страница 215: ...7 46 RS507 Product Reference Guide 15 from the same directory of the PC Tool application Figure 7 58 Retrieve RS507 Log File PC Tool Application ...

Страница 216: ...n parameter enables disables Bluetooth authentication connection Disable Enable Bluetooth Automatic Reconnection Control Bluetooth Auto Reconnection The Bluetooth Auto Reconnection parameter sets Bluetooth automatic reconnection when unexpected Bluetooth disconnection occurs None On power up On out of range NOTE Bar codes marked with Indicate default configuration ...

Страница 217: ...n power up or out of range Reconnect Attempts Timeout The Reconnect Attempts parameter defines the auto reconnect attempt time duration after Bluetooth disconnection 30 seconds 35 seconds 40 seconds 45 seconds 50 seconds 55 seconds 60 seconds ...

Страница 218: ...nly after a successful Bluetooth connection If the Bluetooth connection fails the Bluetooth address is not saved Disable Enable Bell Indication Control BELL Indication SPP mode only The BELL Indication parameter configures the beep tone sequence of the bell indication when a bell character is received This feature is valid only in SPP mode for PC connection Disable Enable GP_1_HI_SHORT GP_2_HI_SHO...

Страница 219: ...7 50 RS507 Product Reference Guide GP_3_HI_SHORT GP_4_HI_SHORT GP_5_HI_SHORT GP_1_LO_SHORT GP_2_LO_SHORT GP_3_LO_SHORT GP_4_LO_SHORT GP_5_LO_SHORT GP_1_HI_LONG GP_2_HI_LONG ...

Страница 220: ...RS507 Bluetooth Connection Using HID and SPP Profiles 7 51 GP_3_HI_LONG GP_4_HI_LONG GP_5_HI_LONG GP_1_LO_LONG GP_2_LO_LONG GP_3_LO_LONG GP_4_LO_LONG GP_5_LO_LONG GP_FAST_WARBLE ...

Страница 221: ...7 52 RS507 Product Reference Guide GP_SLOW_WARBLE GP_HI_LO GP_LO_HI GP_HI_LO_HI GP_LO_HI_LO GP_HI_HI_LO_LO APP_ERROR_BEEP APP_CLICK LOW_CLICK ...

Страница 222: ...RS507 Bluetooth Connection Using HID and SPP Profiles 7 53 BT HID Country Keyboard Types Country Codes Scan the bar code corresponding to the keyboard type ...

Страница 223: ... RS507 to a BT Connection Mode 1 Scan the required profile bar code see the following bar codes 2 Perform a cold boot by removing and re installing the battery onto the RS507 The RS507 starts to operate and is also discoverable as a keyboard HID or serial device SPP SPP bar code ...

Страница 224: ...ect to another PC or before switching the RS507 to a different connection profile To remove the Bluetooth connection scan an un pairing bar code to disconnect the RS507 from the PC Un pairing bar code Label The RS507 emits one string of high low beeps indicating that BT communication with the PC is removed Another way to remove a BT connection is removing and re installing the RS507 battery ...

Страница 225: ...6 x 2 1 x 2 92 in Triggered corded cord length not included 3 3 x 5 3 x 7 4 cm 1 3 x 2 1 x 2 92 in Weight Triggerless standard battery 121 4 g 4 3 oz Triggerless extended battery 146 4 g 5 2 oz Triggered standard battery 134 8 g 4 8 oz Triggered corded 140 8 g 5 0 oz Performance Characteristics Optical Resolution WVGA 752 H x 480 V pixels gray scale Roll 360 Pitch Angle 60 from normal Skew Toleran...

Страница 226: ...anded Straight 2 of 5 IATA two bar start stop Straight 2 of 5 Industrial three bar start stop Trioptic UPC E1 2D enabled by default 4 CB 4 State Customer Bar code Aztec MicroPDF417 PDF417 MaxiCode 2D disabled by default Australian Post British Post 4 state code and infomail Data Matrix Japanese Post KIX Netherlands Post Planet Code Postnet QR Code EAN UCC Composite TCIF Linked Code 39 TLC39 Suppor...

Страница 227: ...Ion 970 mAh 3 7 V with up to 35 000 scans continuous or up to 10 hours with 900 scans per hour on a single charge using fresh batteries Extended battery Li Ion 1940 mAh 3 7 V with up to 70 000 scans continuous or up to 20 hours with 900 scans per hour on a single charge using fresh batteries Corded Corded adaptor to WT4090 Software Compatibility Motorola s Mobility Services Platform MSP DataWedge ...

Страница 228: ...atteries User Environment Operating Temperature 0 to 50 C 32 to 122 F charging is performed until battery temperature is 45 C 113 F Storage Temperature 40 to 85 C 40 to 158 F Humidity 5 to 85 non condensing Electrostatic Discharge ESD 15kV air discharge 8kV direct discharge Power External Power Supply AC Input 90 264 V AC 50 60 Hz with IEC320 C8 AC inlet DC Output 12 V 4 17A Peripherals and Access...

Страница 229: ...de Scanning ECh Enabled 5 5 Beep After Good Decode 38h Enabled 5 5 Beeper Tone 91h Medium 5 6 Beeper Volume 8Ch High 5 7 Beeper Duration F1 74h Medium 5 8 Picklist Mode F0h 92h Disabled 5 10 Fuzzy 1D Processing F1h 02h Enabled 5 11 Decoding Illumination F0h 2Ah Enabled 5 12 UPC EAN UPC A 01h Enabled 6 7 UPC E 02h Enabled 6 7 UPC E1 0Ch Disabled 6 8 EAN 8 JAN 8 04h Enabled 6 8 EAN 13 JAN 13 03h Ena...

Страница 230: ...Character 6 17 UPC E1 Preamble 24h System Character 6 18 Convert UPC E to A 25h Disabled 6 19 Convert UPC E1 to A 26h Disabled 6 19 EAN 8 JAN 8 Extend 27h Disabled 6 22 Bookland ISBN Format F1h 40h ISBN 10 6 21 UCC Coupon Extended Code 55h Enabled 6 22 ISSN EAN F1h 69h Disabled 6 22 Code 128 Code 128 08h Enabled 6 23 Set Length s for Code 128 D1h D2h Any Length 6 23 GS1 128 0Eh Enabled 6 24 ISBT 1...

Страница 231: ... to 55 6 37 Code 11 Check Digit Verification 34h Disabled 6 39 Transmit Code 11 Check Digit s 2Fh Disabled 6 40 Interleaved 2 of 5 ITF Interleaved 2 of 5 ITF 06h Disabled 6 40 Set Lengths for I 2 of 5 16h 17h 14 6 41 I 2 of 5 Check Digit Verification 31h Disabled 6 43 Transmit I 2 of 5 Check Digit 2Ch Disabled 6 43 Convert I 2 of 5 to EAN 13 52h Disabled 6 44 Discrete 2 of 5 DTF Discrete 2 of 5 05...

Страница 232: ...it F1h 6Eh Disabled 6 56 Transmit Matrix 2 of 5 Check Digit F1h 6Fh Disabled 6 57 Inverse 1D F1h 4Ah Regular 6 57 Postal Codes US Postnet 59h Disabled 6 58 US Planet 5Ah Disabled 6 58 Transmit US Postal Check Digit 5Fh Enabled 6 59 UK Postal 5Bh Disabled 6 59 Transmit UK Postal Check Digit 60h Enabled 6 60 Japan Postal F0h 22h Disabled 6 60 Australian Postal F0h 23h Disabled 6 61 Netherlands KIX C...

Страница 233: ...site Codes F0h ABh Disabled 6 67 2D Symbologies PDF417 0Fh Enabled 6 68 MicroPDF417 E3h Disabled 6 68 Code 128 Emulation 7Bh Disabled 6 69 Data Matrix F0h 24h Enabled 6 70 Data Matrix Inverse F1h 4Ch Regular 6 70 Maxicode F0h 26h Disabled 6 71 QR Code F0h 25h Enabled 6 71 QR Inverse F1h 4Bh Regular 6 72 MicroQR F1h 3Dh Enabled 6 72 Aztec F1h 3Eh Enabled 6 73 Aztec Inverse F1h 4Dh Regular 6 73 Symb...

Страница 234: ...7 Hands Free Imager Product Reference Guide Macro PDF Flush Macro PDF Buffer 6 78 Abort Macro PDF Entry 6 78 Table A 1 Standard Default Parameters Table Continued Parameter Parameter Number Default Page Number ...

Страница 235: ...A UPC A UPC E UPC E1 EAN 8 EAN 13 B Code 39 Code 32 C Codabar D Code 128 E Code 93 F Interleaved 2 of 5 G Discrete 2 of 5 or Discrete 2 of 5 IATA H Code 11 J MSI K GS1 128 L Bookland EAN M Trioptic Code 39 N Coupon Code R GS1 DataBar Family T UCC Composite TLC 39 X PDF417 Macro PDF417 Micro PDF417 z Aztec Aztec Rune ...

Страница 236: ...x P01 QR Code MicroQR P02 Maxicode P03 US Postnet P04 US Planet P05 Japan Postal P06 UK Postal P08 Netherlands KIX Code P09 Australian Postal P0A USPS 4CB One Code Intelligent Mail P0B UPU FICS Postal Table B 1 Symbol Code Characters Continued Code Character Code Type ...

Страница 237: ...de 39 Code 39 Full ASCII Code 32 C Code 128 Coupon Code 128 portion d Data Matrix E UPC EAN Coupon UPC portion e GS1 DataBar Family F Codabar G Code 93 H Code 11 I Interleaved 2 of 5 L PDF417 Macro PDF417 Micro PDF417 M MSI Q QR Code MicroQR S Discrete 2 of 5 IATA 2 of 5 U Maxicode z Aztec Aztec Rune X Bookland EAN Trioptic Code 39 US Postnet US Planet UK Postal Japan Postal Australian Postal Neth...

Страница 238: ...smitted as X0412356 Code 128 0 Standard data packet no Function code 1 in first symbol position 1 Function code 1 in first symbol character position 2 Function code 1 in second symbol character position Example A Code EAN 128 bar code with Function 1 character FNC1 in the first position AIMID is transmitted as C1AIMID I 2 of 5 0 No check digit processing 1 Reader has validated check digit 3 Reader...

Страница 239: ... option specified at this time Always transmit 0 GS1 DataBar 14 and GS1 DataBar Limited transmit with an Application Identifier 01 Note In GS1 128 emulation mode GS1 DataBar is transmitted using Code 128 rules i e C1 Example A GS1 DataBar 14 bar code 100123456788902 is transmitted as e001100123456788902 EAN UCC Composites GS1 DataBar GS1 128 2D portion of UPC composite Native mode transmission Not...

Страница 240: ...3 The bar code contains a GS1 128 symbol and the first codeword is 903 907 912 914 915 4 The bar code contains a GS1 128 symbol and the first codeword is in the range 908 909 5 The bar code contains a GS1 128 symbol and the first codeword is in the range 910 911 Example A PDF417 bar code ABCD with no transmission protocol enabled is transmitted as L2ABCD Data Matrix 0 ECC 000 140 not supported 1 E...

Страница 241: ...t implemented FNC1 implied in first position 4 Model 2 symbol ECI protocol implemented FNC1 implied in first position 5 Model 2 symbol ECI protocol not implemented FNC1 implied in second position 6 Model 2 symbol ECI protocol implemented FNC1 implied in second position Aztec 0 Aztec symbol C Aztec Rune symbol Table B 3 Modifier Characters Continued Code Type Option Value Option ...

Страница 242: ...Appendix C Sample Bar Codes Code 39 UPC EAN UPC A 100 123ABC 0 12345 67890 5 ...

Страница 243: ...C 2 RS507 Hands Free Imager Product Reference Guide EAN 13 100 Code 128 Interleaved 2 of 5 3 456789 012340 12345678901231 12345678901234567890123456789012345678901234 ...

Страница 244: ...Sample Bar Codes C 3 GS1 DataBar 14 7612341562341 PDF417 Data Matrix NOTE DataBar 14 must be enabled to read the bar code below ...

Страница 245: ...C 4 RS507 Hands Free Imager Product Reference Guide Maxicode QR Code US Postnet ...

Страница 246: ...Sample Bar Codes C 5 UK Postal ...

Страница 247: ...Appendix D Numeric Bar Codes Numeric Bar Codes For parameters requiring specific numeric values scan the appropriately numbered bar code s 0 1 2 3 4 ...

Страница 248: ...D 2 RS507 Hands Free Imager Product Reference Guide Cancel To correct an error or change a selection scan the bar code below Numeric Bar Codes continued 5 6 7 8 9 Cancel ...

Страница 249: ...mination is made the information content is decoded B Bar The dark element in a printed bar code symbol Bar Code A pattern of variable width bars and spaces which represents numeric or alphanumeric data in machine readable form The general format of a bar code symbol consists of a leading margin start character data or message character check character if any stop character and trailing margin Wit...

Страница 250: ...l laser output were directed into the eye s pupil There are no special operating procedures for this class CDRH Class 2 No additional software mechanisms are needed to conform to this limit Laser operation in this class poses no danger for unintentional direct human exposure Character A pattern of bars and spaces which either directly represents data or indicates a control function such as a numbe...

Страница 251: ...umbers encoded within a bar code symbol Decryption Decryption is the decoding and unscrambling of received encrypted data Also see Encryption and Key Depth of Field The range between minimum and maximum distances at which a scanner can read a symbol with a certain minimum element width Discrete 2 of 5 A binary bar code symbology representing each character by a group of five bars two of which are ...

Страница 252: ...operation within any 1000 second window and an automatic laser shutdown if the scanner s oscillating mirror fails IEEE Address See MAC Address Input Output Ports I O ports are primarily dedicated to passing information into or out of the terminal s memory Series 9000 mobile computers include Serial and USB ports Intercharacter Gap The space between two adjacent bar code characters in a discrete co...

Страница 253: ...lar service Versions include IS 95A and IS 95B See CDMA K Key A key is the specific code used by the algorithm to encrypt or decrypt the data Also see Encryption and Decrypting L LASER Light Amplification by Stimulated Emission of Radiation The laser is an intense light source Light from a laser is all the same frequency unlike the output of an incandescent bulb Laser light is typically coherent a...
Страница 254: ...le of understanding and translating any network information or request sent by any other ODI compatible protocol into something a NetWare client can understand and process Open System Authentication Open System authentication is a null authentication algorithm P PAN Personal area network Using Bluetooth wireless technology PANs enable devices to communicate wirelessly Generally a wireless PAN cons...
Страница 255: ...rks which precedes the start character of a bar code symbol and follows the stop character QWERTY A standard keyboard commonly used on North American and some European PC keyboards QWERTY refers to the arrangement of keys on the left side of the third row of keys R RAM Random Access Memory Data in RAM can be accessed in random order and quickly written and read Reflectance Amount of light returned...

Страница 256: ...ween the home and roaming service Soft Reset See Warm Boot Space The lighter element of a bar code formed by the background between bars Specular Reflection The mirror like direct reflection of light from a surface which can cause difficulty decoding a bar code Standard Trigger Mode The Imager uses this mode when lifted off the counter or removed from the wall mount In this mode aim the Imager at ...

Страница 257: ... TCP IP messages to be sent to multiple networks within an organization or around the world hence its use in the worldwide Internet Every client and server in a TCP IP network requires an IP address which is either permanently assigned or dynamically assigned at startup Telnet A terminal emulation protocol commonly used on the Internet and TCP IP based networks It allows a user at a terminal or co...

Страница 258: ... a reliable delivery is required packet sequence checking and error notification must be written into the applications UPC Universal Product Code A relatively complex numeric symbology Each character consists of two bars and two spaces each of which is any of four widths The standard symbology for retail food packages in the United States V Visible Laser Diode VLD A solid state device which produc...

Страница 259: ...s 6 37 code 128 6 23 code 128 emulation 6 69 code 128 lengths 6 23 code 39 6 28 transmit buffer 6 34 code 39 check digit verification 6 31 code 39 full ASCII 6 32 code 39 lengths 6 30 code 39 transmit check digit 6 31 code 93 6 35 code 93 lengths 6 35 composite CC A B 6 65 composite CC C 6 65 composite TLC 39 6 66 convert GS1 databar to UPC EAN 6 64 convert UPC E to UPC A 6 19 convert UPC E1 to UP...

Страница 260: ...S postal check digit 6 59 UCC coupon extended code 6 22 UK postal 6 59 UPC composite mode 6 66 UPC EAN coupon code 6 22 supp redundancy 6 13 6 14 UPC EAN JAN supplemental AIM ID format 6 14 supplemental redundancy 6 13 UPC A 6 7 UPC A preamble 6 16 UPC A E E1 check digit 6 14 6 15 UPC E 6 7 UPC E preamble 6 17 UPC E1 6 8 UPU FICS postal 6 62 US planet 6 58 US postnet 6 58 USPS 4CB One Code Intelli...

Страница 261: ...t verification 6 43 convert to EAN 13 6 44 transmit check digit 6 43 M macro PDF 6 78 flush buffer abort PDF entry 6 78 Manual Triggering 1 14 matrix 2 of 5 bar codes 6 54 check digit 6 56 lengths 6 55 redundancy 6 56 transmit check digit 6 57 maxicode bar codes 6 71 microPDF417 bar codes 6 68 MSI bar codes check digit algorithm 6 53 check digits 6 52 lengths 6 50 MSI 6 50 transmit check digit 6 5...

Страница 262: ...lt parameters 6 2 T trigger programming via host 5 10 Trigger Position 1 5 Trigger Swivel Assembly 1 5 U unpacking 1 1 unpairing barcode 1 13 UPC EAN bar codes bookland EAN 6 9 bookland ISBN 6 21 check digit 6 14 6 15 convert UPC E to UPC A 6 19 convert UPC E1 to UPC A 6 19 EAN zero extend 6 20 EAN 13 JAN 13 6 9 EAN 8 JAN 8 6 8 ISSN EAN 6 22 supplementals 6 10 UCC coupon extended code 6 22 UPC A 6...

Страница 263: ... U S A http www motorolasolutions com MOTOROLA MOTO MOTOROLA SOLUTIONS and the Stylized M Logo are trademarks or registered trademarks of Motorola Trademark Holdings LLC and are used under license All other trademarks are the property of their respective owners 2011 Motorola Solutions Inc All Rights Reserved ...

Отзывы: