Page 19
APPENDIX D
– SETTING UP THE ETHERNET INTERFACE
Connect an Ethernet cable from the ACT-3X device to your network. Note: The device MUST be connected to the same network
as the computer on which you are going to run this setup.
You must first download the PM Remote Software package from our website.
http://monarchserver.com/Files/Software/PMRemote_Software.zip
Unzip the files and then run the program Ethernetsetup.exe in the Utilities directory. This will install the Ethernet Configuration
Utility.
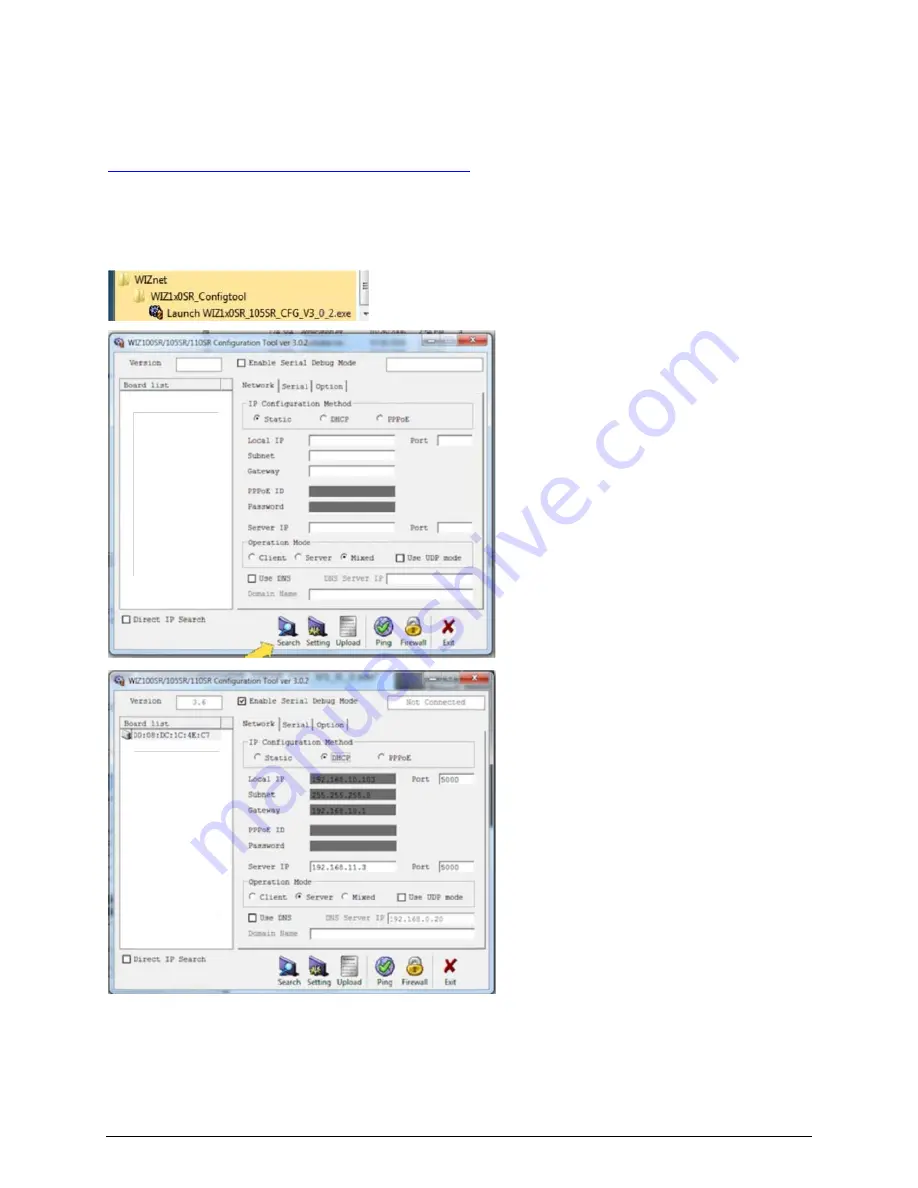
Ensure there is power to the device and it is connected to the Ethernet then run the program:
All Programs – Wiznet - WIZ1x0SR_Configtool -
Launch WIZ1x0SR_105SR_CFG_V3_0_2.exe
This will bring up the window on the left.
Click the SEARCH button at the bottom of the window
and it will find all devices plugged into the Ethernet.
Note that the device is set up for DHCP by default so it
will get an IP address from your local server.
Once the search is complete the window will be
populated as shown next.
The current device setting is shown in the ―IP
Configuration Method‖ box – in this is example you
can see the device has been set for DHCP and it shows
the IP address as 192.168.10.103 (It will be specific to
your network). The Subnet and Gateway information
are also shown. If you have more than one device on
your network each will be identified by the MAC
address in the ―Board List‖ window. Click on the
MAC address of interest to show the addressing for
that device.
At this point you can note this information for later use
or you can set a static IP address by clicking the
―Static‖ radio button and entering the Local IP, Subnet
and Gateway information. Then click the SETTING
button at the bottom of the window and this
information will be sent to the device.
You need to remove power from the device for 10
seconds in order for the new information to be
registered.


