background image

EINSTELLEN DER SITZPOSITION

Das Einstellen der richtigen Höhe des Satteln und des Lenker sorgt für eine angenehme Fahposition
Dieser Abschnitt zeigt die wichtien Handgriffe um die Sitzposition optimal einzustellen.

. EMPFEHLUNGEN:

Um eine optimale Fahrposition zu erhalten, sollte der Sattel auf einer Höhe eingestellt sein, dass Sie 

bei ausgestrecktem Bein mit der Ferse bequem auf dem Pedal stehen können (Das Pedal befi ndet 

sich dabei auf der untersten Position)

. ANWEISUNGEN:

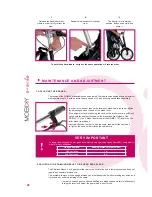
. Einstellung der Sattelhöhe:

- lockern Sie die Klemmschraube am Sattelrohr
- ziehen Sie den Sattel bis zur gewünschten Höhe
- sollten Sie am Ende des Rohres sein, ohne die gewünschte Höhe erreicht zu 

  haben, wiederholen Sıe dasselbe mit der Klemmschraube der Sattelstange 
- sobald Sıe die gewünschte Hohe erreicht haben ziehen Sie die Klemmschrauben 

  fest

Prüfen Sie ob der Sattel gut fi xiert ıst, indem Sie versuchen ihn im Rahmen zu 
drehen. Falls er sich bewegt, ziehen Sıe die Klemmschrauben nochmals nach und 
überprüfen Sie die fi xierung erneut, solange bis die Sattelstange sich nicht mehr im 

Rohr bewegt.

!

SEHR WICHTIG

Damit  Ihre  Sicherheit  gewährleistet  ist,  sollte  der  Sattel  nicht  höher  als  die  Markierung  auf  dem 

Sattelrohr anzeigt, eingestellt werden. Bitte prüfen Sie vor jeder Nutzung dass dıe Markierung am 

Sattelrohr verdeckt ist.

. Einstellung der Sattelneigung:

- Die Sattelspitze befindet sich in optimaler Position. wenn sie leicht nach 

  oben gehoben ist (0.5 - 1.0 cm), um ein Rutschen nach vome zu verhindem.

- lockern Sie die Neigungsschraube. die sich unterhalb des Sattels befi ndet, ohne 

  Sie komplett zu lösen (6 mm Inbus)
- Bewegen Sie den Sattel nach vorne und / oder nach hinten. Um die gewünschte 
  Position zu erhalten.
- Ziehen Sie die Schraube wieder an, sobald Sie die Position erreicht haben.
- Prüfen Sie, ob der Sattel fest ist, indem Sie versuchen ihn hin und her zu bewegen. 
  Falls nötig, ziehen Sie die Schraube nach.

38

Содержание Steve 16"

Страница 1: ... M A N U E L D E L U T I L I S A T E U R O W N E R S M A N U A L B E D I E N U N G S H A N D B U C H Vasco 12 Louis 12 Youri 12 Louis 16 Steve 16 Youri 16 ...

Страница 2: ...PATENT N 107007890 MADE IN FRANCE ...

Страница 3: ... et des règles de sécurité relatives à l utilisation du MOBIKY TABLE DES MATIÈRES pages Vélo MOBIKY standard Sécurité p 4 Vue détaillée du vélo MOBIKY p 5 Réglage de la position de conduite p 6 Utilisation de votre vélo MOBIKY p 8 Entretien et réglages p 10 Maintenance p 12 Inspection générale p 12 Vélo MOBIKY électrique Descriptif technique p 15 Conseils d utilisation p 15 Précautions relatives a...

Страница 4: ... figures descentes d escaliers AVANT CHAQUE UTILISATION Les hauteurs de selle et de guidon doivent être ajustées à votre morphologie Pour obtenir une bonne position de pédalage réglez la hauteur de selle de façon à ce que jambe tendue votre talon soit posé sur la pédale en position la plus basse TRÈS IMPORTANT Lorsque votre vélo MOBIKY est en position dépliée roulage Le tube de hauban voir vue déta...

Страница 5: ...ION ROULAGE 3 POSITION ROULAGE COLLIER DE SERRAGE FOURREAU DE SELLE 2 FOURREAU DE SELLE 4 TUBE HAUBAN 3 7 BÉQUILLE 5 SELLE 6 POIGNÉE DE TRANSPORT 1 COLLIER DE SERRAGE POTENCE GUIDON BATTERIE VAE UNIQUEMENT 9 10 BOITIER DE COMMANDE VAE UNIQUEMENT COLLIER DE SERRAGE DE SELLE 8 5 ...

Страница 6: ...e 8 Une fois la position souhaitée obtenue serrez les colliers de serrage Vérifiez que la selle soit bien fixée en essayant de la faire pivoter dans le cadre Si elle tourne resserrez les colliers de serrage et refaites le test jusqu au blocage parfait de la tige dans le fourreau TRÈS IMPORTANT Pour votre sécurité la selle ne doit pas être sortie au delà du point de repère gravé sur la tige de selle ...

Страница 7: ...oit perpendiculaire Si vous ne respectez pas ces alignements vous risquez de perdre le contrôle ce qui pourrait provoquer des blessures corporelles ou endommager votre vélo MOBIKY Pression des pneus Le confort de roulage dépend de l état des pneus et du gonflage Gonflez vos pneumatiques à la bonne pression Suivez obligatoirement la plage de pression indiquée sur le flan du pneumatique par le construc...

Страница 8: ...atique du hauban dans sa cuvette MANIPULATION DE PLIAGE 1 Tout en maintenant le guidon d une main saisissez et pressez la partie supérieure du tube hauban 2 Tout en maintenant la pression sur le tube hauban faites glisser le fourreau de selle vers le bas 3 Amenez en butée sur le collier de serrage du fourreau de selle 4 Saisissez la poignée de portage 5 Tirez vers le haut 6 Verrouillage automatiqu...

Страница 9: ...ue vous êtes en position dépliée vérifiez que le tube de hauteur soit bien enclenché au fond de la gouttière AU PLIAGE Lorsque vous êtes en position pliée vérifiez que le verrou de hauban appuie bien sur la fourche arrière POSITION DE RANGEMENT Pliage des pédales Poussez la pédale vers le pédalier puis tournez en maintenant la pression Pliage du guidon Tirez successivement les boutons de verrouillag...

Страница 10: ...tte située sur le frein à disque roue avant du MOBIKY 12 le V Brake roue avant du MOBIKY 16 et ou sur le frein Roller Brake roue arrière Dévissez pour libérer le câble ajustez celui ci puis revissez de manière à bien bloquer celui ci TRÈS IMPORTANT En condition humide et sur sol mouillé la distance de freinage augmente d environ 40 par rapport à celle enregistrée en condition sèche 2 RÉGLAGE DU DÉ...

Страница 11: ...ques à la bonne pression Suivez obligatoirement la plage de pression indiquée sur le flanc du pneumatique par le constructeur Pression pneumatique avant et arrière 35 PSI 2 5 Bar I N utilisez pas de pompe pressurisée ou non régulée Ne roulez jamais avec des pneus qui ne sont pas correctement gonflés 4 TENSION DE LA CHAÎNE Une chaîne correctement tendue présente une flèche verticale de 1 cm environ Le...

Страница 12: ...subit des contraintes élevées et s use Les différents matériaux et composants peuvent réagir différemment à l usure ou à la fatigue Si la durée de vie prévue pour un composant a été dépassée celui ci peut se rompre d un seul coup risquant alors d entraîner des blessures pour le cycliste Les fissures égratignures et décolorations dans des zones soumises à des contraintes élevées indiquent que le com...

Страница 13: ...rôlez le jeu du roulement sur le moyeu en levant le vélo et en faisant tourner la roue La roue doit continuer de tourner pendant plusieurs tours avant de s arrêter Pour vérifier le jeu des moyeux essayez de faire bouger la jante d un côté et de l autre entre les branches de la fourche Pendant le test on ne doit pas constater de jeu important Si vous constatez que la roue a du jeu ou qu elle tourne ...

Страница 14: ...s que celle ci ne soit pas pincée entre le pneu et la jante Vérifiez que le pneu ne présente ni Fissure Trace d usure anormale Renflement I Tout pneu défectueux doit être immédiatement remplacé CHAÎNES Examinez les fréquemment pour détecter les défauts et vérifiez les états de tension Le changement standard de chaîne devra être effectué par un mécanicien agréé du cycle MANIVELLE ET PÉDALES La manivel...

Страница 15: ...ptez une vitesse régulière Utilisez les vitesses pour soulager le moteur Privilégiez des parcours plats Vérifiez la pression des pneus 4 bars maxi Pour économiser l énergie évitez Les démarrages sur les premiers pignons Les accélérations successives Les parcours en côte Les surcharges pondérales Le froid température ambiante inférieure à 8 C NETTOYAGE Nettoyez avec un chiffon mouillé et laissez séc...

Страница 16: ...chargeur cordon d alimentation prise remplacez les par des éléments d origine Une fois le chargement terminé débranchez le chargeur et déconnectez la batterie du chargeur PRECAUTIONS RELATIVES AUX COMPOSANTS ELECTRIQUES BATTERIE Ne jetez pas la batterie au feu N utilisez pas la batterie pour alimenter d autres appareils Utilisez le chargeur spécifique seulement pour charger la batterie Ne démontez ...

Страница 17: ...extérieurs poids pente vent température extérieure pression des pneus etc Par température hivernale votre autonomie habituelle pourra se trouver réduite d environ 20 La durée de vie de la batterie au lithium est supérieure à 600 cycles charge décharge soit de 2 à 4 ans suivant son utilisation Après cette période l autonomie chutera logiquement et de manière progressive Sont exclus de la garantie l...

Страница 18: ...irez la batterie quelques secondes puis mettez de nouveau le contact TABLEAU DE BORD 1 Sélection du niveau de puissance Cette fonction vous permet de vous familiariser avec l accélération du moteur et de limiter la consommation d énergie Vous disposez de trois niveaux d assistance indiqués sur le boitier de commande I faible II modéré III élevé 2 Témoin de charge de la batterie Au fur et à mesure ...

Страница 19: ...ts as well as giving you a better understanding of the safety rules to be followed when using MOBIKY TABLE OF CONTENTS pages MOBIKY standard bike Safety p 20 Detailed view of the MOBIKY p 21 Adjusting the riding position p 22 Using your MOBIKY bicycle p 24 Maintenance and adjustment p 26 Maintenance p 28 General inspection p 28 MOBIKY E bike Technical specification p 31 Tips for use p 31 Precaution...

Страница 20: ...n all terrain bike for acrobatics or cycling down stairways etc EACH TIME BEFORE YOU USE IT Ensure that the height of the saddle and the handlebars are correctly adjusted for your body shape In order to obtain a good pedalling position adjust the height of the saddle so that when your leg is fully extended your heel rests on the pedal in its lowest position VERY IMPORTANT When your MOBIKY is unfol...

Страница 21: ...MOBIKY BICYCLE 1 WALKING POSITION 2 STORAGE POSITION STAY CLAMP 2 SADDLE SHEATH 4 STAY TUBE 3 7 KICKSTAND 5 SADDLE 6 CARRY HANDLE 1 STEM CLAMP BATTERY E BIKE ONLY 9 10 DISPLAY E BIKE ONLY SADDLE CLAMP 8 3 RIDING POSITION 21 ...

Страница 22: ... has been obtained tighten the securing clamps Check that the saddle is properly fixed by trying to rotate it in the frame If it turns re tighten the securing clamps and redo the test until the stem is completely locked in the tube VERY IMPORTANT For your safety the saddle must not be pulled out beyond the marker line which is etched in the saddle stem Each time before you use the bicycle check tha...

Страница 23: ...are at right angles to it If you do not ensure that the saddle and handlebars are correctly aligned as stated above you run the risk of losing control of the bicycle which could cause physical injury or damage your MOBIKY bicycle Tyre pressures Ride comfort depends on the condition and pressure of the tyres Inflate your tyres to the correct pressure You must adhere to the tyre pressure range shown ...

Страница 24: ...dle stay automatically locks into place in its locking point FOLDING PROCEDURE 1 Whilst holding the handlebars in one hand grasp and press down the upper part of the chain stay 2 Whilst maintaining the pressure on the chain stay slide the saddle tube downwards 3 Fully retract it in the seat post clamp 4 Take hold of the carrying handle 5 Pull upwards 6 The various parts automatically lock into pla...

Страница 25: ...TANT UNFOLDED When your bicycle is folded be careful that the stay tube is in the sheath FOLDED When your bicycle is folded check that the stay lock is pressing firmly on the rear fork STORAGE POSITION Folding the pedals Press the body of the pedals to the crank and flip to its folded position Folding the handlebars Pull out each of the locking buttons on the top of the handlebar in turn then twist ...

Страница 26: ...n the disk brake front wheel of the MOBIKY 12 the V brake front wheel of the MOBIKY 16 and or on the roller brake rear wheel Unscrew the knob in order to free the cable then adjust the cable and re tighten the knob so that it locks the cable firmly VERY IMPORTANT In damp conditions and on wet ground the braking distance increases by about 40 compared to what it is in dry conditions 2 ADJUSTING THE ...

Страница 27: ... your tyres to the correct pressure You must adhere to the tyre pressure range shown by the manufacturer on the side of the tyre Front and rear tyre pressure 35 PSI 2 5 bar I Never use a high pressure pump or a non regulated pump Never ride with incorrectly inflated tyres 4 CHAIN TENSION There should be about 1 cm of vertical play in a correctly tensioned chain The tension is adjusted by means of t...

Страница 28: ...e is subject to high levels of stress and wear and tear The different materials and components may react differently to wear or fatigue If the anticipated service life of a component has been exceeded it may break suddenly with the risk of the cyclist being injured Cracks scratches and discolouration in areas which are subject to high levels of stress are signs that the component has exceeded its ...

Страница 29: ...e Check the play in the hub bearings by raising the bicycle and turning the wheel The wheel must carry on turning round several times before stopping In order to check the amount of play in the hubs try to move the wheel rim from side to side between the fork blades During this test you should not notice any significant play If you notice that there is play in the wheel or that it doesn t turn free...

Страница 30: ...s not pinched between the tyre and the wheel rim Check that the tyre does not show any cracks signs of abnormal wear bulges I Any defective tyre must be replaced immediately CHAINS Examine them frequently in order to spot any faults and to check tensioning Routine replacement of the chain must be carried out by an approved mechanic for the bicycle CRANKSET AND PEDALS The crankset must turn freely ...

Страница 31: ...maximise the range available to you Use the gears to reduce strain on the motor Avoid hills where possible Check tyre pressures 4 bars max To save energy avoid Setting off using the highest smallest gear wheels Repeated acceleration Hilly routes Overloading Cold conditions ambient temperature below 8 C CLEANING After use clean the bicycle with a damp cloth and leave it to dry Do not use a high pre...

Страница 32: ...r casing the power cable or the plug if they are damaged replace them with original components Once charging is finished unplug the charger and disconnect the battery from the charger PRECAUTIONS RELATING TO ELECTRICAL COMPONENTS BATTERY Do not throw the battery into a fire Do not use the battery to power other equipment Use the specific charger only for charging the battery Do not disassemble or mod...

Страница 33: ...der any circumstances be guaranteed for a specific mileage as this depends on too many external factors weight carried hills wind ambient temperature tyre pressures etc In winter temperatures your usual range may be reduced by about 20 The service life of the lithium battery is greater than 600 charging discharging cycles or between 2 and 4 years depending on use After this period the range will in...

Страница 34: ...r a few seconds then switch the ignition on again INSTRUMENT PANEL 1 Power level selection This function allows you to get used to the acceleration provided by the motor and to limit energy consumption You have a choice of three different levels of assistance as shown on the control panel I low II medium III high 2 Battery charge indicator light As the battery discharges the 4 diodes dim in turn f...

Страница 35: ...rmöglichen sowie Ihnen die entsprechenden Einstellungen und die Sicherheitsvorschriften zu erläutern IN H A L T seite MOBIKY fahrrad Sicherheitshinweise s 36 Detailansicht des Mobiky s 37 Einstellen der Sitzposition s 38 Gerbrauch des Mobiky s 40 Wartung und Einstellungen s 42 Wartung s 44 Inspektion s 44 Eletrofahrrad Pedelec Pedal Electric Cycle Technische Spezifikationen s 47 Gebrauchstipps s 47...

Страница 36: ...enutzen wie z B als Mountainbike für Sprünge etc VOR JEDER BENUTZUNG BEACHTEN Vergewissern Sie sich dass das Fahrrad eine optimale Fahrposition bietet Der Sattel sollte auf eine Höhe eingestellt sein dass Sie bei ausgestrecktem Bein mit der Ferse bequem auf dem Pedal stehen können Das Pedal befindet sich dabei auf der untersten Position SEHR WICHTIG Wenn das Mobiky zum Fahren ausgeklappt wurde Das ...

Страница 37: ...RTPOSITION 2 SCHIEBEPOSITION 3 FAHRPOSITION SATTELROHR 2 SATTELROHRHÜLSE 4 VERSPANNROHR 3 7 STÄNDER 5 SATTEL 6 TRANSPORTGRIFF 1 KLEMMSCHRAUBE AN DER LENKSTANGE BATTERIE NUR E BIKE 9 10 DISPLAY NUR E BIKE KLEMMSCHRAUBE AM SATTELROHR 8 37 ...

Страница 38: ...Sattel gut fixiert ıst indem Sie versuchen ihn im Rahmen zu drehen Falls er sich bewegt ziehen Sıe die Klemmschrauben nochmals nach und überprüfen Sie die fixierung erneut solange bis die Sattelstange sich nicht mehr im Rohr bewegt SEHR WICHTIG Damit Ihre Sicherheit gewährleistet ist sollte der Sattel nicht höher als die Markierung auf dem Sattelrohr anzeigt eingestellt werden Bitte prüfen Sie vor j...

Страница 39: ...Rahem und sich der Lenker senkrecht dazu befindet Sollten Sie diese Ausrichtungen nicht beachten kann ein Kontrollverlust des Rades die Folge sein was Verletzungen oder Beschädigungen am Faltrad nach sich ziehen kann Reifendruck DerFahrkomforthängtunteranderemmitdemindividuellrichtigenReifendruckzusammen Pumpen Sie ihre Reifen bis zum richtigen Luftdruck auf Richten Sie sich unbedingt nach den vom ...

Страница 40: ...tet automa tisch in seine Kerbe ein ZUSAMMENFALTEN DES MOBIKY 1 Halten Sie mit einer Hand den Lenker fest um mit der anderen den oberen Teil des Verspannrohres zu fassen und zu drucken 2 Halten Sie das Verspannrohr gedrückt und lassen Sie das Sattelrohr herunterrutschen 3 Die Klemme muss bis zum Anschlag am Sattelrohr eingeschoben sein 4 Fassen Sie den Transportgriff 5 Ziehen Sie ihn nach oben 6 D...

Страница 41: ...gefaltet ist vergewissern Sie sich dass das Verspannrohr in der Kerbe eingerastet ist ZUSAMMENGEFALTET Wenn das Mobiky zusammengefaltet ist vergewissern Sie sich dass sich die Klemmspange fest gegen die hintere Gabelunterseite presst TRANSPORTPOSITION Einklappen der Pedale Drücken Sie das Pedal gegen das Tretlager und klappen Sie es nach innen Einklappen des Lenkers Ziehen Sie nacheinander die bei...

Страница 42: ...in verändern Sie die Einstellung der Einstellschraube an der Scheibenbremse Mobiky 12 oder an der V Break Mobiky 16 und oder an der Rollenbremse am Hinterrad Lockern Sie die Schraube um den Bremszug zu entspannen ziehen Sie sie wieder an um den Bremszug zu fixieren SEHR WICHTIG Bei feuchten Bedingungen und auf nassem Untergrund verlängert sich der Bremsweg um ca 40 im Vergleich zum Bremsweg auf tro...

Страница 43: ...hlag der Gangschaltung ist 3 LUFTDRUCK Pumpen Sie ihre Reifen bis zum richtigen Luftdruck auf Richten Sie sich unbedingt nach den vom Hersteller angegebenen Drucktoleranzen am Rand des Reifens Reifendruck vome und hinten 35 PSI 2 5 Bar I Benutzen Sie niemals eine Hochdruckpumpe oder eine ohne Druckanzeige Fahren Sie nur mit korrekt aufgepumpten Reifen 4 KETTENSPANNUNG Eine richtig gespannte Kette ...

Страница 44: ...ProdukteistdasMobikyBelastungenausgesetzt Dieverschiedenen Komponenten können unterschiedlich auf Belastungen und Ermüdungen reagieren Wenn die vorgesehene Lebensdauer von Komponenten erreicht ist kann es sein dass Teile brechen und der Fahrer verletzt wird Risse Kratzer und Verfärbungen an Teilen die einer hohen Belastung ausgesetzt sind sind Anzeichen für das Überschreiten der vorgesehenen Leben...

Страница 45: ... lassen ohne zu oszillieren Überprüfen Sie das Spiel in der Nabe indem Sie das Rad anheben und das Laufrad drehen Das Rad sollte sich einige Male drehen bevor es stoppt Um das Spiel in der Radnabe zu testen versuchen Sie die Felge zwischen der Gabel hin und her zu bewegen Es darf kein auffälliges Spiel festzustellen sein Sollten Sie zu viel Spiel oder schwergängiges Drehen bemerken muss das Radlag...

Страница 46: ...e eingeklemmt wird Der Reifen darf keine Risse Spuren unsachgemäßer Nutzung Wölbungen Aufweisen I Jeder defekte Reifen muss unverzüglich ausgetauscht werden KETTEN Untersuchen Sie die Ketten regelmäßig auf eventuelle Schäden und prüfen Sie deren Spannung Der Kettenwechsel muss von einem Fachmann ausgeführt werden PEDALANLAGE Die Pedalarme sollten sich ohne seitliches Spiel drehen Kontrollieren Sie...

Страница 47: ...eren Benutzen Sie die Gangschaltung um die Belastung auf den Motor reduzieren zu können Vermeiden Sie hügelige Anstiege falls möglich Prüfen Sie den Reifendruck max 4 bar Um Energie zu sparen vermeiden Sie Wiederholende Beschleunigungen starke Belastungen für den Motor Hügelige Touren Überladung Kalte Witterungseinflüsse Außentemperaturen unter 8 Grad Losfahren im größten Gang PUTZEN Nach der Benut...

Страница 48: ...hen Ist die Batterie aufgeladen stecken sie die Batterie und das Ladegerät aus VORSICHTSMASSNAHMEN BEZÜGLICH ELEKTRISCHER KOMPONENTEN BATTERIE Geben Sie die Batterie nicht ins Feuer von Wärmequellen fernhalten Benutzen Sie die Batterie nicht für andere Zwecke Benutzen Sie das Ladegerät nur für die Batterie des Mobiky Bauen Sie die Batterie nicht auseinander und modifizieren Sie die Batterie nicht V...

Страница 49: ...ird Fahrergewicht Streckenprofil Wind Außentemperatur Reifendruck etc Bei kalter Außentemperatur kann die Reichweite um ca 20 reduziert sein Die Lebensdauer der Batterie umfasst mehr als 600 Ladezyklen oder zwischen 2 und 4 Jahren abhängig von der Benutzung Danach kann sich die Reichweite des Pedelecs reduzieren Die Garantie schließt sich aus wenn Beschädigungen durch unsachgemäße Handhabung durch ...

Страница 50: ... und starten die Zündung wieder KONTROLLEINHEIT 1 Wahl der Unterstützungsstufe Diese Funktion erlaub Ihnen sich an die Beschleunigung des Motors zu gewöhnen und den Energieverbrauch zu minimieren Sie können aus 3 Unterstützungsstufen wählen I gering II mittel III hoch 2 Batterieverbrauchsanzeige Wenn die Batterie sich beim fahren entläd dimmen sich die Dioden zwischen den zwei Batteriesymbolen von...

Страница 51: ...ch results from deliberate misuse Damage resulting from maintenance or use which contravenes the maker s instructions or from negligence Wear parts bulbs cables and cable housings chains wheel rims gear wheels brake blocks etc and their replacement Any product which has been modified without the maker having been notified Original components that have been replaced by non approved components Damage ...

Страница 52: ......

Отзывы: