5-26 Image Optimization
5.7
Contrast Imaging
The contrast imaging is used in conjunction with ultrasound contrast agents to enhance the
imaging of blood flow and microcirculation. Injected contrast agents re-emit incident acoustic
energy at a harmonic frequency which is much more efficient than the surrounding tissue. Blood
containing the contrast agent stands out brightly against a dark background of normal tissue.
Contrast imaging is an option.
Only C5-1s, C5-2s and C4-1s support abdominal contrast imaging function.
Only P4-2s and SP5-1s supports LVO.
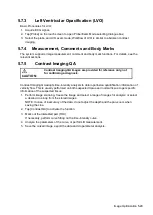
CAUTION:
Set MI index by instructions in the contrast agent accompanied manual.
Read contrast agent accompanied manual carefully before using
contrast function.
NOTE:
Be sure to finish setting the parameters before injecting the agent into the patient to
avoid affecting the image consistency. This is because the agent's acting time is
limited.
The contrast agent used must comply with the relevant local regulations.
5.7.1 Basic Procedures
To perform successful contrast imaging, start with an optimized B image and have the target
region in mind. To perform contrast imaging:
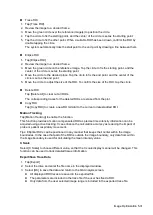
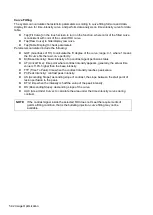
1. Select the probe and the exam mode; tap [Image] to open the image menu.
2. Fix the probe.
3. Tap [Contrast] on the right side of the operating panel to enter the contrast imaging mode.
4. Adjust the acoustic power experientially to obtain a good image.
Tap [Dual Live] to activate the dual live function. Observe the tissue image to find the target
view.
5. Inject the contrast agent, and tap [Timer1] to start the contrast timing. When the timer begins
to work, time will be displayed on the screen.
6. Observe the image. Use the [Pro Capture] and [Retro Capture] on the menu to save the
images. Tap those controls again or tap [Freeze] to end the live capture.
Perform several live captures if there are more than one sections of interest.
7. At the end of contrast imaging, tap [Timer 1] again to exit the timing function. Perform
procedures 3-5 if necessary.
For every single contrast imaging procedure, use [Timer 2] for timing.
If necessary, activate the destruction function by taping [Destruct] and destruct the micro-
bubbles left by the last contrast imaging, or to observe the reinfusion effect in a continuous
agent injecting process.
8. Exit contrast imaging. Tap [B] to return to B mode.
Содержание TE5
Страница 1: ...TE7 TE5 Diagnostic Ultrasound System Operator s Manual Basic Volume ...
Страница 2: ......
Страница 6: ......
Страница 12: ......
Страница 24: ......
Страница 36: ......
Страница 54: ......
Страница 56: ...4 2 Exam Preparation 4 1 1 New Patient Information The Patient Info screen is shown as follows 2 1 3 ...
Страница 110: ......
Страница 115: ...Display Cine Review 6 5 6 Tap Return on the screen or tap Freeze to exit image compare ...
Страница 120: ......
Страница 124: ......
Страница 156: ......
Страница 174: ......
Страница 192: ...12 18 Setup Select Advanced and do as follows Select MAPS and do as follows ...
Страница 202: ...13 2 Probes and Biopsy C5 2s L12 4s L7 3s P4 2s L14 6s C11 3s L14 6Ns V11 3Ws P7 3Ts 7LT4s ...
Страница 203: ...Probes and Biopsy 13 3 7L4s P10 4s L20 5s P7 3s L14 5sp SC6 1s SP5 1s 6CV1s L9 3s C5 1s L11 3VNs C4 1s ...
Страница 222: ...13 22 Probes and Biopsy No Name Description 8 Grooves of the needle guided bracket Matched with the tabs of the probe ...
Страница 226: ...13 26 Probes and Biopsy NGB 034 NGB 035 ...
Страница 250: ......
Страница 272: ......
Страница 276: ...A 4 Wireless LAN Tap Add Manually create a network profile to set ...
Страница 282: ......
Страница 318: ......
Страница 322: ......
Страница 323: ...P N 046 006959 07 1 0 ...


