Image Optimization 5-17
5.5
Power Mode Image Optimization
Power mode provides a non-directional display of the blood flow in terms of intensity as opposed
to flow velocity.
DirPower (Directional Power mode) provides additional information of the flow direction toward or
away from the probe.
5.5.1 Basic Procedures for Power Mode Imaging
1. Select a high-quality image during B mode or B + Color scanning, and adjust to position the
area of interest in the center of the image.
2. Tap [Power] on the right side of the operating panel to enter Power mode.
3. Change the size and position of the ROI (the same as in Color mode).
4. Adjust the image parameters during B + Power mode scanning to obtain optimized images.
Tap [Image] to open the image menu. Adjust the parameters to optimize the image.
5. Perform other operations (e.g., measurement and calculation) if necessary.
5.5.2 Power Mode Image Parameters
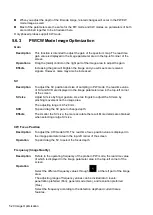
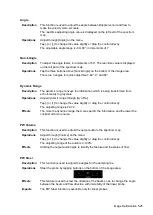
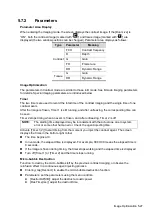
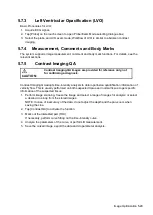
In Power mode scanning, the image parameter area in the top-left corner of the screen
displays the real-time parameter values as follows:
Parameter F
G
PRF
WF
Meaning
Frequency Power Gain
Pulse Repetition
Frequency (PRF)
Power Wall Filter
In Power mode, the acoustic power is synchronous with that of B mode. Adjustment of the
depth to the B mode image will lead to corresponding changes in Power mode image.
Parameters consistent with those in Color mode and B mode are not described. See the relevant
Color mode and B mode sections, while special items of the Power mode are introduced in the
following.
Содержание TE5
Страница 1: ...TE7 TE5 Diagnostic Ultrasound System Operator s Manual Basic Volume ...
Страница 2: ......
Страница 6: ......
Страница 12: ......
Страница 24: ......
Страница 36: ......
Страница 54: ......
Страница 56: ...4 2 Exam Preparation 4 1 1 New Patient Information The Patient Info screen is shown as follows 2 1 3 ...
Страница 110: ......
Страница 115: ...Display Cine Review 6 5 6 Tap Return on the screen or tap Freeze to exit image compare ...
Страница 120: ......
Страница 124: ......
Страница 156: ......
Страница 174: ......
Страница 192: ...12 18 Setup Select Advanced and do as follows Select MAPS and do as follows ...
Страница 202: ...13 2 Probes and Biopsy C5 2s L12 4s L7 3s P4 2s L14 6s C11 3s L14 6Ns V11 3Ws P7 3Ts 7LT4s ...
Страница 203: ...Probes and Biopsy 13 3 7L4s P10 4s L20 5s P7 3s L14 5sp SC6 1s SP5 1s 6CV1s L9 3s C5 1s L11 3VNs C4 1s ...
Страница 222: ...13 22 Probes and Biopsy No Name Description 8 Grooves of the needle guided bracket Matched with the tabs of the probe ...
Страница 226: ...13 26 Probes and Biopsy NGB 034 NGB 035 ...
Страница 250: ......
Страница 272: ......
Страница 276: ...A 4 Wireless LAN Tap Add Manually create a network profile to set ...
Страница 282: ......
Страница 318: ......
Страница 322: ......
Страница 323: ...P N 046 006959 07 1 0 ...


