


3-5
Chapter 3 Setup
3
2
2
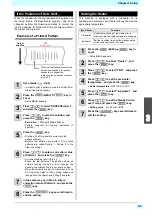
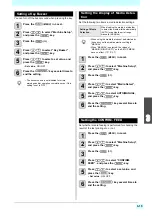
If the Positions of Dots Shift...
When the condition for printing (Distance of the platen and
the head /media thickness/media type/etc.) has been
changed, perform the following operation to correct the
ink drop position for bidirectional (Bi) printing and obtain
the proper printing result.
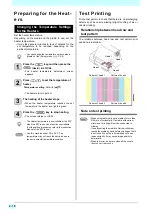
Example of a Printed Pattern
1
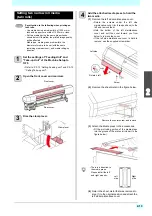
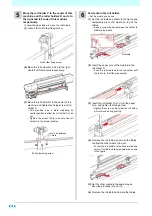
Set a media. (
• In order to print a pattern, a media that is 500 mm
wide at least is necessary.
2
Press the
(MENU)
key in
Local.
• Setup MENU appears.
3
Press
to select “DROP.POScorrect” ,
and press the
key.
4
Press
to select resolution, and
press the
key.
•
Resolution
: Y300dpi/Y600dpi/Y900dpi
• Perform correction for printing resolutions (Y
direction).
5
Press the
key.
• Printing of the Drop position correct printed
pattern will start.
• Multiple test patterns are printed. (The printed
patterns are called Pattern 1, Pattern 2 in the
order of printing.)
6
Press
to enter a correction value
of Pattern 1, and press the
key.
• Corrected feeding rate: -40 to 40
• Check the test patterns. The position where an
outward feeding line and a return feeding line
become one straight line is the correction value.
• When the correction value in not between -40 and
40, adjust the height of the printing heads and
then perform the operations in Step 2 and later.
7
In the same way as in Step 6, enter a
correction value of Pattern 2, and press the
key.
8
Press the
key several times to
end the setting.
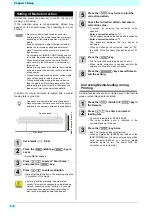
Setting the Heater
This machine is equipped with a pre-heater on its
backside, and contains a print heater to keep the ink at an
appropriate temperature.
1
Press the
(MENU)
key in
Local.
• Setup MENU appears.
2
Press
to select “Heater” , and
press the
key.
3
Press
to select “PRE” , and press
the
key.
4
Press
to set the pre-heater
temperature , and press the
key.
•
Heater temperature
: OFF/ 20°C to 60°C
5
Press
to select “Ink Heater” , and
press the
key.
6
Press
to set the Stanby Switch
over Time, and press the
key.
•
Setting value
: 0 to 60 min/ NONE
7
Press the
key several times to
end the setting.
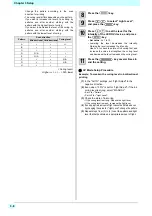
The dots at the fourth position counted
from the zero position in the positive
direction form a straight line.
In this case, the dot position correction
value is 4.0.
Output
direction
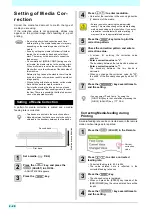
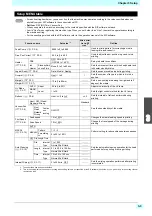
Type of Heater
Function
Pre-heater
Used for pre-heating of the media prior to
printing to prevent rapid temperature changing.
Ink-heater
Set the transition time until the standby status
of the head heater and ink heater.
Содержание SIJ-320UV
Страница 1: ...MIMAKI ENGINEERING CO LTD URL http mimaki com D202809 13 Original instructions ...
Страница 13: ...xii Warning labels 1 2 2 2 2 2 1 No Reorder Label 1 M905811 2 M903330 3 M905980 4 M907935 5 M903239 6 M903404 ...
Страница 14: ...xiii Warning labels ...
Страница 28: ...1 14 Chapter 1 Before Use ...
Страница 98: ...4 26 ...
Страница 116: ...5 18 Chapter 5 Troubleshooting ...
Страница 122: ...Chapter 6 Appendix 6 6 ...
Страница 124: ...MM FW 1 50 MIMAKI ENGINEERING CO LTD 2015 ...