


29
Chapter 4 - Installation
Startup checklist
The enclosed startup checklist guides the process of the machine installation and
checkout. The startup checklist forms must be completed and sent to Milltronics Mfg. to
activate the machine warranty. Use the startup checklist in conjunction with the
following outline when installing and setting up the machine.
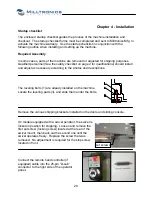
Required Assembly
In some cases, parts of the machine are removed or adjusted for shipping purposes.
Qualified personnel
(See the safety checklist on page 2 for qualifications)
should install
and adjust as necessary according to the photos and descriptions.
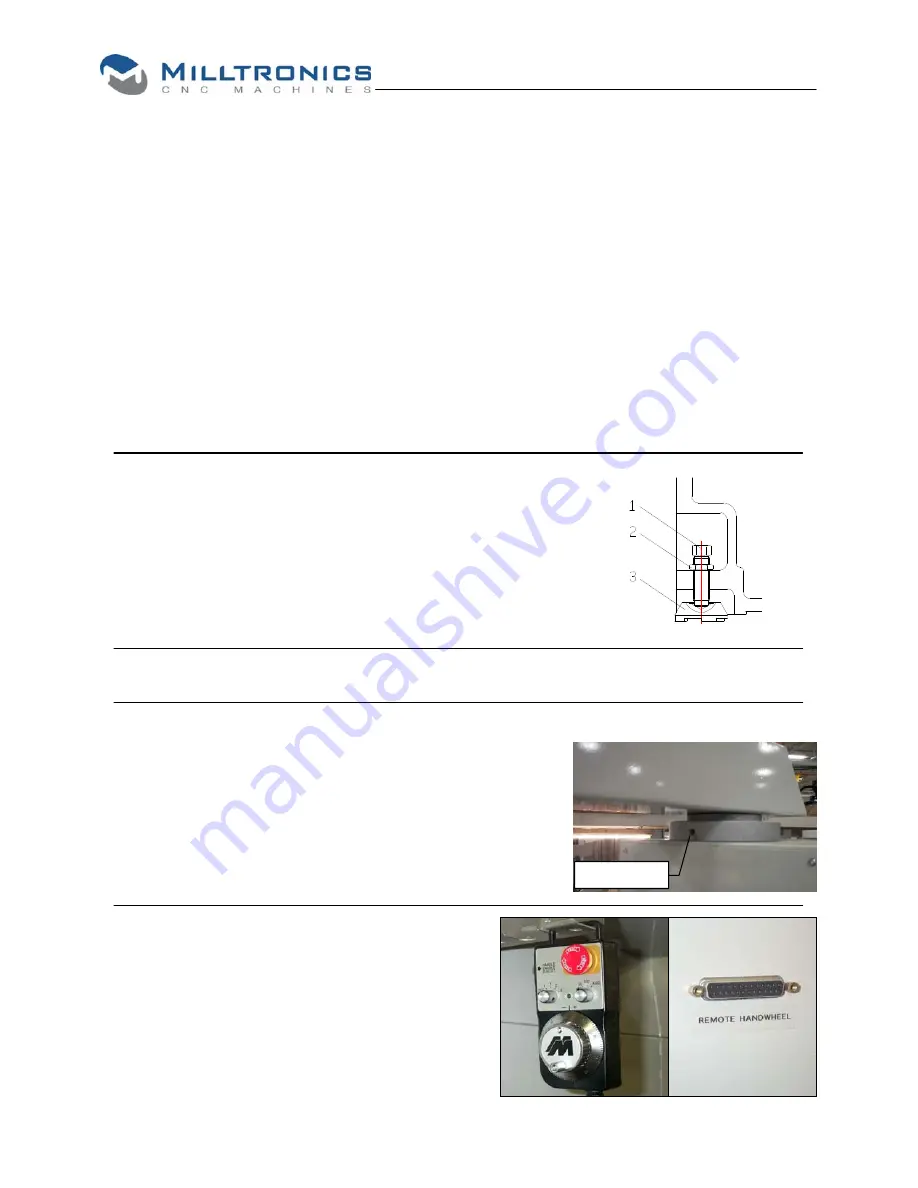
The leveling bolts (1) are already installed on the machine.
Locate the leveling pads (3), and slide them under the bolts.
Remove the various shipping brackets installed on the doors and sliding console.
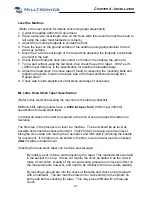
On models equipped with a swivel pendant, the swivel is
locked in position for shipping. Loosen and remove the
first set screw (locking screw) located at the rear of the
swivel mount, then back out the second one until the
swivel operates freely. Replace the screw that was
removed. No adjustment is required for the stop screw
located in front.
Set screws
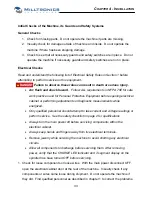
Connect the remote hand controller (if
equipped) cable into the 25-pin “D-sub”
connector to the right side of the operator
panel.
Содержание ML Series
Страница 2: ......
Страница 4: ......
Страница 6: ......
Страница 20: ......
Страница 23: ...CHAPTER 2 SPECIFICATION ML14 26 Series Machine Layout 17 ...
Страница 24: ...ML35 40 Series Machine Layouts ML35 Series ML40 Series 18 ...
Страница 33: ...CHAPTER 3 SITE PREPARATION 27 ML22 ML26 Lifting device drawing ...
Страница 34: ......
Страница 74: ......
Страница 76: ......
Страница 78: ......
Страница 80: ......
Страница 82: ......
Страница 83: ......