.
A complete Parts List is available at www.MillerWelds.com
OM-264 267 Page 15
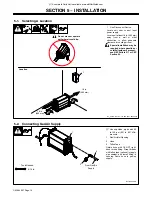
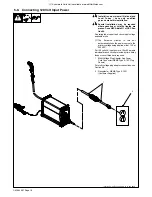
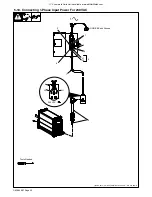
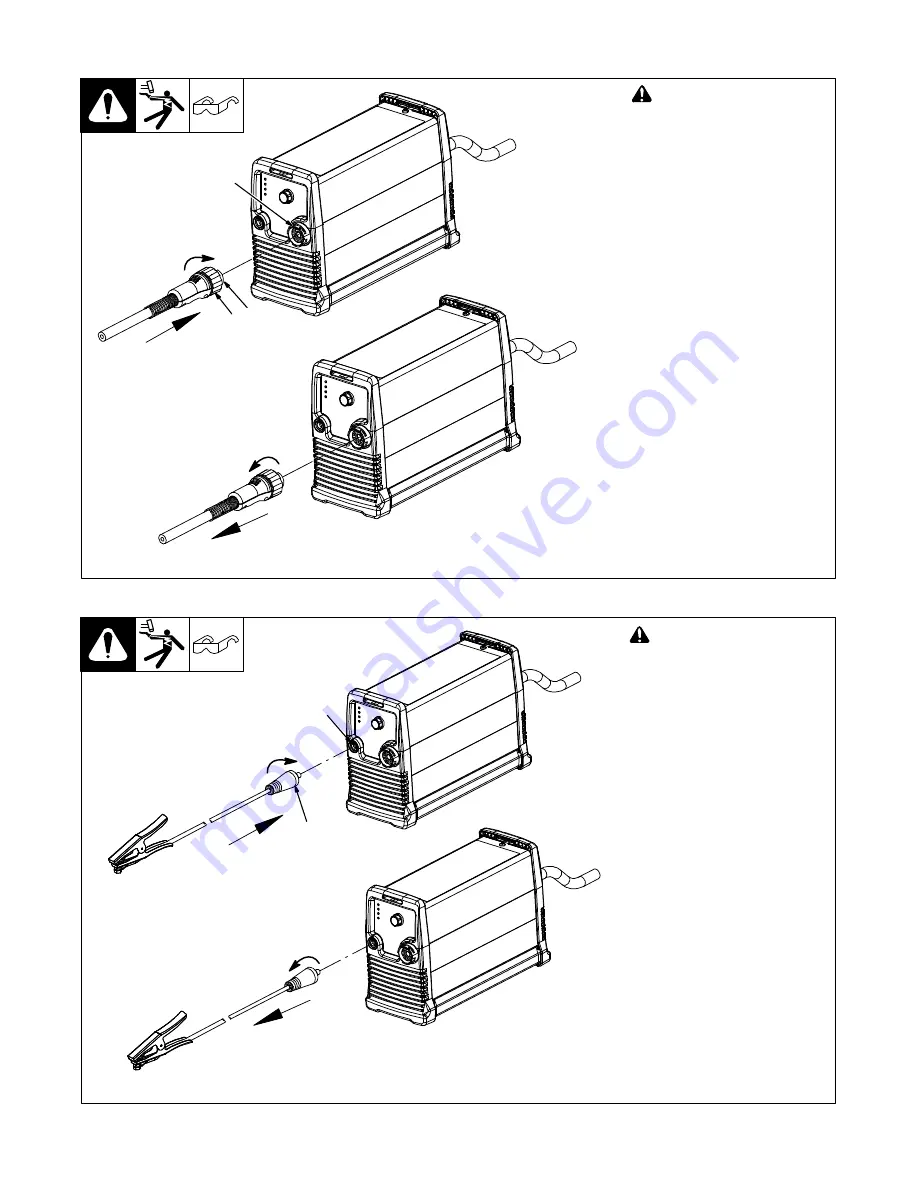
5-3. Connecting And Disconnecting Torch
!
Turn off power source and
disconnect input power.
1
Torch Connector
2
Quick Connect Collar
3
Receptacle
To connect torch:
Align torch connector key with
receptacle keyway, and insert into
receptacle. Rotate collar until it
firmly snaps into the locked
position.
To disconnect torch:
Rotate collar to release torch
connector from receptacle and pull
torch connector away from unit.
Ref. 264 954-B
2 1
3
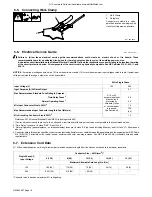
5-4. Connecting And Disconnecting Work Cable
Ref. 264 954-B / Ref. 803 475-G
!
Turn off power source and
disconnect input power.
1
Work Cable Plug
2
Work Cable Receptacle
To connect plug, align key with
receptacle keyway and insert into
receptacle. Rotate plug clockwise
(hand tight only) 1/4 turn to secure in
receptacle.
To disconnect plug, rotate counter-
clockwise until key aligns with key-
way and pull plug from receptacle.
2
1
Содержание XT40 Torch
Страница 23: ...A complete Parts List is available at www MillerWelds com OM 264 267 Page 19 Notes...
Страница 40: ...OM 264 267 Page 36 SECTION 9 ELECTRICAL DIAGRAM Figure 9 1 Circuit Diagram For Spectrum 625 X TREME...
Страница 41: ...OM 264 267 Page 37 264 143 A...
Страница 42: ...OM 264 267 Page 38 Figure 9 2 Circuit Diagram For Spectrum 625 X TREME CNC...
Страница 43: ...OM 264 267 Page 39 265 480 A...
Страница 48: ...Notes...
Страница 50: ...Notes Work like a Pro Pros weld and cut safely Read the safety rules at the beginning of this manual...


