background image

IMPORTANT SAFETY INSTRUCTIONS

WARNING

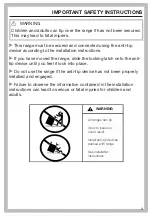
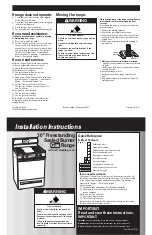
Children and adults can tip over the range if has not been secured.
This may lead to fatal injuries.

 

This range must be secured and connected using the anti-tip

device according to the installation instructions.

 

If you have moved the range, slide the locking latch onto the anti-

tip device until you feel it lock into place.

 

Do not use the range if the anti-tip device has not been properly

installed and engaged.

 

Failure to observe the information contained in the installation

instructions can lead to serious or fatal injuries for children and
adults.

All ranges can tip

Injury to persons 
could result

Install anti-tip devices 
packed with range

See installation 
instructions

WARNING

3

Содержание HR 1954-3 DF

Страница 1: ...Operating Instructions 48 Inch Dual Fuel Range Speed Oven and Gourmet Warming Drawer To prevent accidents and machine damage read these instructions before installation or use en US CA M Nr 11 919 070 ...

Страница 2: ...t or tamper with the safety interlocks b Do not place any object between the oven front face and the door or allow soil or cleaner residue to accumulate on sealing surfaces c Do not operate the oven if it is damaged It is particularly important that the oven door close properly and that there is no damage to the 1 Door bent 2 hinges and latches broken or loosened 3 door seals and sealing surfaces ...

Страница 3: ... moved the range slide the locking latch onto the anti tip device until you feel it lock into place Do not use the range if the anti tip device has not been properly installed and engaged Failure to observe the information contained in the installation instructions can lead to serious or fatal injuries for children and adults All ranges can tip Injury to persons could result Install anti tip devic...

Страница 4: ...t touch any electric switches Do not use any phones inside your building Immediately call your gas supplier from a neighbor s phone Follow the gas supplier s instructions If you are unable to reach your gas provider call the fire department Installation and service must be performed by a qualified installer qualified service agency or your gas provider In Massachusetts installation must be perform...

Страница 5: ... Selecting a menu option 34 Scrolling 34 Exiting a menu 34 Changing a value or setting 34 Changing a setting in a list 34 Entering numbers with the roller 34 Entering numbers using the numerical keypad 34 Changing the setting with a segment bar 34 Entering letters 35 Displaying the context menu 35 Moving entries 35 Displaying the pull down menu 35 Displaying Help 35 Activating MobileStart 35 Featu...

Страница 6: ... the temperature and core temperature 58 Changing the microwave power level 58 Setting additional durations 58 Changing set durations 59 Deleting the set cooking durations 59 Interrupting a cooking process in the Microwave operating mode 59 Canceling a cooking program 59 Preheating the oven 60 Booster 60 Preheat 61 Crisp function 62 Changing the operating mode 62 Settings 63 Settings overview 63 O...

Страница 7: ...5 Using the Alarm function 75 Using the Timer function 76 Main and submenus 77 Microwave operation 79 How it works 79 Suitable dishware 79 Suitable dishware 80 Unsuitable dishware 82 Testing dishware 83 Cover 84 Quick Microwave 85 Automatic Programs 86 Categories 86 Using automatic programs 86 Usage notes 86 Search 87 Special Modes 88 Defrost 89 Dehydrate 92 Reheat 93 Warm up Cookware 96 Proof 96 ...

Страница 8: ... modes 117 Cleaning and care of the drawer 118 Cleaning and care of the oven 120 Unsuitable cleaning agents 120 Removing normal soiling 121 Removing stubborn soiling 122 Lowering the browning broiling element 123 Frequently Asked Questions 124 Customer Service 130 Contact in the event of a fault 130 Appliance warranty and product registration 130 Caring for the environment 131 Declaration of confo...

Страница 9: ...ctions before installing or using the oven for the first time Only use the appliance for its intended purpose Keep these operating instructions in a safe place and pass them on to any future user Read and follow the specific PRECAUTIONS TO AVOID POSSIBLE EXPOSURE TO EXCESSIVE MICROWAVE ENERGY found at the beginning of this manual Only use the appliance for its intended purpose Install or locate th...

Страница 10: ...instructions before using the range for the first time To prevent accidents and damage to the appliance always observe both the installation instructions and operating instructions Both documents contain important information about installation safety use and maintenance Miele cannot be held liable for damage occurring as a result of non compliance with the instructions Keep these installation ins...

Страница 11: ... to prepare food and keep it warm Any other use is not permitted Risk of Fire Do not use this oven to store or dry combustible materials Persons who lack physical sensory or mental abilities or experience with the appliance should not use it without supervision or instruction by a responsible person The oven compartment is equipped with special bulbs to cope with particular conditions e g temperat...

Страница 12: ...hildren s skin is far more sensitive to high temperatures than that of adults External parts of the oven such as the door glass control panel and the vent become quite hot Do not let children touch the oven when it is in operation Risk of injury from the open door The oven door can support a maximum weight of 17 5 lbs 8 kg Children could injure themselves on an open door Do not let children sit on...

Страница 13: ...ectrical installation and in this Miele product must also be maintained in isolated operation or in operation that is not synchronized with the grid power supply or these measures must be replaced by equivalent measures in the installation As described for example in the current version of VDE AR E 2510 2 Operating a damaged oven can result in microwave leakage and present a hazard to the user Do ...

Страница 14: ...or the plug if present is removed from the outlet To do this pull the plug not the cord Shut off the gas supply and disconnect the range from the gas supply Installation and maintenance of the gas connection must be performed by qualified installers service agencies or gas providers Do not use a power strip or extension cord to connect the range to electricity These are a fire hazard and do not gu...

Страница 15: ...ecome hot enough to cause burns External parts of the oven such as the door glass vents and the control panel can become hot During and after use do not touch or let clothing or other flammable materials come into contact with heating elements or interior surfaces of the oven until they have had sufficient time to cool Do not let food sit in the oven for an extended period of time before or after ...

Страница 16: ...nd overheating of the oven WARNING NEVER use this appliance as storage space Doing so may result in carbon monoxide poisoning and overheating of the oven WARNING NEVER cover any slots holes or openings in the oven bottom or cover an entire rack with materials such as aluminum foil Doing so blocks air flow through the oven and may cause carbon monoxide poisoning Aluminum foil linings may also trap ...

Страница 17: ...r attempt to put out oil or fat fires with water Turn the oven off and extinguish the flames by leaving the door closed Broiling food for excessively long cooking durations can cause it to dry out with the risk of catching fire Do not exceed the recommended cooking durations Please be aware that durations when using microwave power are often considerably shorter when cooking reheating and defrosti...

Страница 18: ...the oven Always cover food that is left in the oven to keep warm A buildup of heat can cause damage to the oven Never line the floor of the oven with aluminum foil or oven liners If you wish to place dishware on the floor of the oven during the cooking process or place dishware on the floor of the oven to heat it up you can do so but only with the Convection Bake Convection Roast operating mode wi...

Страница 19: ... opens automatically Stir liquids well before heating or cooking After heating wait at least 20 seconds before removing the container from the oven In addition you can place a glass rod or similar item if available in the container during the heating process Risk of injury caused by hot food When you heat food up the heat is created directly in the food itself For this reason the dishware will rem...

Страница 20: ...rating mode Food with a thick skin or peel such as tomatoes sausage potatoes and eggplant can burst when heated or cooked Pierce or score the skin of these foods several times to allow steam to escape Do not use a thermometer containing mercury or liquid as these are not suitable for use with very high temperatures and break very easily Only use the Miele probe supplied with the appliance to measu...

Страница 21: ...nufacturer s instructions Fire hazard due to containers made of flammable materials Plastic disposable containers must meet the requirements specified for dishware in the section on microwave operation Do not leave the oven unattended when heating or cooking food in disposable containers made of plastic paper or other flammable materials Heat retaining bags usually contain a thin layer of aluminum...

Страница 22: ...ximum load capacity of the telescopic drawer rails is 55 lbs 25 kg If you overload the warming drawer or lean stand on the drawer when it is open you will damage the rails The underside of the warming drawer gets hot when the appliance is in use Be careful not to touch it when the drawer is open Liquids that get inside the warming drawer can cause the appliance to short circuit Open and close a lo...

Страница 23: ...er for cleaning Scratches on the door glass can cause the glass to break Do not use abrasive cleaners hard sponges brushes or sharp metal tools to clean the door glass Try to prevent the interior walls being splashed with food containing salt If this does happen wipe it away thoroughly to avoid corrosion to stainless steel surfaces inside the oven compartment In warm moist environments there is a ...

Страница 24: ...broiling operating modes Do not store the probe in the oven compartment when it is not being used Do not clean the non slip mat from the Gourmet Warming Drawer in the dishwasher or washing machine Never place it in the oven to dry KEEP THE OPERATING AND INSTALLATION INSTRUCTIONS IN A SAFE PLACE AND REVIEW THEM PERIODICALLY 24 ...

Страница 25: ... 8 burners power burners and extra large burners HR 1955 3 with 6 burners power burners extra large burners and grill HR 1956 3 with 6 burners power burners extra large burners and griddle plate b Speed oven Controls for the speed oven on the left hand side c Gourmet warming drawer The drawer can be opened and closed by pressing lightly on the drawer front d Oven Controls for the oven on the right...

Страница 26: ... front Open and close the drawer by pressing lightly on the drawer front Push2open c Non slip liner d Extra data plate For connecting the drawer to your WiFi e Wireless precision probe You should only use the wireless precision probe in the oven it is not designed for use in the speed oven ...

Страница 27: ...5x 3 a Controls b Browning Broiling element c Connection socket for the wired food probe d Convection fan with heating element e 3 shelf levels for the glass tray and wire rack f Extra data plate For connecting the oven to your WiFi g Door ...

Страница 28: ...tton For setting the temperature e Duration sensor button For setting a specific duration or reverting to continuous operation f Indicators for the selected duration 1 h 1 hour 2 h 2 hours 3 h 3 hours 4 h 4 hours No display Continuous operation g Temperature display segment bar h Low Temperature operating mode i Keep Warm operating mode j Warm Dishes Plates operating mode k Warm Cups Glasses opera...

Страница 29: ...ning on the oven interior lighting and the display when approached and to dismiss the audible signal when movement is detected e Touch display For displaying information and for operation f Back sensor button To go back a step g Timer sensor button To activate or deactivate timers or alarms h Light sensor button For switching the oven interior lighting on and off i Lift Panel sensor button For rai...

Страница 30: ...e proximity sensor is located under the touch display next to the Back sensor button The proximity sensor detects when you approach the touch display e g with your hand or body If you have activated the corresponding settings you can turn on the oven interior lighting turn on the oven or acknowledge the audible signals see Settings MotionReact MotionReact ...

Страница 31: ...g process runs with the maximum power level level 7 and a cooking duration of 1 minute see section Quick Microwave Touching the sensor button repeatedly increases the cooking duration in increments This function can only be used when no other cooking processes are in use Back Depending on which menu you are in this will take you back a level or back to the main menu Timer If a menu appears on the ...

Страница 32: ... the display If you tap a menu name in the header the display will switch to that menu To switch to the start screen tap The time of day is shown on the right of the header You can set the time of day by tapping the display Additional symbols may also appear e g SuperVision At the top of the header there is an orange line where you can drag down the pull down menu This allows you to turn settings ...

Страница 33: ... there is not enough space on the display Alarm Timer Some settings e g display brightness and signal tone volume are selected using a segment bar The system lock or sensor lock is on see Settings Safety The controls are locked Core temperature when using the probe Remote control only appears if you are in the Miele home system and have selected the Remote Control On setting SuperVision only appea...

Страница 34: ... setting The setting is now saved This will take you back to the previous menu Entering numbers with the roller Swipe the roller up or down until the desired value is displayed in the center Confirm with OK The changed number is now saved Entering numbers using the numerical keypad Tap on the value that is in the middle of the numerical keypad The numerical keypad appears Tap the required numbers ...

Страница 35: ...ng a cooking program you can turn settings such as Booster or Preheat and the WiFi function on or off Use the orange line under the header to drag the pull down menu down Select the setting you want to change Active settings are highlighted in orange Depending on the selected color scheme inactive settings are highlighted either in black or white see Settings Display To close the pull down menu dr...

Страница 36: ... using the cooktop and oven functions Precision probe Screws for securing the oven to the cabinet niche Anti tip device including screws for securing the range Various accessories Standard and optional accessories Your drawer is equipped with a non slip liner that ensures that the dishware stands securely This oven is supplied with a glass tray a wire rack and a food probe All the accessories list...

Страница 37: ...he possible creation of sparks Do not use the wire rack for cooking processes with the Microwave operating mode Do not place the wire rack on the oven floor Place it on one of the shelf levels Using the wire rack The wire rack has non tip safety notches These prevent it being pulled right out when it only needs to be pulled out partially If you insert the wire rack the wrong way round the non tip ...

Страница 38: ...round baking pan HBF 27 1 is suitable for cooking pizzas flat cakes sweet and savory tarts baked desserts flat bread and can also be used for frozen cakes The perforated round baking pan HBFP 27 1 has been specially developed for baked goods made from fresh yeast dough and for baking bread and rolls The tiny perforations assist in browning the underside of baked goods They can also be used for deh...

Страница 39: ...ack in shelf level 1 and place the Gourmet Casserole Dish on the wire rack The surface of the Gourmet Casserole Dishes has a non stick coating and is suitable for induction cooktops Gourmet Casserole Dishes are available in different depths The width and the height are the same Suitable lids are available separately Please quote the model designation when ordering Depth 8 1 2 22 cm Depth 13 3 4 35...

Страница 40: ... will switch itself off automatically after a certain time has elapsed following the last operation depending on the operating mode and temperature selected PerfectClean treated surfaces PerfectClean surfaces have very good non stick properties making them exceptionally easy to clean Food can be easily removed from these surfaces Soiling from baking and roasting can also be easily removed from the...

Страница 41: ...ing processes that are in progress in each component Stop cooking programs that are in progress Connecting the components to your WiFi network will increase energy consumption even when the range is turned off Make sure that the signal of your WiFi network is sufficiently strong in the place where your range is installed Availability of the WiFi connection The WiFi connection shares a frequency ra...

Страница 42: ... on the appliance s data plate Data plate The data plate for connecting the drawer to your WiFi is located here Connecting the drawer via the Miele App Start registering the appliance in the Miele App Follow the login steps You are then requested to activate the WiFi on the drawer Turn the drawer off Press and hold the Duration sensor button At the same time touch the Remote sensor button 2 h will...

Страница 43: ...eat the steps above Tip If your WiFi router does not support WPS please connect the drawer via the Miele App Disconnecting the WiFi connection reset to factory settings To set up a new WiFi connection the existing WiFi connection must be disconnected Turn the drawer off Press and hold the Temperature sensor button At the same time touch the Remote sensor button With an existing WiFi connection 2 h...

Страница 44: ...on repeatedly until the symbol lights up Touch the Temperature sensor button repeatedly until the segment on the far right hand side of the temperature display lights up Touch the Duration sensor button repeatedly until 2 h lights up Close the drawer The drawer will switch itself off automatically after two hours The drawer is equipped with a contact switch This ensures that the heating element an...

Страница 45: ...ocation Select the required location Setting up Miele home Set up Miele home will appear on the display To set up Miele home immediately select Continue To set it up at a later date select Skip See Settings Miele home for information on setting up at a later date To set up Miele home immediately select the connection method you want to use You will then be guided by the display and the Miele app S...

Страница 46: ...n the oven cavity Turn the oven on using the On Off button The main menu will appear Select Operating Modes Select Convection Bake 350 F 160 C will appear as a recommended value The oven heating lighting and cooling fan will turn on Set the highest possible temperature Confirm with OK Heat up the oven for at least an hour After at least an hour turn the oven off with the On Off button Cleaning the...

Страница 47: ...o not place anything over the sensor controls or indicators The drawer is operated via the sensor buttons and the indicators Tap the On Off button The last setting selected is automatically activated and displayed the next time the drawer is turned on Touch the Menu sensor button repeatedly until the required operating mode lights up Touch the Temperature sensor button repeatedly until the segment...

Страница 48: ...ing operating modes are available Warm Cups Glasses Warm Dishes Plates Keep Warm Slow Roasting Danger of injury caused by hot dishware Dishware will take longer to warm up but can get very hot You could burn yourself on the hot dishware Use pot holders when removing hot dishware from the drawer The last operating mode selected is automatically activated and displayed the next time the drawer is tu...

Страница 49: ...re lights up in the temperature display The last temperature selected is automatically activated and displayed the next time the drawer is turned on exception Low Temperature Temperature settings Temperature display Temperature F C 105 40 140 60 150 65 150 65 115 45 150 65 160 70 160 70 120 50 155 70 170 75 170 75 130 55 170 75 175 80 175 80 140 60 175 80 185 85 185 85 Approximate temperatures mea...

Страница 50: ...ensor button a fifth time Keeping food warm Health risk caused by using too low a temperature Bacteria may develop in the food if the temperature used for keeping food warm is too low Only use the Keep Warm operating mode This operating mode is for keeping food warm which has just been cooked and is still hot It is not for reheating food that has gone cold Place the hot food in preheated dishware ...

Страница 51: ...er liquids and food with a high moisture content with a suitable lid or heat resistant foil This will prevent moisture escaping and condensing outside the dishware To avoid spilling the food do not overfill the dishware Freshly cooked food is hotter than food which is being kept warm Serve food which has been kept warm on preheated plates Foods begin to lose their nutrients during the cooking proc...

Страница 52: ...es Roasting Plates Yes Stew Pot Yes Fish strips Pan No Meat in a sauce Pot Yes Vegetables in sauce Pot Yes Goulash Pot Yes Mashed potatoes Pot Yes Menu Plates Yes Baked potatoes new potatoes Plate pot Yes Breaded cutlets Pan No Pancakes Plates No Pizza Plates No Boiled potatoes Pot Yes Sauce Pot Yes Strudel Plates No Warming bread loaf No Warming rolls No 52 ...

Страница 53: ...ensure that the maximum temperature 140 F 60 C is not exceeded Heated dishware cools down very quickly For that reason you should not remove it from the drawer until just before you need it Warming times Various factors will affect the warming times material and thickness of the dishware load size how the load is arranged temperature setting It is therefore not possible to state precise warming ti...

Страница 54: ... a guide 6 place settings Or one of the following arrangements 6 dinner plates 10 1 4 26 cm 12 dinner plates 10 1 4 26 cm 6 deep soup plates 9 1 16 23 cm 18 deep soup plates 9 1 16 23 cm 6 dessert plates 7 1 2 19 cm 16 soup bowls 4 10 cm 1 oval platter 12 5 8 32 cm 6 dinner plates and 6 deep soup plates 10 1 4 26 cm 9 1 16 23 cm 1 serving bowl 6 5 16 16 cm 1 serving bowl 5 1 8 13 cm 6 pizza plates...

Страница 55: ... Yes with plate 00 30 Preparing yogurt Yogurt jars with lids 5 00 Keep Warm operating mode Food Dishware Cover dishware Temperature Duration h min Defrosting berries Bowl plate No 00 50 Dissolving gelatin Bowl No 00 15 Soaking rice pudding Pot Yes with lid 00 40 Melting chocolate Bowl No 00 20 Defrosting frozen vegetables Bowl No 1 00 55 ...

Страница 56: ...r than usual Activating the Sabbath Program The drawer must be turned off Press and hold the Duration sensor button Touch the On Off sensor button at the same time 1 h 2 h 3 h and 4 h will light up Touch the Menu sensor button repeatedly until the required indicator lights up Touch the Temperature sensor button repeatedly until the required indicator lights up Deactivating the Sabbath Program You ...

Страница 57: ...ocess for operating modes which do not use microwave power Touch Start to start the cooking process for operating modes which use microwave power The set values appear and the cooking duration counts down in the display for all operating modes If you have set a temperature you will see the temperature increasing An audible signal will sound when the set temperature is reached for the first time Th...

Страница 58: ...e food being placed in the oven and the start of cooking Fresh food can change color and even spoil When baking the cake mixture or dough can dry out and the raising agents can lose their effectiveness Select as short a time as possible until the start of the cooking process You have placed the food in the oven selected an operating mode and the required settings such as the temperature By enterin...

Страница 59: ...perating mode You can interrupt a cooking process when using the Microwave operating mode and pause the cooking duration While the cooking duration is counting down Stop appears in the bottom right of the display Select Stop The cooking process is interrupted and the cooking duration is paused Start is highlighted in green Select Start The cooking process resumes and the cooking duration continues...

Страница 60: ...Convection Bake Convection Roast and Surround operating modes cakes and pastries with a short cooking duration approx 30 minutes or less as well as delicate items e g sponge with the Surround operating mode without the Booster function Booster The Booster function is used to quickly preheat the oven This function is turned on as the factory default setting for the following operating modes Setting...

Страница 61: ...lace most dishes in the cold oven compartment to make use of the heat produced during the preheating phase If you have set a cooking duration it will only start to count down when the target temperature is reached and you have placed the food in the oven Start the cooking program immediately without delaying the start time The Preheat function is not available with the Microwave operating mode Tur...

Страница 62: ...You want to turn on the Crisp function function for this cooking program Drag down the pull down menu Depending on the color scheme Crisp function is highlighted in either black or white Select Crisp function Crisp function is highlighted in orange Close the pull down menu The Crisp function function is turned on Changing the operating mode You can change to another operating mode during a cooking...

Страница 63: ...ng Clock type Analog Digital Clock format 24 h 12 h am pm Set Date Lighting On On for 15 seconds Off Start screen Main menu Operating modes Automatic Programs Special Modes Favorites MyMiele Display Brightness Color scheme Bright Dark QuickTouch On Off Volume Buzzer Tones Keypad Tone Welcome Melody On Off Factory default 63 ...

Страница 64: ...mperatures Recommended power levels Cooling fan run on Time controlled Temperature controlled MotionReact Switch the light on during cooking program always on Off Switch the appliance on On Off Acknowledge buzzer On Off Safety System Lock On Off Sensor Lock On Off Miele home Activate Deactivate Connection status Set up again Reset Set up Remote Control On Off Factory default 64 ...

Страница 65: ...t Display this Appliance Buzzer Tones RemoteUpdate On Off Electrical version 208V 60Hz 220V 60Hz 240V 60Hz Calibrate temperature Software version Legal information Open Source Licenses Showroom Program Demo Mode On Off Factory default Appliance settings Favorites MyMiele Recommended power levels Recommended temperatures Factory default 65 ...

Страница 66: ...ay and the proximity sensor will automatically detect when you approach the display If you also select the Display QuickTouch Off setting the oven has to be turned on before it can be used Off The display appears dark to save energy The oven has to be turned on before you can use it Night dimming To save energy the time only shows on the display between 5 00 a m and 11 00 p m The display remains d...

Страница 67: ...r on the start screen see MyMiele This new start screen will then appear when the oven is next turned on Select the Back sensor button or follow the path in the header to get to the main menu Display Brightness The display brightness is represented by a segment bar Maximum brightness Minimum brightness Color scheme Choose between a light or dark color scheme for the display Bright The display has ...

Страница 68: ...or pounds ounces lb oz Temperature You can set the temperature in Celsius C or Fahrenheit F Quick Microwave For an immediate start of the microwave a microwave power level of 7 and a cooking duration of 1 minute are preset Power Level You can select a microwave power level from 1 through 7 Duration The maximum cooking duration that can be set depends on the microwave power level selected Power lev...

Страница 69: ...oven modes will appear on the display Select the operating mode you want to use The recommended temperature will appear together with the range within which it can be changed Change the recommended temperature Confirm with OK Changing the recommended temperature also affects the corresponding operating mode which uses microwave power Recommended power levels If you often cook with microwave power ...

Страница 70: ...ity sensor to respond even when the oven is turned off select the Display QuickTouch On setting Switch the light on during cooking program As soon as you approach the touch display during a cooking process the oven interior lighting turns on The oven interior lighting automatically turns off again after 15 seconds always on As soon as you approach the touch display the oven interior lighting turns...

Страница 71: ...ons react to touch as normal Miele home The oven is a Miele home compatible appliance with SuperVision functionality Your oven is equipped with a WiFi communication module and is suitable for wireless communication There are a number of ways of connecting your oven to your WiFi network We recommend connecting your oven to your WiFi network using the Miele app or via WPS Activate This setting is on...

Страница 72: ...obileStart The Remote sensor button lights up You can operate your oven remotely with the Miele app Directly operating on the oven takes priority over operating it via the remote control function on the app You can use MobileStart as long as the Remote sensor button is lit up SuperVision The oven is a Miele home compatible appliance with SuperVision functionality for monitoring other domestic appl...

Страница 73: ...ly If you do not install an update you can continue to use your oven as usual However Miele recommends installing updates Activating deactivating The RemoteUpdate function is activated as standard Available updates will be downloaded automatically but will only be installed if you initiate installation manually Deactivate RemoteUpdate if you do not want any updates to be downloaded automatically R...

Страница 74: ...d an overview of the integrated open source components under Open Source Licenses Confirm with OK Showroom Program This function enables the oven to be demonstrated in showrooms without heating up Do not activate this setting for domestic use Demo Mode If you have Demo mode activated Demo mode is active The appliance will not heat up will appear when you turn on the oven On Touch OK for at least 4...

Страница 75: ...If you are cooking at the same time or if you are in a different menu the alarm time and will appear in the top right hand corner of the display At the specified time for the alarm will flash on the display next to the time and an audible signal will sound Select the Timer sensor button or the set alarm time on the display The audible signal will stop and the symbols on the display will go out Cha...

Страница 76: ... down on the display and appears instead of the time of day If you are cooking at the same time or if you are in a different menu the timer duration and will appear in the top right hand corner of the display At the end of the timer duration will flash the time will start counting up and an audible signal will sound Select the Timer sensor button or the required timer on the display The audible si...

Страница 77: ...Convection Bake Convection Roast 350 F 160 C 85 475 F 30 250 C Surround 350 F 180 C 85 475 F 30 250 C Microwave 7 1 7 Combination Modes Combi Conv Bake Combi Conv Roast 3 1 3 Combi Conv Broil 3 1 3 Combi Broil 3 3 1 3 1 3 Combi Auto Roast 3 1 3 Intensive 350 F 170 C 125 450 F 50 220 C Auto Roast 350 F 160 C 200 450 F 100 230 C Bake 350 F 190 C 200 400 F 100 200 C Maxi Broil 3 1 3 Convection Broil ...

Страница 78: ... Dehydrate 150 F 60 C 85 200 F 30 70 C Reheat Warm up Cookware 175 F 80 C 175 225 F 50 100 C Proof 100 F 35 C 85 125 F 30 50 C Slow Roasting 200 F 90 C 175 250 F 80 120 C Sabbath Program 350 F 180 C 350 F 180 C Keep warm 175 F 75 C 125 200 F 60 90 C MyMiele Favorites Settings 78 ...

Страница 79: ...shware being used Microwaves can pass through porcelain glass cardboard and plastics but not metal Therefore do not use metal containers or dishware that contains metal Metal reflects the microwaves which can create sparks and the microwaves are not absorbed by the metal Danger of injury from increased pressure in sealed containers or bottles Pressure can build up during reheating in sealed contai...

Страница 80: ...t holders when using stoneware Plastic dishware and disposable plastic containers with the Microwave operating mode Tip To protect the environment avoid the use of disposable containers Plastic dishware must be heat resistant to a minimum of 230 F 110 C Otherwise the plastic may melt and fuse with the food Only use plastic dishware with the Microwave operating mode Do not use plastic dishware with...

Страница 81: ...nv Broil operating modes as well as for operating modes which do not use microwave power placed on one level Metal baking tins for baking with the Combi Auto Roast Combi Conv Bake Combi Conv Roast Combi Broil and Combi Conv Broil operating modes as well as for operating modes which do not use microwave power Aluminum foil trays without lids for defrosting and reheating ready meals The food is only...

Страница 82: ...oil Exception for even defrosting reheating or cooking of unevenly shaped cuts of meat e g poultry small pieces of aluminum foil may be used to cover thin parts for the last few minutes of the process Metal clips or plastic or paper ties containing wire Plastic containers where the aluminum lid has not been completely removed Crystal glass Utensils and dishware with metallic decoration e g gold ri...

Страница 83: ... are suitable for use Place the empty dishware in the middle of the glass tray and insert the tray in shelf level 1 Close the door Select the Microwave operating mode Set the highest microwave power level level 7 and a cooking duration of 30 seconds Start the process Observe the dishware during the entire duration Immediately open the door if there are sparks or crackling noises If there are spark...

Страница 84: ...he cover can withstand temperatures of up to 230 F 110 C At higher temperatures e g in the Maxi Broil or Convection Bake Convection Roast functions the plastic may distort and fuse with the food Only use a cover for the Microwave operating mode The cover should not form a seal with the container If the container has a narrow diameter the steam may not be able to escape The cover could get too hot ...

Страница 85: ... microwave power level and the cooking duration The maximum cooking duration that can be set depends on the microwave power level selected see section Settings Quick Microwave Select the Minute sensor button Touching the sensor button repeatedly increases the cooking duration in increments The time left will appear in the display You can interrupt the cooking process at any time with Stop or cance...

Страница 86: ...food depending on the cooking program Usage notes After cooking allow the oven compartment to cool down to room temperature again before starting a automatic program Some automatic programs require a preheating phase before food can be placed in the oven A prompt will appear on the display indicating when this needs to be done Some automatic programs require liquid to be added during the cooking p...

Страница 87: ...on the display Select Search Use the keyboard to type in the search text e g Bread The number of hits will be shown in the footer If no match is found or if there are more than 40 matches the hits field will be deactivated and you will need to change the search text Select XX hits The categories and automatic programs found will then appear Select the automatic program you want or the category and...

Страница 88: ...rn The maximum cooking duration that can be set is 4 minutes The microwave power level is set and cannot be modified see section Settings Popcorn Select Special Modes Select Popcorn The time left will appear in the display You can interrupt the cooking process at any time with Stop or cancel it by selecting the Back sensor button Disposable containers made out of paper or other flammable materials...

Страница 89: ...n food will not be lying in the defrosted liquid Meat poultry or fish does not need to be fully defrosted before cooking Defrost until the food has started to thaw The surface will then be sufficiently thawed to take herbs and seasoning Using the Defrost Special Mode Use the Defrost mode to gently defrost frozen food Only use dishware that is microwave safe Select Special Modes Select Defrost A li...

Страница 90: ...the nature of the food its initial temperature and the amount to be cooked Take note of the standing times Only use dishware that is microwave safe Select Operating Modes Select Microwave Depending on the type of food set the microwave power level and the defrosting duration specified in the chart In general you are advised to select the middle duration Place the food on the glass tray on shelf le...

Страница 91: ... g 2 4 6 5 10 Fruit cake 3 slices Approx 0 6 lb 300 g 2 6 8 10 15 Butter cake 3 slices Approx 0 6 lb 300 g 2 6 8 5 10 Cream cake 3 slices Approx 0 6 lb 300 g 1 4 4 30 5 10 Yeast rolls puff pastries 3 pieces Approx 0 6 lb 300 g 2 6 8 5 10 Microwave power level defrosting time standing time 1 Allow food to stand at room temperature This standing time allows the heat to spread evenly throughout the f...

Страница 92: ...ing dried on the glass tray at regular intervals The drying times are longer for whole or halved food Food for drying F C h Fruit 140 160 60 70 2 8 Vegetables 130 150 55 65 4 12 Mushrooms 115 125 45 50 5 10 Herbs 85 95 30 35 4 8 special mode operating mode temperature drying time special mode Dehydrate operating mode Surround When drying herbs always use the glass tray on shelf level 2 and use the...

Страница 93: ...eheat food or liquids in sealed containers or bottles Open containers beforehand and with baby bottles the screw top and teat must be removed Danger of injury caused by hot liquids When heating food and in particular liquids using the Microwave operating mode the boiling point may be reached without the typical bubbles being produced The liquid does not boil evenly throughout This boiling delay ca...

Страница 94: ...ation You could burn yourself on the heater elements oven cavity or accessories Condensation may accumulate on the bottom of the dishware Use pot holders when working in the hot oven cavity and when removing the dishware During the standing time the temperature is distributed evenly in the food After reheating allow the food to stand at room temperature for a few minutes to enable the heat to spre...

Страница 95: ...t room temperature This standing time allows the heat to spread evenly throughout the food 2 A boiling delay can be avoided by stirring liquids before reheating them After heating wait at least 20 seconds before removing the container from the oven In addition you can place a glass rod or similar item if available in the container during the heating process 3 The durations apply to food with an in...

Страница 96: ...uld burn yourself on the heater elements oven cavity or accessories Condensation may accumulate on the bottom of the dishware Use pot holders when removing dishware Proof This program is designed specifically for proofing dough Select Special Modes Select Proof If necessary adjust the recommended temperature and set the cooking duration Follow the instructions on the display Keep warm You can keep...

Страница 97: ...d succulent results Only use lean meat which has been correctly seasoned and trimmed Bones should be removed before cooking For searing use a suitable cooking oil or fat that can withstand high temperatures e g clarified butter vegetable oil Do not cover meat during the cooking process Cooking takes approx 2 4 hours depending on the weight and size of the meat and how well you want it cooked As so...

Страница 98: ... fully in the center of the meat Close the door At the end of the program Ready will appear on the display and an audible signal will sound Using the Surround operating mode Use the glass tray with the wire rack placed on top of it Turn off the Booster function for the preheating phase Place the glass tray with a wire rack on shelf level 1 Select Operating Modes Select the Surround operating mode ...

Страница 99: ...5 115 min 130 140 min 113 119 F 45 48 C 129 135 F 54 57 C 145 151 F 63 66 C Pork tenderloin approx 0 75 lbs 350 g 70 90 min 145 156 F 63 69 C Gammon joint approx 2 2 lbs 1 kg 140 160 min 145 151 F 63 66 C Veal tenderloin approx 2 2 lbs 1 kg pink medium well done 45 55 min 75 85 min 90 100 min 113 119 F 45 48 C 129 135 F 54 57 C 145 151 F 63 66 C Saddle of veal approx 2 2 lbs 1 kg pink medium well ...

Страница 100: ...conds after you have closed the door The oven interior lighting will remain on during the entire cooking period Sabbath Program or Yom Tov and the set temperature will appear permanently on the display The time of day will not appear The proximity sensor will not respond and neither will any of the sensor buttons except for the On Off button The message Do not open the door will appear After aroun...

Страница 101: ...he Microwave operating mode If possible use the probe to monitor the temperature when cooking see Roasting Probe Set the core temperature fish at least 158 F 70 C poultry at least 185 F 85 C Tips Turn separate or stir the food several times Stir the food from the outside towards the middle as food heats more quickly from the outside Use only dishware that is suitable for use in a microwave and ove...

Страница 102: ...rozen 450 5 11 2 Cauliflower florets 500 6 10 2 Kohlrabi batons 500 3 8 2 Asparagus 500 5 8 2 Leeks 500 5 8 2 Leeks frozen 450 5 8 2 Peppers cut into strips 500 5 10 2 Beans green 500 4 12 2 Brussels sprouts 500 5 12 2 Brussels sprouts frozen 450 5 10 2 Mixed vegetables frozen 450 5 12 2 Weight cooking duration standing time 1 Allow food to stand at room temperature This standing time allows the h...

Страница 103: ...es The instructions are for a maximum of 5 jars with a capacity of 4 cups 0 5 l each Only use special jars which you can find in specialist dealers Convection Bake Bottling jars with a screw cap Microwave Microwave safe bottling jars with glass lids sealed with clear adhesive tape Only use undamaged jars and rubber rings Rinse the jars with hot water before canning and fill them up to a maximum of...

Страница 104: ...ture and time Using the Microwave operating mode Select the Microwave operating mode and microwave power level 6 Wait until bubbles rise evenly in the jars This takes about 3 minutes per jar With 5 jars therefore it takes 15 minutes Then reduce the microwave power level to prevent the contents from boiling over Canning fruit and vegetables Switch the oven off as soon as bubbles are visible in the ...

Страница 105: ...s not make a popping noise when opened dispose of the contents Frozen food ready meals Tips for cakes pizza and baguettes Bake cakes pizza and baguettes on parchment paper on the wire rack Use the lowest temperature recommended by the manufacturer Tips for French fries croquettes and similar items Bake these frozen products on parchment paper on the glass tray Use the lowest temperature recommende...

Страница 106: ...matic Programs Special Modes Favorites Confirm with OK The selected subitem and its respective symbol will appear in the list Proceed as described for more entries Only options that have not yet been selected are available for selection Deleting entries Select MyMiele Touch the entry you want to delete and keep your finger on it until the context menu appears Select Delete The entry will then be r...

Страница 107: ... and confirm the settings If you select the Preheat function use Add to add another cooking stage where you set a cooking duration Only then can you save or start the program All settings for the first cooking stage have now been set More cooking stages can be added for example if you would like to add another operating mode to follow the first If additional cooking stages are required select Add ...

Страница 108: ... want Confirm the message regarding which shelf level to use with OK The selected program will begin automatically right away or at the time set Use Info to display information such as how to place or turn the food depending on the cooking process At the end of the program select Close Changing cooking stages Cooking stages in an automatic program that have been saved under a different name cannot...

Страница 109: ...saved Confirm with OK The program has now been renamed Deleting a Favorite Select Favorites Touch the program you want to delete and keep your finger on it until the context menu appears Select Delete Confirm the query with Yes The program is deleted Go to Settings Factory default Favorites to delete all Favorites at the same time Moving Favorites Select Favorites Touch the program you want to mov...

Страница 110: ...osing a baking temperature higher than those recommended may reduce the cooking time but will lead to uneven browning and unsatisfactory cooking results Selecting the cooking duration Check whether the food is cooked shortly before the end of the specified cooking duration Stick a wooden skewer into the food If it comes out clean without any batter dough on it the food is done Notes on the operati...

Страница 111: ... Using Combi Conv Bake Use heat resistant baking tins suitable for microwave use see Microwave operation Suitable dishware such as heat resistant glass or ceramic dishes as these allow microwaves through them The Combi Conv Bake operating mode is particularly suitable for baking dough which requires a longer cooking duration such as rubbed in beaten mixtures and yeast recipes If you use this opera...

Страница 112: ...p 1 8 liter of water to the dish Do not add too much liquid during cooking as this will hinder the browning process Browning only occurs towards the end of the cooking duration Remove the lid about halfway through the cooking duration if you want a more intensive browning result At the end of the program take the food out of the oven cover it and leave to stand for about 10 minutes This helps reta...

Страница 113: ... automatically drops the temperature back down to the preselected cooking temperature continued roasting temperature For roasting use dishware with heat resistant handles such as an oven dish roasting pan terracotta dish or a heat resistant glass dish Place the wire rack with the food on shelf level 2 Using Combi Conv Roast or Combi Auto Roast These operating modes are not suitable for roasting de...

Страница 114: ...mpt you to use the probe You can also use the probe with Favorites and with the following operating modes Auto Roast Convection Roast Surround Microwave Combi Auto Roast Combi Conv Roast Important usage notes You can place the meat in a pot on the wire rack or on the glass tray depending on the operating mode selected The metal tip of the probe must be fully inserted into the center of the food so...

Страница 115: ...so delay the start of the cooking program to a later time Select Start at You can estimate approximately when the food will be ready as the duration of the cooking program is about the same as if you were cooking food without using the probe You cannot set Duration and Ready at because the total cooking duration is determined by when the set core temperature is reached Time left display If the tem...

Страница 116: ...al way To enhance the flavor season with a little salt You can also drizzle the fish with lemon juice It is generally best to broil on the wire rack To broil brush the wire rack with oil and then place the food on the wire rack Selecting the temperature Select the temperature for the Convection Broil and Combi Conv Broil operating modes As a general rule select the lower temperature given in the c...

Страница 117: ...n find an overview of all the operating modes with their recommended values in Main and submenus The plastic on the probe can melt at very high temperatures Do not use the probe when using the broiling operating modes Do not store the probe in the oven compartment when it is not being used If you use operating modes which use microwave power the cooking duration is shortened Using Convection Broil...

Страница 118: ...ld be discolored or damaged if unsuitable cleaning agents are used The oven front is particularly susceptible to damage from oven cleaners All surfaces are susceptible to scratching Scratches on glass can lead to breakage in some circumstances Remove all cleaning agent residues immediately Clean and dry the entire appliance after each use Allow the appliance to cool down first Unsuitable cleaning ...

Страница 119: ...esidues left by the cleaning agents using clean water This is particularly important on surfaces treated with PerfectClean enamel as cleaner residues can negatively affect their non stick properties After cleaning dry the surfaces with a soft cloth Cleaning the non slip mat Do not clean the non slip mat in the dishwasher or washing machine Never place it in the oven to dry Remove the non slip mat ...

Страница 120: ...ooled clean the oven cavity the inside of the door and the door seal Waiting too long to clean the oven will make it much more difficult to clean Operating a damaged oven can result in microwave leakage and present a hazard to the user Check the door and door seal for any sign of damage If any damage is seen the oven should not be used again Contact Miele Unsuitable cleaning agents To avoid damagi...

Страница 121: ... of water with some lemon juice in the oven and heat for a few minutes Removing normal soiling Moisture inside the oven can cause damage Do not use too much water on the cloth or sponge and do not let water or any other liquid find its way into any oven cavity openings Remove normal soiling immediately with warm water liquid dish soap and a clean sponge or a clean damp microfiber cloth Remove all ...

Страница 122: ...ean surfaces can be cleaned using Miele Oven Cleaner This cleaner must only be applied to cold surfaces If the oven spray gets into gaps and openings a strong odor is generated during subsequent cooking processes Do not spray the oven cleaner onto the ceiling of the oven Do not spray the oven cleaner into the gaps and openings of the oven cavity walls and rear wall Leave the oven cleaner to work a...

Страница 123: ...he oven cavity floor can be scratched by the falling nut Place a cloth or similar item over the oven floor to protect it Unscrew the nut Take care not to damage the browning broiling element Do not use force when lowering the browning broiling element Carefully lower the browning broiling element The liner on the ceiling of the oven can be damaged Do not use the abrasive side of the dishwashing sp...

Страница 124: ...igher temperature The air vents are covered Make sure that air can circulate freely The food is too hot The Keeping food warm operating mode is not selected Set the correct operating mode The temperature setting is too high Select a lower temperature The dishware is not hot enough The Warming dishware plates operating mode was not selected Set the correct operating mode The temperature setting is ...

Страница 125: ...le signal does not sound The audible signals are deactivated or set at too low a volume Turn on the audible signals or increase the volume with Settings Volume Buzzer Tones The oven does not heat up Demo mode is activated You can select menu options on the display and sensor buttons but the oven heating does not work Deactivate Demo mode by selecting Settings Showroom Program Demo Mode Off You can...

Страница 126: ...ake sure that the plug is correctly inserted in the socket and that the socket switch has been switched to on Check if the breaker has tripped If it has contact a qualified electrician or Miele Customer Service If the display does not respond there is a fault with the controls Touch and hold the On Off button until the display turns off and the oven restarts System Lock appears on the display when...

Страница 127: ...nd switch the cooling fan to a lower speed You can hear a noise af ter a cooking program The cooling fan remains turned on after a cooking program see Settings Cooling fan run on An abnormal sound can be heard when the oven is operating in mi crowave mode A metal dish has been used during a cooking process using microwave power Check if there are sparks caused by using metal dishes see Microwave o...

Страница 128: ...rial or color of the bakeware is not suitable for the operating mode selected Light colored shiny or thin walled pans are less suitable These reflect the oven s heat which means that the heat does not penetrate to the food effectively resulting in uneven or poor browning Dark matte baking pans are best for baking The food is not suffi ciently heated or is not cooked at the end of a set duration wh...

Страница 129: ...food When reheating food with different densities such as with menu cooking it is sensible to start with a low microwave power level and select a longer reheating duration The oven interior light ing turns off after a short time You have selected the Lighting On for 15 seconds setting If you want the oven interior lighting to remain on during the entire cooking program select the Lighting On setti...

Страница 130: ...nd of this document Please quote the model identifier and serial number of your appliance SN when contacting Miele Customer Service Both pieces of information can be found on the data plate This information is given on the data plate which is visible on the front frame of the oven when the door is fully open Appliance warranty and product registration You can register your product and or view the ...

Страница 131: ...for the proper functioning and safe use of the equipment Handling these materials improperly by disposing of them in your household waste can be harmful to your health and the environment Therefore please do not dispose of your old appliance with regular household waste and follow local regulations on proper disposal Consult with local authorities dealers or Miele in order to dispose of and recycl...

Страница 132: ... 481 GHz Maximum transmitting power 120 mW and the following WiFi module FCC ID 2AC7Z EK057 IC ID 21098 EK057 Frequency band 2 412 GHz 2 462 GHz Maximum transmitting power 0 2 W Compliance Statement This device complies with Part 15 of the FCC Rules and contains licence exempt transmitter s receiver s that comply with Innovation Science and Economic Development Canada s licence exempt RSS Standard...

Страница 133: ...respected In addition the integrated communication module contains software components which are distributed under open source licensing terms You can access these open source components along with the associated copyright notices copies of the valid licensing terms and any additional information locally via IP using a web browser http s ip address Licenses The liability and warranty arrangements ...

Страница 134: ......

Страница 135: ...en contacting Customer Service Canada Importer Miele Limited Headquarters and Miele Centre Customer Support Phone 888 99 MIELE 64353 info mieleusa com 161 Four Valley Drive Vaughan ON L4K 4V8 www miele ca Customer Care Centre Phone customercare miele ca 800 565 6435 905 532 2272 International Headquarters Miele Cie KG Carl Miele Straße 29 33332 Gütersloh Germany ...

Страница 136: ...M Nr 11 919 070 00 en US CA HR 1954 3 DF HR 1955 3 DF HR 1956 3 DF ...

Отзывы: