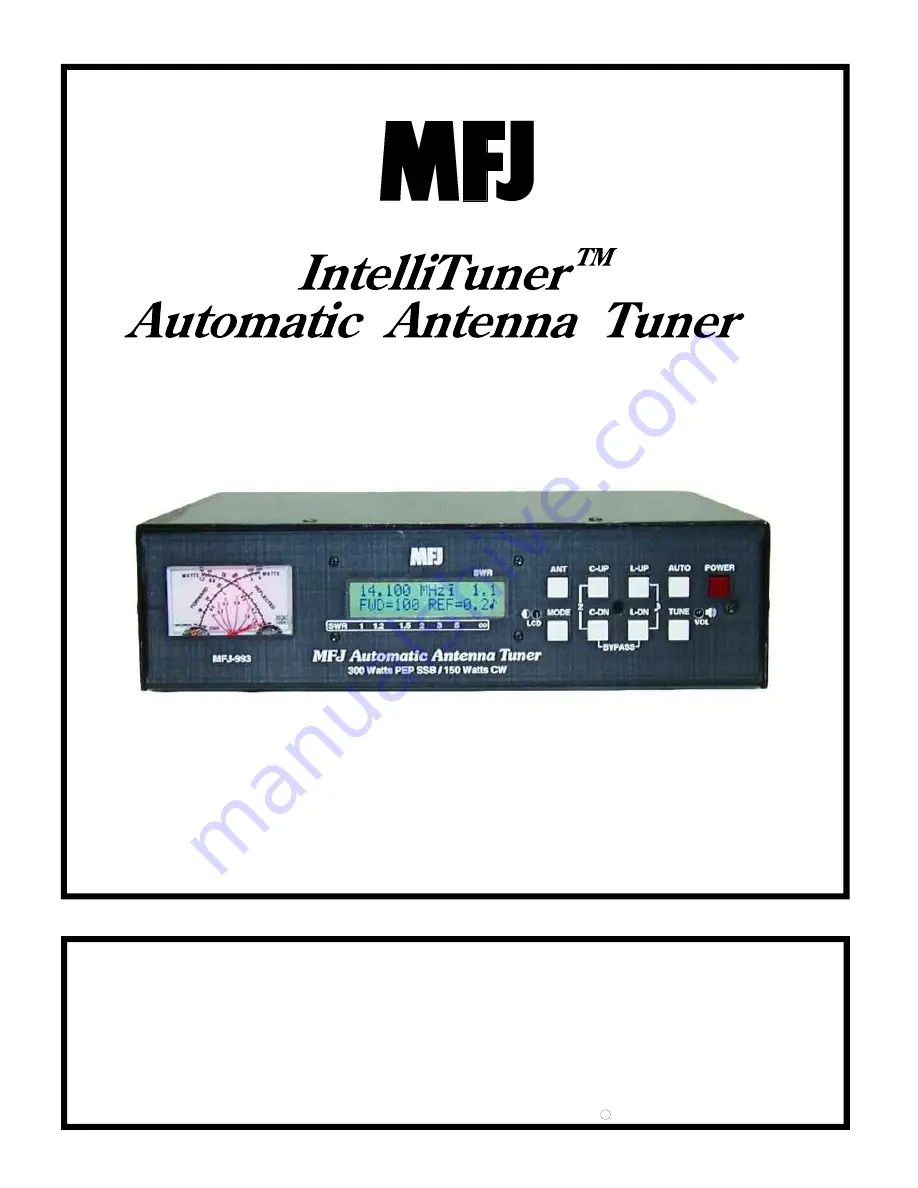
background image

INSTRUCTION MANUAL

CAUTION: Read All Instructions Before Operating Equipment

MFJ ENTERPRISES, INC.

300 Industrial Park Road

Starkville, MS 39759 USA

Tel: 662-323-5869 Fax: 662-323-6551

COPYRIGHT

2005-2012 MFJ ENTERPRISES, INC.

C

Model MFJ-993B

VERSION 2B

Содержание IntelliTuner MFJ-993

Страница 1: ...TION Read All Instructions Before Operating Equipment MFJ ENTERPRISES INC 300 Industrial Park Road Starkville MS 39759 USA Tel 662 323 5869 Fax 662 323 6551 COPYRIGHT 2005 2012 MFJ ENTERPRISES INC C Model MFJ 993B VERSION 2B ...

Страница 2: ...itional handbooks or other official publications The copy of this manual provided to the customer will not be updated to reflect current data Customers using this manual should report errors or omissions recommendations for improvements or other comments to MFJ Enterprises 300 Industrial Park Road Starkville MS 39759 Phone 662 323 5869 FAX 662 323 6551 Business hours M F 8 4 30 CST ...

Страница 3: ...d C DN Buttons 5 L UP and L DN Buttons 5 AUTO Button 5 TUNE Button 6 StickyTuneTM 6 VOL Control 6 POWER Button 6 Back Panel 8 Power 8 Remote Port 8 Radio Interface 8 Transmitter 11 Ground 11 Balanced Line 11 Wire 11 Antenna 1 11 Antenna 2 11 Installation 11 SWR Wattmeter 12 THE MENUS Main Mode Menus 13 Digital Wattmeter Menu 13 Power Bar Meter Menu 13 SWR Bar Meter Menu 14 L Network Menu 14 Tuner ...

Страница 4: ...uning 21 Meter Codes and Audible Beeps 21 Transceiver Foldback 23 Grounding Hints 23 Antenna System Hints 24 Coaxial Cable Selection 24 Location 24 Matching Problems 25 APPENDICES Resetting the Tuner 26 Factory Defaults 26 Delete Antenna Memory 27 Total Reset 27 Self Test 27 Power Down Circuit Test 29 Relay Test 29 Firmware Version Number via Meter 29 Setting the Speaker Volume 30 Wattmeter Calibr...

Страница 5: ...4Y4 41 Connections for FT 2000 series of radios 41 Operation for FT 2000 series of radios 42 Connections for FTDX 5000 series of radios 42 Operation for FTDX 5000 series of radios 42 In Case of Difficulty 43 Technical Assistance 43 List of Accessories 43 Circuit Block Diagram 44 FIGURES Figure 1 Typical Installation Block Diagram 4 Figure 2 MFJ 993B Front Panel 4 Figure 3 Mode Button Flow Chart an...

Страница 6: ...er Automatic Antenna Tuner Instruction Manual 2005 2012 MFJ Enterprises Inc iv TABLES Table 1 Memory Resolution 19 Table 2 Meter Needle Stationary Codes 22 Table 3 Meter Needle Bounce Codes 23 Table 4 Failure Messages 28 ...

Страница 7: ...gs are instantly restored and you re ready to operate in milliseconds Each of two antenna selections has four banks of memory which can learn and remember more than 2500 frequencies and tuner settings per bank When you key your transmitter MFJ s InstantRecallTM checks its memory to see if you have operated on that frequency before If so tuning is instantaneous and you re ready to operate If not MF...

Страница 8: ...nter for remembering frequency specific matching values Two SO 239 coax fed antenna connectors Connector for random wire or single wire antennas Built in 4 1 current balun for balanced line antennas Optional remote control Optional radio interface cables for compatible radios Specifications Impedance matching range 6 to 1600 ohms 300 watts or 6 to 3200 ohms 150 watts SWR matching range Up to 8 1 f...

Страница 9: ...StickyTuneTM to be ON Place the ANT button in the out position to select antenna 1 Note StickyTuneTM after power cycle means that the MFJ 993B will do a full tune after a power cycle on the first frequency you transmit on only No other frequency or memory solutions will be affected So you can fully re tune on any frequency by simply cycling power 6 Lock the AUTO button in to select semi automatic ...

Страница 10: ...bypass the tuner at anytime when the tuner power is ON by pressing C DN and L DN simultaneously or pressing TUNE quickly When the MFJ 993B is bypassed the reflected meter needle bounces to the 20 watt mark while the switches are pressed Transmitter MFJ 993B 50 ohm Coax Antenna 1 RF Ground 12 VDC Antenna 2 Figure 1 Typical Installation Block Diagram Front Panel 0 1 0 3 0 50 100 200 300 0 5 20 40 60...

Страница 11: ... capacitance dependent on frequency is used to limit the maximum voltage and current across the tuner s components This limit can be removed in the LC Limit setup menu but is not recommended Note Pressing C UP and C DN simultaneously toggles the capacitor between the input and output sides of the L network Forward needle bounces to the 30 watts when the capacitor is on the transmitter side Reflect...

Страница 12: ...and hold the TUNE button for two seconds The reflected power needle goes to 60 watt mark when on and to 5 watt mark when off one beep indicates on and two beeps indicate off Power On Reset POR StickyTuneTM mode is selected via the POR Sticky Tune setup menu default is ON after a power cycle Note StickyTuneTM is disabled after tuning Note StickyTuneTM after power cycle means that the MFJ 993B will ...

Страница 13: ...tart the tuning process press and hold for more than two seconds to toggle the StickyTune on and off Press in to select semi automatic mode out to select automatic mode Press to decrease inductance Press to increase inductance Press to decrease capacitance Press to increase capacitance Press to switch main modes and setup modes Press in to select antenna 2 out to select antenna 1 Press in to turn ...

Страница 14: ...n there are two LEDs on the remote control The red Tuning LED lights to indicate tuning is in progress and the green SWR LED lights when the SWR is below the target SWR Note To use the MFJ 993RC remote control both the ANT and AUTO buttons on the MFJ 993B automatic tuner must be locked in otherwise Antenna 1 and Automatic mode are selected Radio Interface A 3 5 mm stereo phone jack for connecting ...

Страница 15: ...rts the Icom AH 3 or AH 4 tuner Push and hold the radio s TUNER button for two seconds to start the tuning process Push TUNER quickly to bypass the tuner Refer to Icom Radio Interface on page 33 for connections and operation Pin Key connects to Pin Start connects to Pin Ground connects to 2 Pin 3 13 8V connects to 4 1 the Tip of 3 5 mm Stereo Phone Plug the Ring of 3 5 mm Stereo Phone Plug the Cen...

Страница 16: ...4 3 during the tune process when an amplifier is not used For best accuracy when an amplifier is used MFJ recommends that the Yaesu CW tune setting be set to 50 watts for 100 watt transceivers and 75 watts for 200 watt MKV transceivers during the tune process If a FH 1 or FH 2 keypad is also used both the FH 1 FH 2 and the radio control cable may be plugged in parallel using a 3 5 mm headphone spl...

Страница 17: ... operate the tuner with its cover removed Contact with the components inside the tuner while transmitting will result in painful RF burns Locate the tuner so that the rear terminals are not accessible during operation The single wire and balanced line connection may have high voltage while transmitting Disconnect all antennas from the tuner during lightning storms Always tune with low power 2 20 w...

Страница 18: ...matically sets the meter to the high power range Forward power less than 25 watts and reflected power less than four watts automatically set the meter to the low power range To cycle the meter range among low high and auto range press the TUNE and L DN buttons simultaneously The forward needle will read 300 for high range 30 for low range and 100 for auto range until the buttons are released When ...

Страница 19: ... numeric reading of forward power appears at the end of the bar meters A power scale is printed just below the display on the front panel Each power bar meter is consisted of 60 bar segments When in the high power range each vertical bar segment consists of three dots Below 100 watts each bar segment represents two watts above 100 watts each bar segment represents 20 watts The forward bar meter ha...

Страница 20: ...5 1 to infinity The numeric reading of forward power appears at the end of the bar meter There is also an audio SWR indicator see SWR Beep Menu section on page 20 1 1 2 1 5 2 3 SWR Figure 12 SWR Bar Meter L Network Menu Shows the configuration of the L network matching circuit SWR and forward power The antenna symbol on the upper left corner indicates the antenna side of the L network The capacita...

Страница 21: ...3 4 5 8 9 1 2 3 4 5 6 10 1 2 3 4 5 6 11 12 13 14 6 2 3 4 5 Figure 13 Main Mode Menus Display Tuner Indicators Various tuner indicators are shown on the main menus to indicate tuner status Refer to Figure 13 for locations of these indicators The number enclosed within is the item number of Figure 14 Antenna A small 1 appears to indicate antenna 1 is selected 15 a small 2 appears to indicate antenna...

Страница 22: ...ndicate automatic mode 26 StickyTune When StickyTuneTM is ON a bar appears on top of the Auto Semi indicator 27 2 2 4 3 3 3 3 Enlarged Views of Indicators Appears when Antenna 1 is selected Appears when Antenna 2 is selected Appears when IntelliTune is ON Appears when Memory Bank A is ON Appears when Memory Bank B is ON Appears when Memory Bank C is ON Appears when Memory Bank D is ON Appears when...

Страница 23: ...Level Target SWR Auto Tune SWR Meter Range Peak Hold Memory and IntelliTuneTM Within each setup menu Press the MODE button briefly to cycle through the setup menus press and hold the MODE button for two seconds to exit the setup mode and go back to the main mode Press the C UP or L UP button to increase or turn on the setting for the current setup menu Press the C DN or L DN button to decrease or ...

Страница 24: ...tts Auto range automatically sets the meter scales according to the input RF power to the tuner Forward power greater than 30 watts or reflected power greater than six watts automatically sets the meter to the high power range Forward power less than 25 watts and reflected power less than four watts automatically set the meter to the low power range Refer to Figures 13 and 14 for the on screen Met...

Страница 25: ...D Refer to Table 2 for meter code To clear the memory for an antenna all four banks select the antenna with the ANT button and turn off the power to the tuner Then press and hold both TUNE and C DN buttons while turning on the power A DELETE ANTENNA message will appear Total Reset erases both antenna memories and returns all tuner settings to their factory default states To achieve this turn power...

Страница 26: ... power is cycled Default is OFF If ON then StickyTuneTM will be active for the first tune only Then it will turn off StickyTuneTM can be enabled by cycling power with POR Sticky Tune set to ON or by pressing TUNE for more than two seconds LC Limit Menu The upper limits of inductance L and capacitance C are factory limited according to frequency and maximum power rating i e higher frequencies need ...

Страница 27: ...t to indicate that the capacitance is on the antenna side corresponding with the rear panel configuration of connectors the capacitance value moves to the right side of the display when the capacitance is on the transmitter side of the inductance A general rule of thumb is that loads with impedance higher than 50 ohms call for the capacitance on the antenna side loads with impedance lower than 50 ...

Страница 28: ...s Intersect at SWR 2 0 TUNE C UP Target SWR 1 5 1 beep Target SWR 2 0 2 beeps Table 2 Meter Needle Stationary Codes If not enough power is applied for tuning less than 2 watts the display will flash INCREASE POWER three times and QRO dah dah di dah di dah dit dah dah dah will be sent on CW Increasing the input power above two watts ends this message When input power is too high the tuner enters a ...

Страница 29: ...a foldback circuit to protect the final transistors from damage due to high SWR A foldback circuit detects the SWR during transmit and reduces the output power as the SWR rises above a preset threshold usually 2 1 The higher the SWR the lower the power is set to prevent damage However even if your transceiver has a foldback circuit you should manually set the power level to 20 watts or less for tu...

Страница 30: ...nd leads for RF and lightning should have wide smooth surfaces Avoid the use of woven or braided conductors in RF and lightning grounds unless the lead needs to be flexible Antenna System Hints Coaxial Cable Selection The proper selection of coax cable will minimize antenna system losses especially in the presence of high SWR And the coax cable selection is particularly important in high power ama...

Страница 31: ...everal thousand volts This can cause component arcing and heating The following suggestions will reduce the difficulty in matching an antenna with a tuner Never center feed a half wave multi band antenna with a high impedance feedline that is close to an odd multiple of a quarter wave long Never center feed a full wave antenna with a feedline close to a multiple of a half wave long If this tuner w...

Страница 32: ...DN L DN POWER Figure 15 Power On Operations Important The radio interface cable must be disconnected from the tuner if the radio power is off before performing any of the following power on operations Resetting the Tuner Each time the tuner is powered off the microprocessor saves all memories and configurations to non volatile memory When the power is off the tuner is bypassed straight through fro...

Страница 33: ...n to delete the antenna memory DELETED will display and both meter needles go to full scale or press the NO L UP button to cancel CANCEL will display and both meter needles go to zero scale Release the button to resume normal operation Remember that the selected antenna memory will be lost Total Reset To erase both antenna memories and reset to factory defaults press and hold down the TUNE C DN an...

Страница 34: ...letes To skip this copyright message press C DN button 7 You will be prompted to press each of the front panel buttons The forward needle should bounce once for each press and the reflected needle should move up a division for each press 8 The unit then tests its non volatile memory Notice this step will reset the unit to its factory default settings 9 If the unit is okay a repetitive message PASS...

Страница 35: ...Turn off the transmitter power or disconnect the transmitter before performing this test otherwise damage to the tuner can result To test the relays and their control circuitry press and hold the C DN button while turning the power on The message RELAY TEST will appear Four numbers representing the relays will be shown in the center of the display The C UP L UP C DN and L DN buttons corresponding ...

Страница 36: ...er on 4 A message CAL FWD METER TO 100 WATTS will display and both meter needles will bounce Use a small flat blade screwdriver and adjust the FWD trimpot R75 located behind the display to set the forward needle to the 100 watt mark 5 Press the TUNE button to calibrate the reflected needle 6 A message CAL REF METER TO 20 WATTS will display Adjust the REF trimpot R76 located behind the display to s...

Страница 37: ... Press the TUNE button to end calibration 13 Turn off the power to the tuner and the transmitter 14 Remove the transmitter wattmeter and the 50 ohm dummy load from the tuner 15 Secure the cover back onto the tuner 16 Connect your transmitter to the TRANSMITTER connector and connect your antenna to the appropriate antenna connector on the tuner Frequency Counter Calibration To calibrate the frequen...

Страница 38: ...ned off The radio does not fuse the DC power to the tuner and damage to the radio can occur if the interface s power connection comes in contact with ground 4 Connect the 5 pin molex connector to the mating 5 pin molex connector marked as ACC on the back of the Alinco radio 5 Push the POWER button on the tuner to the in position and then power on the radio Operation The operation of the MFJ 5124A ...

Страница 39: ...NER on the back of the Icom radio 5 Push the POWER button on the tuner to the in position and then power on the radio 6 Some Icom radios such as the IC 706 automatically check to see if an external antenna tuner is connected during power on For other Icom radios such as the IC 718 the Tuner Type menu in the radio menu system must be enabled Refer to your radio s operating manual for accessing the ...

Страница 40: ... AT or ACC on the back of the Kenwood radio 6 Push the POWER button on the tuner to the in position and then power on the radio 7 Some Kenwood radios automatically check to see if an external antenna tuner is connected during power on For other Kenwood radios such as the TS 450S and the TS 690S the External Antenna Tuner menu in the radio menu system must be enabled Refer to your radio s operating...

Страница 41: ...r s RADIO INTERFACE jack 4 Insert the 2 1 x 5 5 mm coaxial power plug into the tuner s POWER jack 5 Insert the 8 pin modular plug into the MFJ 5124 s TO RADIO jack 6 Important Make sure the DC power to the radio has been turned off The radio does not fuse the DC power to the tuner and damage to the radio can occur if the interface s power connection comes in contact with ground 7 Connect the 8 pin...

Страница 42: ...mage to the radio can occur if the interface s power connection comes in contact with ground 7 Connect the 8 pin mini DIN connector to the mating 8 pin mini DIN connector marked as TUNER on the back of the radio 8 Push the POWER button on the tuner to the in position and then power on the radio Operation for FT 450 The operation of the MFJ 5124Y radio interface is similar to the operation of the F...

Страница 43: ...eration 2 Turn the radio off Insert the 3 5 mm stereo phone plug into the tuner s RADIO INTERFACE jack 3 Insert the 2 1 x 5 5 mm coaxial power plug into the tuner s POWER jack 4 Insert the 8 pin modular plug into the MFJ 5124 s TO RADIO jack 5 Important Make sure the DC power to the radio has been turned off The radio does not fuse the DC power to the tuner and damage to the radio can occur if the...

Страница 44: ...radio can occur if the interface s power connection comes in contact with ground 7 Connect the 8 pin mini DIN connector to the mating 8 pin mini DIN connector marked as TUNER on the back of the radio 8 Push the POWER button on the tuner to the in position and then power on the radio Operation for FT 950 The operation of the MFJ 5124Y radio interface is similar to the operation of the FC 40 describ...

Страница 45: ... plug into the tuner s RADIO INTERFACE jack 4 Insert the 2 1 x 5 5 mm coaxial power plug into the tuner s POWER jack 5 Insert the 8 pin modular plug into the MFJ 5124 s TO RADIO jack 6 Important Make sure the DC power to the radio has been turned off 7 Connect the DB 9 connector to the mating DB 9 connector marked as CAT on the back of the radio 8 The FT 847 does not have a DC power connection on ...

Страница 46: ...all transceivers d Press ENT to exit the Menu mode 2 Insert the 3 5 mm stereo phone plug into the MFJ 993B RADIO INTERFACE jack 3 Connect the 3 5 mm mono plug on the MFJ 5124Y3 to the REMOTE jack on the rear panel of the transceiver 4 Connect a 12V 1000 mA DC source to the MFJ 993B 5 Push the POWER button on the MFJ 993B to the in position The radio may be powered on either before or after the tun...

Страница 47: ...this interface control signals are connected between the radio and the tuner The operator can then control the tuner and radio with a single push of the TUNE button on the front panel of the MFJ 993B Connections for FT 2000 series of radios 1 Before connecting the MFJ 5124Y4 to your radio set the maximum TUNE power of the radio as follows a On your transceiver enter the Menu mode by pressing the M...

Страница 48: ... normally operates at 100 watts output power when power is turned down to 100 watts the TUNE power will reduce to 25 watts If the operator normally has his FTDX 5000 set for the full 200 watts then this should be set to 20 watts d Press and hold in the MENU button for two seconds to save the new setting and exit to normal operation If you press the MENU button momentarily the new setting will not ...

Страница 49: ...l does not reference your problem or your problem is not solved by reading the manual you may call MFJ Technical Service at 662 323 0549 or the MFJ Factory at 662 323 5869 You will be best helped if you have your unit manual and all information on your station handy so you can answer any questions the technicians may ask You can also send questions by mail to MFJ Enterprises Inc 300 Industrial Par...

Страница 50: ...lock Diagram Transmitter Antenna 2 Antenna 1 Remote Port Radio Interface Balanced Line Wire Impedance Sensor SWR Sensor Frequency Counter Memory Microcontroller Relay Drivers Ground SWR Wattmeter Push Buttons LCD Display Speaker User Interface Contrast Volume 4 1 Current Balun Inductors 0 24 uH Capacitors 0 3900 pF Z L Network ...

Страница 51: ...ervice Department at 662 323 0549 or the MFJ Factory at 662 323 5869 4 This warranty does not apply to kits sold by or manufactured by MFJ Enterprises Inc 5 Wired and tested PC board products are covered by this warranty provided only the wired and tested PC board product is returned Wired and tested PC boards installed in the owner s cabinet or connected to switches jacks or cables etc sent to MF...

Страница 52: ...MFJ 993B Manual Version 2B Printed In U S A 03 2012 300 Industrial Park Road Starkville MS 39759 MFJ ENTERPRISES INC ...

Отзывы: