High-End Pressure Controller
CPC8000
74
Operating Instructions - CPC8000
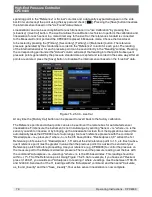
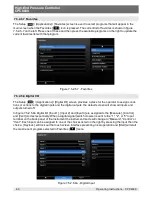
7.5.2.5.2 2-Point Calibration
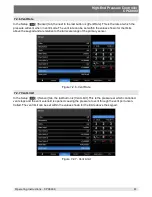
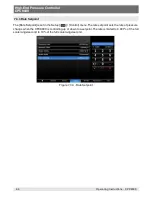
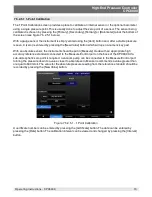
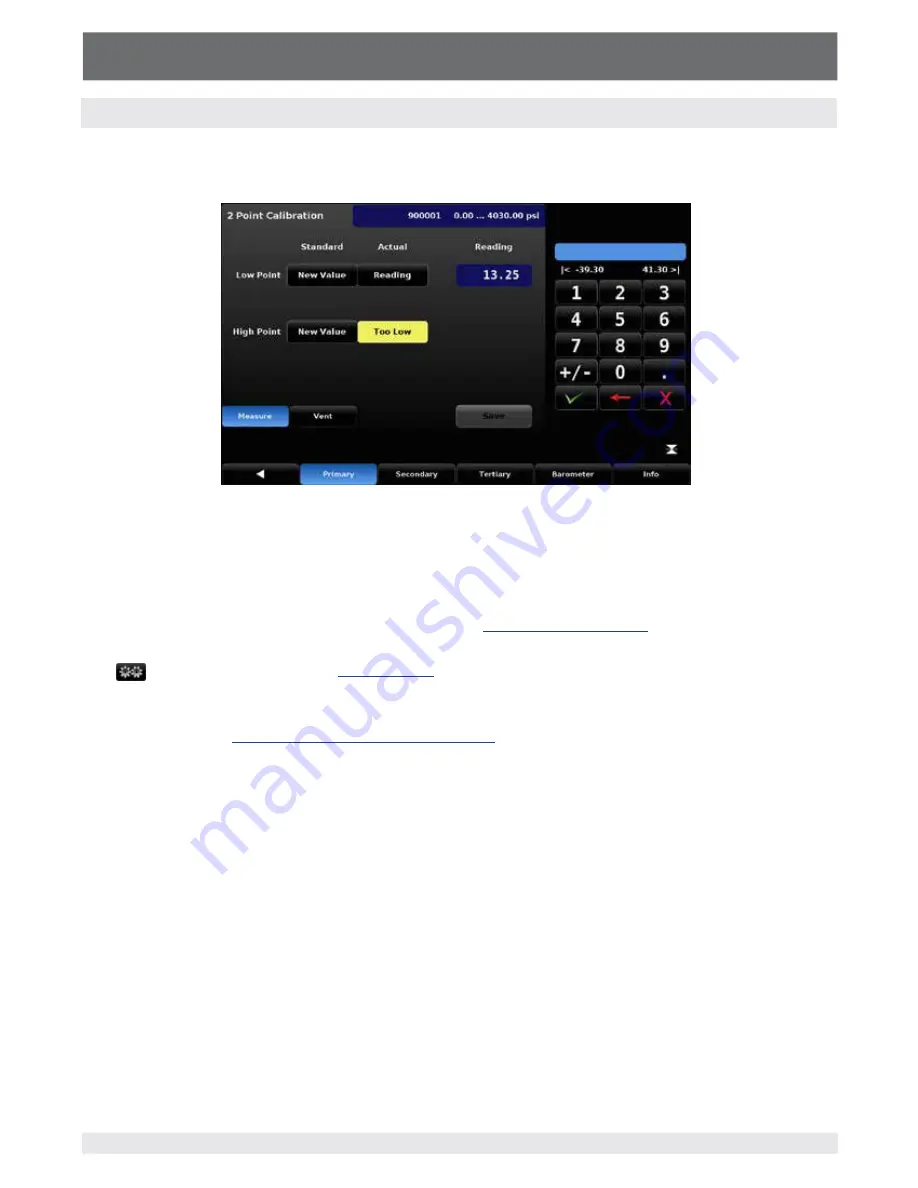
A 2 Point Calibration adjusts both the “zero” (low point) and the “span” (high point) of the active transduc-
er. This is accomplished by interacting with the “2 Point Calibration” screen (see fgure 7.5.2.5.2).
Figure 7.5.2.5.2 - 2 Point Calibration
Follow the steps below for a complete 2 Point Calibration:
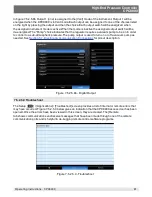
1. Select a Transducer to calibrate by pressing one of the available transducer tabs at the bottom of the
screen, in this case [Primary] [Secondary], [Tertiary], or [Barometer].
2. Ensure that the head correction is adjusted properly
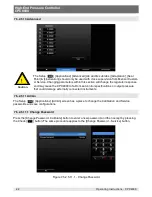
3. The 2 point calibration screen is accessed through the password protected portion of the Setup
[
]/ [Applications] area. See
4. To calibrate the “low Point”:
• The Measure /Control port of the instrument should be supplied with a suitable, “low point”
pressure (see
Section 5.6, Pneumatic Connections
, for the port location).
• For a gauge transducer, this low point pressure can be achieved by Pressing the [Vent] button on
the 2 Point calibration screen and wait for the reading to stabilize at, or close to, zero.
• For an absolute transducer a suitable source of vacuum should be applied to the Measure/Control
port along with a high accuracy vacuum standard or a pressure calibration standard should be
connected to the Measure/Control port that can generate and measure a pressure value. In either
case the pressure should be measured at a stable value that is within 20% of the minimum range
of the selected internal transducer.
• When the pressure is stable the [Reading] button, under the “Actual” label and on the row labeled
“Low Point”, should be pressed. This action accepts the value and it will appear with a green
background where the [Reading] button was.
• Press the [New Value] button and, via the numeric key pad, enter the “true pressure” obtained
from the calibration standard. This value will be (0) zero in the case of a gauge transducer that is
vented, otherwise it should be obtained from the pressure measured by your calibration standard.
After the value has been accepted by pressing the [check] mark on the numeric key pad the value
will appear with a green background where the [New Value] button was. These actions complete
the low point calibration.
Содержание CPC8000
Страница 6: ...High End Pressure Controller CPC8000 6 Operating Instructions CPC8000 NOTES ...
Страница 10: ...High End Pressure Controller CPC8000 10 Operating Instructions CPC8000 NOTES ...
Страница 24: ...High End Pressure Controller CPC8000 24 Operating Instructions CPC8000 NOTES ...
Страница 84: ...High End Pressure Controller CPC8000 84 Operating Instructions CPC8000 Notes ...
Страница 112: ...High End Pressure Controller CPC8000 Operating Instructions CPC8000 113 NOTES ...

