


000162
Name selection
Cancel
OK
Group name
Group name
Language selection
Name line 1
Category models
Category models
Name line 2
Milk
Hot water
Speciality
Milk
Hot water
Speciality
4
3
2
1
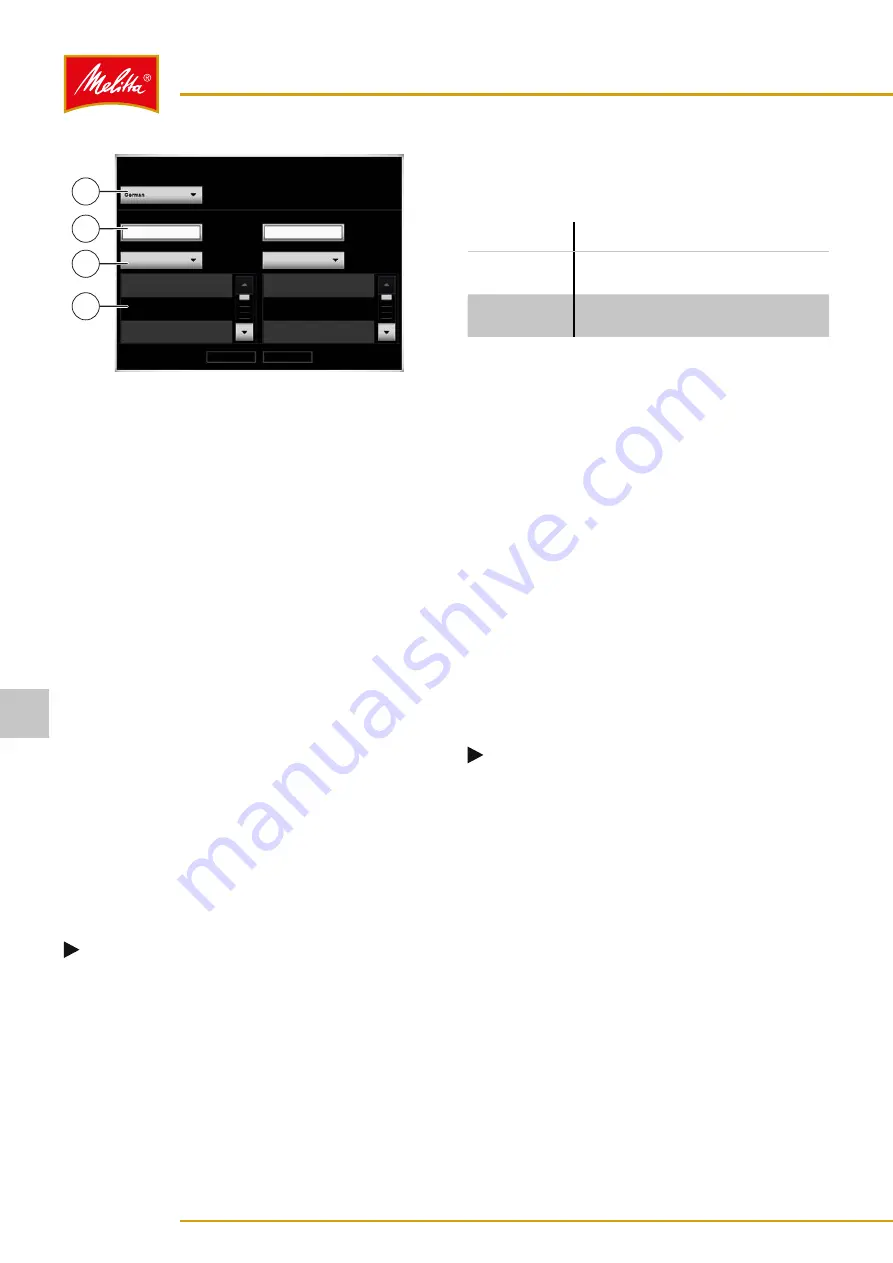
Fig. 29: Selecting or entering a name
3. Under "Language selection" (4), select the language
that should be used for the name.
͵
You can adjust the languages available for se-
lection under the machine settings (see chap-
4. Select one of the following options to enter a name
for the line in question:
•
Select a default name: Under "Category
models" (2), select a category and then select a
name from the list below (1).
•
Enter your own name: Press the corresponding
line (3) and enter a name using the screen
keyboard (see chapter 7.2 on page 21).
5. Confirm the name with the "OK" button.
6. Press the "Release" button (3) (see Fig. 28) to activate
the created group for dispensing.
͵
If you do not release the group, it will not be dis-
played on the dispensing interface.
9
The new product group is created.
7�4�3
Deleting product groups
1. Press the required product group.
2. Press the "X" button (7) (see Fig. 28).
3. If prompted to confirm the deletion, press the
"Delete" button to confirm the deletion.
͵
Press the "Cancel" button to cancel the deletion.
Note
Only the display on the screen is cleared. The
products remain stored on the machine.
9
The product group is deleted.
7�4�4
Editing product groups
The following buttons can be used to edit a product
group:
Button
Function
Release
Activate/deactivate the selected
group for dispensing
Display
receptacle
Show/hide the icon for the
receptacle type in dispensing mode
7�4�5
Adding dispensing products
1. If you wish to add a dispensing product to a product
group, open the required product group by pressing
the symbol twice.
2. Press the "Create new product" button (5) (see Fig.
3. Select the required dispensing product from the
product list.
4. Press the "Release" button (3) (see Fig. 28) to activate
the created product for dispensing.
͵
If you do not activate the product, it will not be
displayed on the dispensing interface.
9
The dispensing product has been added.
7�4�6
Deleting dispensing products
1. Press the required product.
2. Press the "X" button (7) (see Fig. 28).
Note
Only the display on the screen is cleared. The
products remain stored on the machine.
9
The dispensing product has been deleted.
7�4�7
Sorting dispensing products
1. Select the product by pressing on it.
2. Press the "Down" button (6) (see Fig. 28) to move the
dispensing product downward.
3. Sort the dispensing products.
͵
Start with the last dispensing product at the bot-
tom and end with the first dispensing product at
the top.
9
The dispensing products have been sorted.
Settings
22
26646 • 20160202
7


