background image


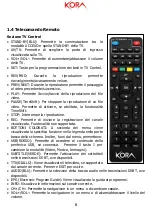
1.4 Telecomando Remoto 

Sezione TV Control 


STAND-BY[BLU]: Permette la commutazione tra la 

modalità ACCESO e quella STAND-BY della TV. 


AV/TV: Permette di scegliere la porta di ingresso 

visualizzata sulla TV. 


VOL+/VOL-: Permette di aumentare/abbassare il volume 

della TV. 


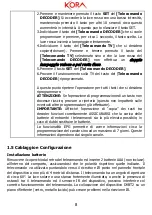
SET: Tasto per la programmazione dei tasti in TV Control. 


REV/FWD: Durante la riproduzione permette 

riavvolgimento/avanzamento veloce. 


PREV/NEXT: Durante la riproduzione permette il passaggio 

al video precedente/successivo. 


PLAY: Permette l’avvio/riavvio della riproduzione del file 

video. 


PAUSE(TimeShift): Per stoppare la riproduzione di un file 

video. Permette di attivare, se abilitata, la funzionalità 

TimeShift. 


STOP: Interrompe la riproduzione. 


REC: Permette di iniziare la registrazione del canale 

visualizzato. Funzionalità non supportata. 


BOTTONI COLORATI: A  seconda del menu viene 

visualizzata la specifica funzione nella legenda nella parte 

bassa dello schermo. Inoltre, fuori dal menu, permettono: 


USB(ROSSO): Permette di accedere al contenuto della 

periferica USB, se connessa.  Premere il tasto 1 per 

cambiare la modalità (Video, Musica, Immagini). 


SUBTITLE(VERDE): Permette l’attivazione dei sottotitoli 

nelle trasmissioni DVBT, ove disponibili. 


TTX(GIALLO): Viene visualizzato il televideo, se supportato 

dal canale corrente.  Premere EXIT per uscire. 


AUDIO(BLU): Permette la selezione della traccia audio nelle trasmissioni DVBT, ove 

disponibili. 


EPG (Electronic Program Guide): Viene visualizzata la guida ai programmi.  


INFO: Visualizza le informazioni sul canale corrente. 


CH+/CH-: Permette la navigazione in un menu o di cambiare canale. 


VOL+/VOL-: Permette la navigazione in un menu o di alzare/abbassare il livello del 

volume. 

Содержание KORA IRRADIO DTR-3341

Страница 1: ...ali 12 2 3 Installazione 12 2 4 Conf Sistema 14 2 5 Strumenti 13 3 DOMANDE FREQUENTI 17 4 SUPPORTO OFFERTO 20 INDEX English 1 INSTALLATION 23 1 1 System Requirements 23 1 2 Contents of the package 23 1 3 Front and Rear 23 1 4 Remote Control 25 1 5 Wiring and Setup 26 1 6 Recording 28 2 ADVANCED CONFIGURATION 30 2 1 Media Player 30 2 2 Edit Channels 31 2 3 Installation 31 2 4 System Setup 32 2 5 To...

Страница 2: ...amente protetta può condurre violente scariche che possono danneggiare il dispositivo invalidandone la garanzia Non aprire mai per nessuna ragione il dispositivo In caso di malfunzionamenti contattare immediatamente l assistenza tecnica e o personale qualificato Installare il dispositivo in modo da garantirne un adeguato flusso d aria Non ostruire per alcuna ragioni le feritoie per la ventilazione...

Страница 3: ... dall acquisto il prodotto qualora queste non siano accettate Prodotto sotto licenza Dolby Laboratories I simboli Dolby e la doppia O sono marchi registrati Dolby laboratories Nome o marchio del fabbricante numero di iscrizione nel registro delle imprese e indirizzo del fabbricante Shenzhen Mao two power Co Ltd 3Floor Unit B Plant 6 Xifa C Area Silver Tin Industrial Zone Xixiang Street Bao an Dist...

Страница 4: ...mettendo la riproduzione di foto e filmati direttamente da una memoria USB Il telecomando IR in dotazione permette di controllare sia il DVBT che la TV tramite la mappatura di 4 tasti On Off Volume selezione ingresso della Tv 1 1 Requisiti di sistema Prima di procedere con l installazione del prodotto verificare di disporre dei seguenti requisiti Televisore con ingresso HDMI o Scart Antenna Una an...

Страница 5: ...evitore IR Utilizzato per ricevere la segnalazione IR del telecomando Non va mai coperto Indicatore di Stand By Indica lo stato di funzionamento del dispositivo Verde Acceso Rosso Spento M Permette l accesso al Menu CH CH Permette di cambiare il canale visualizzato in modalità Menu permette di muoversi tra le varie voci visualizzate OK Permette di confermare le scelte in modalità menu Power Permet...

Страница 6: ...a registrazione del canale visualizzato Funzionalità non supportata BOTTONI COLORATI A seconda del menu viene visualizzata la specifica funzione nella legenda nella parte bassa dello schermo Inoltre fuori dal menu permettono USB ROSSO Permette di accedere al contenuto della periferica USB se connessa Premere il tasto 1 per cambiare la modalità Video Musica Immagini SUBTITLE VERDE Permette l attiva...

Страница 7: ...eperibili sul mercato Si ricorda che questo non è un difetto di prodotto Il telecomando è dotato di 4 tasti programmabili On Off AV Vol che permettono di controllare comodamente la TV cui il DVBT2 è collegato La programmazione va effettuata per ogni singolo tasto uno alla volta Pertanto la procedura va ripetuta dall INZIO alla FINE tasto per tasto Non è possibile programmare più tasti contemporane...

Страница 8: ...mpatterà sulle eventuali altre programmazioni già effettuate IMPORTANTE Affinché l operazione di copia dei tasti tra decoder funzioni correttamente ASSICURARSI che la carica delle batterie di entrambi i telecomandi sia la più elevata possibile in caso di dubbi sostituire le batterie La funzionalità EPG permette di avere informazioni circa la programmazione del canale sino ad un massimo di 7 giorni...

Страница 9: ...ta effettuati tutti i collegamenti e dopo averne attentamente controllato l esattezza è possibile accendere la TV e quindi il dispositivo tramite il telecomando in dotazione Il display visualizzerà la scritta Strt In questo menu è possibile Regione premere i tasti Vol Vol per selezionare il paese dove il dispositivo verrà utilizzato Questa scelta è critica perché serve a fornire al decoder le info...

Страница 10: ... per confermare la selezione Toccare Exit per uscire 1 6 Riproduzione Prima di poter utilizzare la funzionalità di riproduzione visualizzazione è necessario collegare alla porta USB del dispositivo una memoria USB già formattata FAT32 o NTFS e contenente i contenuti multimediali da riprodurre Si veda la figura seguente Premere il tasto USB verificare che in alto sia evidenziata la voce Video Music...

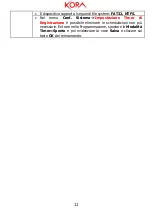
Страница 11: ... NTFS Nel menu Conf Sistema Impostazione Timer di Registrazione è possibile eliminare le schedulazioni non più necessarie Entrare nella Programmazione spostare la Modalità Timer Spento e poi evidenziare la voce Salva e cliccare sul tasto OK del telecomando ...

Страница 12: ...e OK per aprire la voce selezionata Premere EXIT per uscire dal menu Scansione Canali automatica Permette la scansione automatica dei canali È opportuno selezionare la Regione Nazione modalità FTA e Modalità T2 spuntare NO altrimenti il decoder cercherà esclusivamente segnali in standard DVBT2 Evidenziare la voce Ricerca e premere il bottone OK del telecomando Il processo di sintonizzazione è del ...

Страница 13: ... tasti freccia Alto Basso CH CH per navigare nel menu Informazioni Ripristino impostazioni di fabbrica Aggiornamento da USB Auto StandBy e premere OK per aprire la voce selezionata Premere EXIT per uscire dal menu Informazioni Vengono visualizzate le informazioni inerenti al firmware hardware utilizzati dal dispositivo Ripristino impostazioni di fabbrica Permette di effettuare un reset alle condiz...

Страница 14: ...cegliere lo scostamento orario UTC 1 o UTC 2 È possibile applicare l ora legale automaticamente Verificare che l ora utilizzata sia quella corretta Impostazione Timer di registrazione È possibile impostare sino ad 8 timer di visualizzazione o editare quelli esistenti Controllo Parentale Una volta digitata la password è possibile attivare il blocco del menu Blocco Menu Acceso per richiedere la pass...

Страница 15: ...iudere l OSD con le scelte Premere stop durante la riproduzione per tornare alla visualizzazione precedente Durante la riproduzione i tasti REV FWD permettono il riavvolgimento avanzamento veloce Immagini Musica È possibile visualizzare le immagini File audio nella periferica di memorizzazione di massa connessa Il procedimento è analogo con quanto visto con la sezione Video cui si rimanda Rimozion...

Страница 16: ... WMA AC 3 Dolby Digitai E AC 3 Dolby Digital Plus IEC958 SPDIF Contenitore TS MPG MP4 AVI MKV FLV DIVX Risoluzione 1080p 1080i 720p 576p 576i 480p 480i Fotogrammi MPEG 2 4 1080p 30fps CH 264 1080p 60fps VC 1 2048 1024p 30fps AVS AVS 1080p 60fps VP8 1080p 30fps HEVC 1080p 60fps Limiti Tecnici HEVC 8 bit sino a 40Mbps HEVC 10 bit sino a 20Mbps DTS non supportato ...

Страница 17: ...tattare un antennista Alcuni dispositivi emettono segnali che disturbano il dispositivo Spegnere i dispositivi elettrici nelle vicinanze PC depuratori altro La riproduzione dei file da USB avviene a scatti o presenta evidenti disturbi La periferica di memorizzazione è troppo lenta Cambiare la periferica di memorizzazione con una più veloce con interfaccia USB2 0 CODEC parzialmente supportato Il di...

Страница 18: ...e sono scariche Sostituire le batterie Come posso copiare file più grandi di 4GB su una MicroSD USB connessa al dispositivo File System Il dispositivo supporta i file system sia il FAT32 limitato a file di 4GB massimo che NTFS Formattare la memoria in NTFS Premendo i tasti CH CH non visualizzo tutti i canali ma soltanto alcuni perché Il decoder sta visualizzando i canali di una lista selezionata t...

Страница 19: ...ssibile utilizzare la password 1006 per accedere al dispositivo ed effettuarne il reset alle condizioni iniziali La programmazione dei tasti non ha esito positivo Errore nella procedura di programmazione Porre un foglio di carta bianca sul tavolo sotto i telecomandi per evitare i riflessi della superficie del tavolo Disporre i 2 telecomandi uno di fronte all altro ad una distanza di 3 cm poggiati ...

Страница 20: ...io sul funzionamento del prodotto è possibile contattare il servizio di assistenza tecnica tramite l invio di una mail o contattando il servizio di supporto telefonico Assistenza fornita da Melchioni Ready srl Tel 02 49486083 Mail support melchioni ready com ...

Страница 21: ...ical network may conduct violent discharges that can damage the device and void the warranty Never open the device for any reason In case of malfunctions immediately contact technical assistance and or qualified personnel Install the device to ensure adequate airflow Do not obstruct the ventilation slots for any reason Respect the operating conditions about humidity and temperature Never use the p...

Страница 22: ...if these are not accepted Manufactured under license from Dolby Laboratories The Dolby and double O symbols are registered trademarks of Dolby laboratories Manufacturer s name or trade mark commercial registration number and address Shenzhen Mao two power Co Ltd 3Floor Unit B Plant 6 Xifa C Area Silver Tin Industrial Zone Xixiang Street Bao an District Shenzhen City China Model Identifier MR 12010...

Страница 23: ...s both in low and in high definition Kora DTR 3341 also integrates the Media Player function allowing playback of Photos and Movies directly from a USB memory Auto Learning remote controller 1 1 System Requirements Before proceeding with the installation of the product make sure you have the following requirements TV with HDMI or Scart input Antenna An incorrectly positioned antenna or bad wiring ...

Страница 24: ... be covered Stand By indicator Indicates the operating status of the device Green On Red Off MENU Allows access to the Menu CH CH Allows to change the displayed channel in Menu mode it allows to move between the various displayed items OK Allows you to confirm the choices in the menu mode Power Allows you to turn off on the device Rear Panel RF IN Connect this input with the antenna cable COAXIAL ...

Страница 25: ... COLORED BUTTONS Depending on the menu the specific function is displayed in the legend at the bottom of the screen EPG Electronic Program Guide The program guide is displayed INFO Displays information about the current channel CH CH Allows navigation in a menu or change channels next previous OK Allows you to confirm a choice or show the channel list VOL VOL Allows navigation in a menu or raising...

Страница 26: ...y attention on IR aligmement Press and release the learning remote control button you want to program the red LED will light blinking TV RC Press the button of the original remote control the LED should blink 2 times and light constantly release the button When learning is completed press the SET button the LED will turn off Repeat this for the other buttons The battery charge should be as high as...

Страница 27: ...oblems with IR reception Wiring Connect the antenna cable to the RF IN input You can connect the device to the TV in standard PAL resolution using the SCART cable cable not supplied You can connect the device to the TV in HD resolution 720p or FULL HD 1080i p via the HDMI cable cable not supplied Optional You can also send the audio signal to an external amplifier using an audio coaxial cable COAX...

Страница 28: ...t Auto Antenna Power select the option On to supply the signal on the antenna output Highlight the word OK in the OSD and then click the OK button on the remote control Automatic channel tuning will start immediately This process is completely automatic but can last several minutes After tuning you can watch TV In the lower part in menu mode there is a legend with the active keys on the displayed ...

Страница 29: ...es may be not compatible When large capacity memories are connected the device may take some time to analyze the entire contents The use of slow memories non USB2 0 interface can produce problems during recording especially in high resolution contents The device supports the following file systems FAT32 NTFS ...

Страница 30: ...selected pressing the OK button starts playback in full screen Press the SUB T button to activate the subtitles and switch between those available press Exit to close the OSD with the choices Press the AUDIO button to change the audio track among those available press Exit to close the OSD with the choices Press Stop during playback to return to the previous display During playback the REV FWD but...

Страница 31: ...V button to select one list of favorite channels To exit of this list of favorites click FAV use the arrow CH CH and select ALL TV List and press on OK Radio Channel List It is possible similarly for radio channels to do the above for video channels Delete all You can delete all stored channels 2 3 Installation To access the menu press the button MENU and then using the arrow Vol Vol select Instal...

Страница 32: ...choose the time offset UTC 1 or UTC 2 Verify that the visualized time is correct Timer Setting You can set up to 8 watching timers or edit existing ones Parental Lock Once the password has been entered the Block menu can be activated Menu Lock On to request the password in order to enter into this menu Selecting Rating Lock You can block programs based on a show s rating to protect your children f...

Страница 33: ...to perform the correct update The use of an incorrect update file can lead to the blocking of the device invalidating the warranty Auto StandBy You can select the hours of operation before switching to standby mode When the device switches to low power mode the display shows the current time to remove the time display set the Auto Standby Time to Off Due to the limited power of CPU the application...

Страница 34: ...playback is interrupted The storage device is too slow Change the storage device with a faster USB interface 2 0 Codec isn t supported The device is not a multimedia player and supports a limited number of formats codecs Convert the video file No sound The volume level is too low Turn up the volume Mute function is active Mute function off Wiring problems Check the correct wiring Only sound is pla...

Страница 35: ...ess FAV button and move to the ALL TV List Press OK then Exit The displayed time info is not correct Daylight saving time and standard time DST Go to the section System Setup Local Time Setting and select Region Italy Use GMT User Defined and Configure GMT by selecting UTC 1 00 or 2 00 This operation must be done at each swtch from daylight saving time 4 SUPPORT For any other problem or doubt abou...

Страница 36: ......

Страница 37: ......

Отзывы: