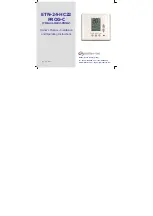
meitav-tec ETN-24-HC22 PROG-C Скачать руководство пользователя страница 1


ETN-24-HC22

PROG-C


(TRE-24-HC22-PROG)


Owner's Manual - Installation 

and Operating Instructions


Meitav-tec Ltd (Contel group)

Tel: +972-3-9626462   Fax: +972-3-9626620


Rev. 6.4  12.06


www.meitavtec.com - [email protected]

Содержание ETN-24-HC22 PROG-C

Страница 1: ...24 HC22 PROG C TRE 24 HC22 PROG Owner s Manual Installation and Operating Instructions Meitav tec Ltd Contel group Tel 972 3 9626462 Fax 972 3 9626620 Rev 6 4 12 06 www meitavtec com support meitavtec...

Страница 2: ...remote control Option With weekly program built in 6 Troubleshooting for the technician 7 1 Options and Accessories Hand held remote control with weekly program Individual cool and heat set points Ext...

Страница 3: ...rface Install three screws as required Make electrical connections as shown on enclosed electrical wiring diagram Next page Install the cover to the back panel first the two tabs on the bottom and the...

Страница 4: ...er W1 Heater 1 W2 Heater 2 T External Sensor T External Sensor Y2 Compressor 2 G Fan Y1 Compressor 1 Note 1 T T Terminals can be used in any systems configuration when a Meitav tec external sensor is...

Страница 5: ...itch disconnect electricity in the main board 4 DIP switch Explanations different configurations 4 1 The DIP switch is located in the middle of the board as shown in the drawing Inside the thermostat...

Страница 6: ...t in use X OFF Heat Pump in COOL mode O X 3 Heat Pump in HEAT mode B X OFF 3 minutes delay for compressor X 4 No delay X OFF Internal Sensor Control X 5 External sensor control X OFF Internal Sensor C...

Страница 7: ...connection option Important The external sensor must be Meitav tec type Default switch from factory Table 4 3 N TC Sensor Temperature Resistance Characteristics Temp C 7 2 10 0 12 8 15 6 18 3 21 1 23...

Страница 8: ...ect power 24Vac 5 Make sure the reading in the display is by the external sensor only The wire length for the external sensor can be up to 100 feet 30 meters with standard cable If the distance is gre...

Страница 9: ...the clock display In auto change mode press the set buttons or COOL and TEMPERATURE will flash Set the cooling temperature with or buttons After three seconds HEAT will be displayed and the TEMPERATUR...

Страница 10: ...on The Heating and Cooling MODE will appear Make adjustments using the set buttons or Press SELECT button again fan will appear Use the set buttons or to choose between Fan On and Auto Fan Change Mode...

Страница 11: ...ormal display will show the temperature in the room When is pressed it will flash and show the set point for the selected mode 2 Days of the week When setting the program It will display the period th...

Страница 12: ...the SET will appear in the display 6 ON OFF thermostat active or deactivated 7 Heat Cool modes When both in the display auto change heat cool 8 Fan Mode When the display shows FAN the unit s mode is...

Страница 13: ...ol Set Point 24 C 23 C 22 C 25 C Heat Set Point 21 C 21 C 21 C 18 C The following chart will help simplify making normal adjustments System Mode Fan Operation and the program We recommend that you fil...

Страница 14: ...4 Programming Adjust Clock Settings Hours Adjust Clock Settings Minutes Adjust Clock Day of the week 2 Heat Temp 1 Program No Hour Minutes Cool Temp Program No Hour Minutes Wake Day Heat Temp Cool Tem...

Страница 15: ...es Saturday and Sunday programming Return Sleep Heat Temp Cool Temp Heat Temp Cool Temp Follow the steps above to set the programs for Saturday and Sunday At any time during the programming you can re...

Страница 16: ...ight The backlight of the unit will activate when any button is pressed or the information is send from the remote control 6 RT04 Hand held remote control Option Purchase separately 6 1 General This r...

Страница 17: ...int towards the thermostat Fan Press FAN button to change between FAN ON or AUTO FAN A Press ON SEND button to send information to thermostat Mode Press MODE button to change between COOL HEAT AUTO CH...

Страница 18: ...ment buttons or COOL and SET TEMP will flash Set cooling with or buttons Press SELECT button HEAT and SET TEMP will flash Set the heating set point with or buttons Press the SELECT button again or Pre...

Страница 19: ...gs for the week riday ning 4 Night Adjust the minutes with or buttons Press SELECT again weekday will flash Adjust the day with or buttons Press SELECT again to exit from prog Press ON SEND button to...

Страница 20: ...ming Press and hold SELECT button for three seconds PROGRAM flashing and the days Mon Fri will appear on display Press or buttons PROGRAM 1 START flashing will appear Press or button the hours will fl...

Страница 21: ...s in PROGRAM 1 Press SELECT button PROGRAM 3 START flashing will appear Press or buttons and adjust the hours minutes and temperature the same way as in PROGRAM 1 Press SELECT button PROGRAM 4 START f...

Страница 22: ...grammable SEND will blink Press ON SEND button to send the information to the thermostat If you did not change between them press the SELECT button to end programming Programmable or non programmable...

Страница 23: ...e Rh connection Heat stages do not switch on Check the W1 connection In heat mode unit blows cool air Check the Auto Fan settings The unit may be set to FAN shown in the display The unit is not sensin...

Страница 24: ...24 REV 6 4...

Отзывы: