


1
20-emea-pillcam-colon-procedure-qrg-4781779 © 2020 Medtronic. All rights reserved. Medtronic, Medtronic logo
and Further, Together are trademarks of Medtronic. All other brands are trademarks of a Medtronic company.
QUICK REFERENCE GUIDE
* Setup the pre-capsule and post-capsule ingestion bowel
prep instructions in the Tools
Regimen Manager
section of the software before patient check-in
PillCam
™
COLON 2 system procedure
with PillCam
™
recorder 3
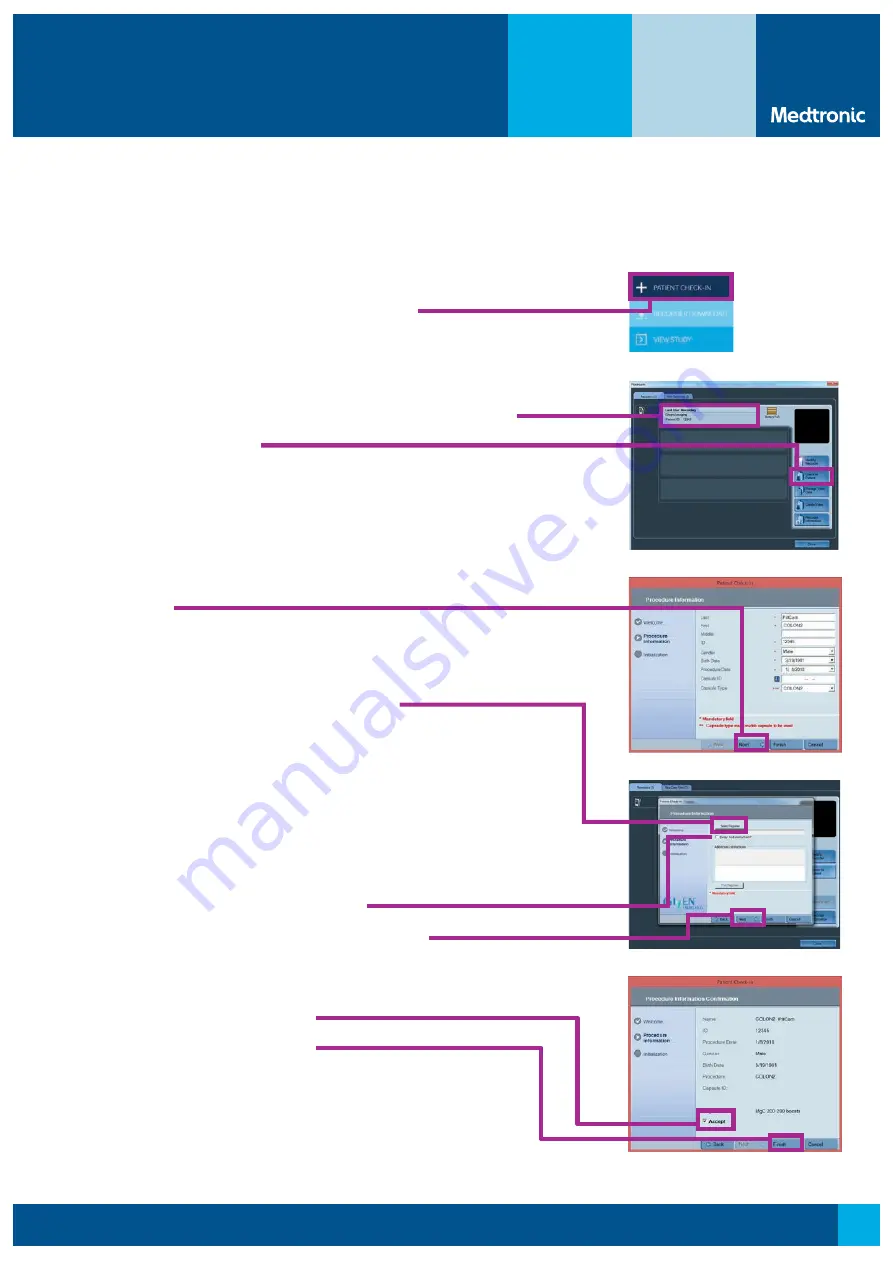
Patient check-in
1.
Open PillCam
™
desktop software v9.
From the home screen, click on
Patient Check-in.
2.
A.
Click the
Recorders
tab to select recorder that you wish to use.
B.
Click
Check-In Patient.
3.
A.
Enter procedure information.
B.
Select capsule type “COLON 2.”
C.
Click
Next
.
4. A.
Click
Select Regimen
(moves to new screen).
B.
Click the box next to the bowel prep regimen
you previously customized, named, and approved
*
.
C.
Click
Select
(moves back to main screen).
D.
Check the “Delay first instruction?” box only if you want
to enforce a minimum 60 minute instruction-free period
between the time of capsule ingestion and the first patient
instruction alert on the recorder. This approach may be
helpful for patients discharged after ingestion.
Otherwise, ensure the box is unchecked.
E.
Click
Next
and continue patient check-in process.
5.
A.
Confirm data and check
Accept
.
B.
Click
Finish
. PillCam
™
recorder 3
is ready for procedure.


