User Manual
•
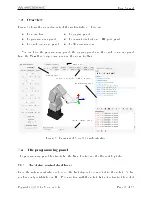
Select the Control option and click Connect.
•
As soon as the robot is connected, you will get the following welcome message in the
log panel: [3000][Connected to Meca500 x_x_x.x.x], where the x's are numbers.
8.1.3 Activating the robot
•
Select the
checkbox, in the Main Control tab OR type in the programming text eld
ActivateRobot and click the
Ù
button.
You will hear a distinctive clicking sound.
8.1.4 Homing the robot
•
Select the
checkbox in the Main Control tab or erase ActivateRobot, type Home and
click the
Ù
button in the programming panel.
B
CAUTION
The robot will move slightly during homing. Before homing it, make sure that
there is no risk for mechanical interference.
8.2 Moving the robot
A six-axis robot arm is a complex mechanism and no matter how intuitive its programming
interface is, the robot will still have limits. These limitations are not always obvious. For
example, in any six-axis robot arm, there are often paths that the robot cannot follow, even
though they seem to be inside the robot's workspace. Never forget that the workspace of a
general six-axis robot is a very intricate six-dimensional entity, not just a sphere.
NOTICE
If you know nothing about orientation representations and robot singularities,
we strongly advise you to read some introductory notes on robotics and our
tutorials on
and on
After homing, click the Zerro All Joints button in the Joints Jog tab on the left. The robot
will move all of its joints to their
0
◦
positions. In this robot joint set (shown in Fig. 9),
the robot is in a so-called
wrist singularity
and you will not be able to move it in Cartesian
space (e.g., by jogging). The simplest way to exit this singularity is to jog joint 5, but here
is another, more interesting way. Move the robot's end-eector to the pose
x
= 250
mm,
y
= 0
mm,
z
= 150
mm,
α
= 0
◦
,
β
= 90
◦
,
γ
= 0
◦
.
Page 22 of 38
Copyright c
2020 by Mecademic Inc.


