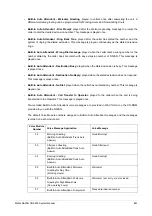


Matrix NAVAN CNX200 System Manual
895
To resolve this, NAVAN provides a configurable Pre-PSTN Digit Count (PPDC) for each CO trunk.
The PPDC defines the number of digits to be dialed by the extensions to reach the CO. The system applies Toll
Control check on extensions only after checking the PPDC configured for the CO.
On trunks that are connected to another PBX, in this case, T4, T5, and T6, PPDC must be configured with the
same number of digits as the Trunk Access Codes assigned for PBX-A. For example, if the Trunk Access Code is a
single digit number '0', the PPDC on must be configured as '1'. If the Trunk Access Code is a two-digit number, for
example, 61, the PPDC should be configured as '2'.
On trunks directly connected to the CO, i.e. T1, T2, T3 of NAVAN, the PPDC must be configured as ‘0’.
To take the above example further, when PPDC is configured as ‘1’ on T4, T5 and T6, when the user of Extension
21 dials ‘0’ followed by another ‘0’ to grab T1 or T2 trunk of PBX-A, the system will check the PPDC configured on
the trunk. On finding ‘1’ the system will ignore the first 0 dialed by the extension, and let the extension user grab T1
or T2 by considering the second ‘0’. The Extension user will get the CO dial tone from T1 or T2 of PBX-A.
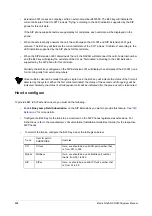
How to configure
The PPDC should be configured only for 'Behind the PBX Applications'. For all normal applications, this
count must be set to '0' for all the trunks. Otherwise, external number dialing may be hampered. Features
like Least Cost Routing and Station Message Detail Recording will also be affected.
For CO Trunks that are directly connected to the CO, PPDC must be configured as ‘0’.
For CO Trunks that are connected to the extensions of another PBX, PPDC must be configured as per the number
of digits in the Trunk Access Codes defined for the second PBX.
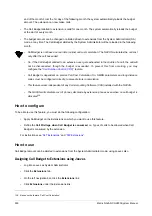
To configure, PPDC on a CO Trunk port,
•
Log into Jeeves as System Engineer.
•
Click the
Trunks
tab.
•
On the left navigation bar, click the
Trunks
link.
•
Then click
CO Trunks
.
•
Click the number of the CO trunk you want to assign PPDC ‘
0
’ (i.e. trunk connected directly to the CO) by
clicking on the CO trunk number tab. For example,
CO-1
.
•
The parameters of the CO trunk tab you selected appears.
•
Click
Hardware
Settings
to expand options.
Содержание NAVAN CNX200
Страница 1: ...NAVAN CNX200 System Manual ...
Страница 2: ......
Страница 3: ...NAVAN CNX200 Office in a Box Solution for Small Businesses System Manual ...
Страница 26: ...16 Matrix NAVAN CNX200 System Manual NAVAN CNX226 3G NAVAN CNX226 2G2 ...
Страница 27: ...Matrix NAVAN CNX200 System Manual 17 NAVAN CNX208 3G2 NAVAN CNX244 3G2 ...
Страница 28: ...18 Matrix NAVAN CNX200 System Manual Application of NAVAN ...
Страница 118: ...108 Matrix NAVAN CNX200 System Manual To exit the SA mode click Logout on the top of the page ...
Страница 122: ...112 Matrix NAVAN CNX200 System Manual ...
Страница 128: ...118 Matrix NAVAN CNX200 System Manual ...
Страница 146: ...136 Matrix NAVAN CNX200 System Manual You can also view the DHCP Status by clicking the Status tab See DHCP ...
Страница 158: ...148 Matrix NAVAN CNX200 System Manual ...
Страница 268: ...258 Matrix NAVAN CNX200 System Manual ...
Страница 278: ...268 Matrix NAVAN CNX200 System Manual ...
Страница 296: ...286 Matrix NAVAN CNX200 System Manual ...
Страница 306: ...296 Matrix NAVAN CNX200 System Manual ...
Страница 323: ...Matrix NAVAN CNX200 System Manual 313 Default CPTG Type applied to each Region supported by NAVAN ...
Страница 397: ...Matrix NAVAN CNX200 System Manual 387 ...
Страница 419: ...Matrix NAVAN CNX200 System Manual 409 1 Click Device Settings Location1 to expand options ...
Страница 436: ...426 Matrix NAVAN CNX200 System Manual ...
Страница 530: ...520 Matrix NAVAN CNX200 System Manual ...
Страница 570: ...560 Matrix NAVAN CNX200 System Manual ...
Страница 712: ...702 Matrix NAVAN CNX200 System Manual Page Zones For information on how to create and assign Page Zones see Paging ...
Страница 848: ...838 Matrix NAVAN CNX200 System Manual ...
Страница 852: ...842 Matrix NAVAN CNX200 System Manual ...
Страница 864: ...854 Matrix NAVAN CNX200 System Manual To generate the detailed test report click the Generate Test Report button ...
Страница 900: ...890 Matrix NAVAN CNX200 System Manual Pick up the handset Dial 1070 Replace handset ...
Страница 903: ...Matrix NAVAN CNX200 System Manual 893 For SLT Users When dialed extension is busy Dial 4 on busy tone ...
Страница 912: ...902 Matrix NAVAN CNX200 System Manual Exit System Administrator mode ...
Страница 930: ...920 Matrix NAVAN CNX200 System Manual Replace handset ...
Страница 994: ...984 Matrix NAVAN CNX200 System Manual You may log out of Jeeves ...
Страница 1072: ...1062 Matrix NAVAN CNX200 System Manual To Retrieve Message Wait Pick up the handset Dial 1077 ...
Страница 1086: ...1076 Matrix NAVAN CNX200 System Manual To resume outgoing speech Press Flash Key Dial 1052 ...
Страница 1114: ...1104 Matrix NAVAN CNX200 System Manual For SLT Users When dialed extension is busy Dial 5 on Busy Tone ...
Страница 1155: ...Matrix NAVAN CNX200 System Manual 1145 Dial New User Password You get confirmation tone Replace handset Extended IP Phone ...
Страница 1216: ...1206 Matrix NAVAN CNX200 System Manual ...
Страница 1308: ...1298 Matrix NAVAN CNX200 System Manual The End IP Address ...
Страница 1310: ...1300 Matrix NAVAN CNX200 System Manual ...
Страница 1356: ...1346 Matrix NAVAN CNX200 System Manual NAVAN Features tested on IP Phones of different Brands ...
Страница 1357: ...Matrix NAVAN CNX200 System Manual 1347 ...
Страница 1366: ...1356 Matrix NAVAN CNX200 System Manual ...
Страница 1374: ...1364 Matrix NAVAN CNX200 System Manual ...


