PRINTED IN U.S.A.
65
50960025/CP0514
2.
Connect one end of the (red) positive (+) jumper
cable to the positive (+) battery terminal on the
disabled machine first. DO NOT allow the posi-
tive (+) jumper cable clamps to touch any metal
other than the positive (+) battery terminals.
Connect the other end of the positive jumper
cable to the jumper battery positive (+) terminal.
3.
Connect one end of the (black) negative (-)
jumper cable to the jumper battery negative (-)
terminal.
4.
Make the final negative (-) jumper cable connec-
tion to the disabled machine’s engine block or
frame (ground)
⎯
NOT to the disabled machines
negative battery post. If making the connection to
the engine, keep the jumper cable clamp away
from the battery, fuel lines, and moving parts.
NOTE:
Twist the jumper cable clamps on the bat-
tery terminals to ensure a good electrical connec-
tion.
5.
Start the engine. If it does not start immediately,
start the jumper vehicles engine to avoid exces-
sive drain on the booster battery.
6.
After the machine has started and is running
smoothly, have the second person remove the
jumper cables (negative (-) jumper cable first)
from the jumper vehicle battery, and then from the
disabled machine, while ensuring NOT to short
the two cables together.
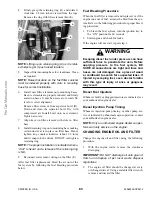
Allow sufficient time for the alternator to build up a
charge in the battery before operating the machine or
shutting off the engine.
NOTE:
If the battery frequently becomes dis-
charged, have the battery checked for possible
dead cell(s), or troubleshoot the electrical system
for possible short circuits or damaged wire insula-
tion.
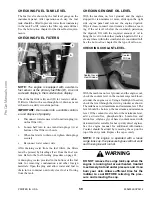
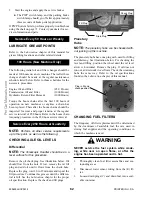
CHECKING AND TORQUING BOOM
LEAF CHAINS
Inspect the leaf chains for proper tension. On the three-
section boom, two of the chains are on the top front of
the boom. A third chain is accessible from inside the
rear of the boom (see three-section boom illustration).
Torque the two chains on the front of the three-section
boom to 30 ft.-lbs. (40 Nm). Lubricate with 80W-90
oil.
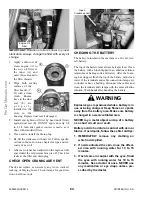
Jump Starting
If the battery becomes discharged or does not have
enough power to start the engine, use jumper cables
and the following procedure to jump-start the engine.
IMPORTANT:
BE SURE that the jumper battery is
also a 12-volt D. C. battery, and the vehicle used
for jump starting has a negative-ground electrical
system.
1.
Turn the key switches on both vehicles to “OFF.”
Be sure that both vehicles are in “Neutral” and
NOT touching.
WARNING
The ONLY safe method for jump-starting a dis-
charged battery is for TWO PEOPLE to per-
form the following procedure. The second per-
son is needed for removing the jumper cables
so that the operator does not have to leave the
operator’s compartment while the engine is
running. NEVER connect the jumper cables
directly to the starter solenoid of either
engine. DO NOT start the engine from any
position other than the operator’s seat, and
then ONLY after making sure all controls are in
“neutral.”
Closely follow the jump-start procedures, in
the order listed, to avoid personal injury. In
addition, wear safety glasses to protect your
eyes, and avoid leaning over the batteries
while jump-starting.
DO NOT attempt to jump-start the machine if
the battery is frozen, because this may cause
it to rupture or explode.
4. To neutralize acid spilled on the floor, use
one of the following mixtures:
a. 1 pound (0.5 kg) of baking soda in 4
quarts (4 liters) of water.
b. 1 pint (0.4 liters) of household ammo-
nia in 4 quarts (4 liters) of water.
Whenever battery is removed from the unit,
BE SURE to disconnect the negative (-) bat-
tery terminal connection first.
Содержание MT10044XT
Страница 12: ...50960025 CP0514 8 PRINTED IN U S A INTENTIONALLY BLANK To be removed as Dealer s file copy ProCarManuals com...
Страница 25: ...PRINTED IN U S A 21 50960025 CP0514 SAFETY 808034 808035 808033 808032 808036 808031 51200535 ProCarManuals com...
Страница 85: ...PRINTED IN U S A 81 50960025 CP0514 Date Hours Service Procedure MAINTENANCE LOG ProCarManuals com...
Страница 86: ...50960025 CP0514 82 PRINTED IN U S A Date Hours Service Procedure MAINTENANCE LOG ProCarManuals com...
Страница 87: ...PRINTED IN U S A 83 50960025 CP0514 Date Hours Service Procedure MAINTENANCE LOG ProCarManuals com...
Страница 91: ...PRINTED IN U S A 87 50960025 CP0913 Hydraulic Schematic for Two Joystick Control without PWP ProCarManuals com...
Страница 92: ...50960025 CP0913 88 PRINTED IN U S A Hydraulic Schematic for Two Joystick Control with PWP ProCarManuals com...
Страница 93: ...PRINTED IN U S A 89 50960025 CP0913 Hydraulic Schematic for Tri Function Joystick without PWP ProCarManuals com...
Страница 94: ...50960025 CP0913 90 PRINTED IN U S A Hydraulic Schematic for Tri Function Joystick with PWP ProCarManuals com...
Страница 95: ...PRINTED IN U S A 91 50960025 CP0913 Electrical Schematic with Radio Remote ProCarManuals com...
Страница 96: ...50960025 CP0913 92 PRINTED IN U S A Electrical Schematic without Radio Remote ProCarManuals com...
Страница 97: ...PRINTED IN U S A 93 50960025 CP0514 INTENTIONALLY BLANK ProCarManuals com...
Страница 108: ...50960025 CP0514 104 PRINTED IN U S A Load Zone Charts MT10055XT Work Platform Decal 50380043 ProCarManuals com...
Страница 114: ...50960025CP0514 2014 Manitou Americas Inc PRINTED IN U S A All Rights Reserved ProCarManuals com...


