INSTRUCTION MANUAL
MANUAL DE INSTRUCCIONES
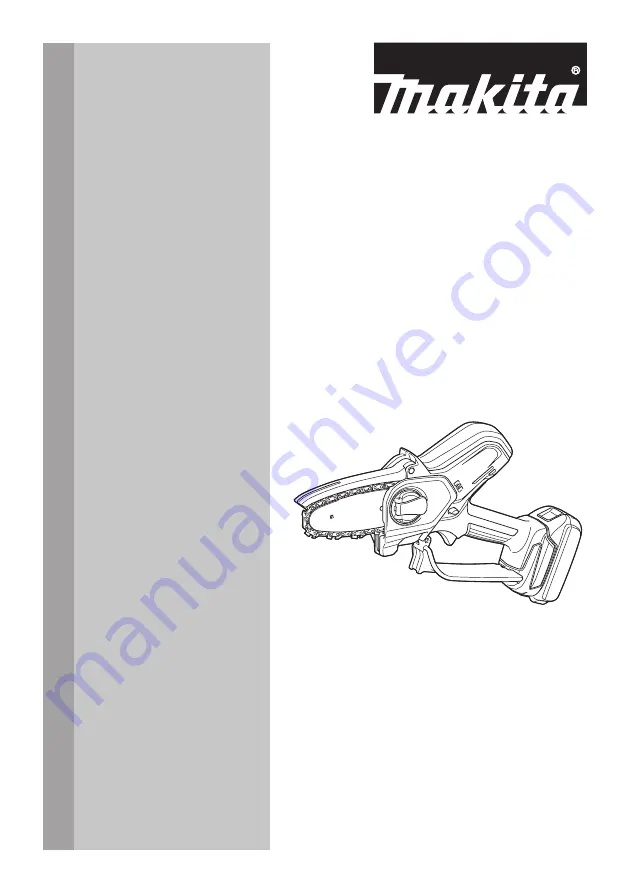
Cordless Pruning Saw
Sierra Inalámbrica para Podar
XCU12
XCU14
IMPORTANT:
Read Before Using.
IMPORTANTE:
Lea antes de usar.
Страница 1: ...INSTRUCTION MANUAL MANUAL DE INSTRUCCIONES Cordless Pruning Saw Sierra Inalámbrica para Podar XCU12 XCU14 IMPORTANT Read Before Using IMPORTANTE Lea antes de usar ...
Страница 2: ... 2014 The weight may differ depending on the attachment s including the battery cartridge s Saw chain guide bar and sprocket combination Saw chain type 80TXL Number of drive links 26 32 Guide bar Guide bar length 100 mm 4 150 mm 6 Cutting length 111 mm 4 3 8 161 mm 6 3 8 Part No 162B84 9 162C41 3 Pitch 0 325 Gauge 1 1 mm 0 043 Type Hard nose bar Sprocket Number of teeth 7 Pitch 0 325 WARNING Do no...
Страница 3: ... users of pacemakers and other similar medical devices should contact the maker of their device and or doctor for advice before operating this power tool Personal safety 1 Stay alert watch what you are doing and use common sense when operating a power tool Do not use a power tool while you are tired or under the influence of drugs alcohol or med ication A moment of inattention while operating powe...
Страница 4: ...m perature above 130 C may cause explosion 7 Follow all charging instructions and do not charge the battery pack or tool outside the temperature range specified in the instruc tions Charging improperly or at temperatures outside the specified range may damage the battery and increase the risk of fire Service 1 Have your power tool serviced by a qualified repair person using only identical replacem...
Страница 5: ... the depth gauge height can lead to increased kickback 14 Follow all instructions when clearing jammed material storing or servicing the pruning saw Make sure the switch is off and the battery pack is removed Additional Safety Instructions Personal protective equipment 1 Clothing must be close fitting but must not obstruct mobility 2 Wear the following protective clothing during work A tested safe...
Страница 6: ...can cause a large current flow overheating possible burns and even a breakdown 6 Do not store and use the tool and battery car tridge in locations where the temperature may reach or exceed 50 C 122 F 7 Do not incinerate the battery cartridge even if it is severely damaged or is completely worn out The battery cartridge can explode in a fire 8 Do not nail cut crush throw drop the battery cartridge ...
Страница 7: ...ess tool power 2 Never recharge a fully charged battery car tridge Overcharging shortens the battery service life 3 Charge the battery cartridge with room tem perature at 10 C 40 C 50 F 104 F Let a hot battery cartridge cool down before charging it 4 When not using the battery cartridge remove it from the tool or the charger 5 Charge the battery cartridge if you do not use it for a long period mor...
Страница 8: ... to you or someone around you CAUTION Do not install the battery cartridge forcibly If the cartridge does not slide in easily it is not being inserted correctly Indicating the remaining battery capacity Only for battery cartridges with the indicator 1 2 Fig 4 1 Indicator lamps 2 Check button Press the check button on the battery cartridge to indi cate the remaining battery capacity The indicator l...
Страница 9: ...r from being accidentally pulled a lock off lever is provided To start the tool depress the lock off lever and pull the switch trigger Release the switch trigger to stop 1 2 Fig 5 1 Switch trigger 2 Lock off lever Checking the run down brake CAUTION If the saw chain does not stop within a few seconds in this test stop using the tool and consult our authorized service center Run the tool and then r...
Страница 10: ...Fig 9 1 Lever 2 Sprocket cover 3 Remove the sprocket cover 4 Align the hole on the guide bar with the pin on the tool body and then place the guide bar as shown in the figure 1 3 2 Fig 10 1 Guide bar 2 Hole 3 Pin 5 Slide the guide bar toward the sprocket to lock the pin 1 2 Fig 11 1 Guide bar 2 Pin 6 Remove the guide bar from the tool body 7 Check the direction of the saw chain Match the direc tio...
Страница 11: ...over 1 3 2 Fig 15 1 Sprocket cover 2 Bolt 3 Pin 11 Turn the lever clockwise until the sprocket cover is secured then return it to the original position 1 2 Fig 16 1 Lever 2 Sprocket cover Make sure that the saw chain does not loose and the saw chain can be moved smoothly back and forth If necessary adjust the tension of the saw chain by refer ring to the section for adjusting saw chain tension Adj...
Страница 12: ...d for the first time it may take up to two minutes for the saw chain oil to begin its lubricating effect upon the saw mech anism Run the saw without load until it does so NOTICE When filling the chain oil for the first time or refilling the tank after it has been com pletely emptied add oil up to the bottom edge of the filler neck The oil delivery may otherwise be impaired NOTICE Use the saw chain...
Страница 13: ...is adequate Fig 23 Working with the tool CAUTION Keep all parts of the body away from the saw chain when the tool is operating CAUTION Hold the tool firmly with both hands when the tool is operating CAUTION Do not overreach Keep proper footing and balance at all times NOTICE Never toss or drop the tool NOTICE Do not cover the vents of the tool Before starting the tool bring the root of guide bar a...
Страница 14: ...aw chain Sharpen the saw chain when Mealy sawdust is produced when damp wood is cut The chain penetrates the wood with difficulty even when heavy pressure is applied The cutting edge is obviously damaged The saw pulls to the left or right in the wood caused by uneven sharpening of the saw chain or damage to one side only Sharpen the saw chain frequently but a little each time Two or three strokes ...
Страница 15: ...the figure 1 2 Fig 29 1 File 2 Saw chain The file can be guided more easily if a file holder optional accessory is employed The file holder has markings for the correct sharpening angle of 30 align the markings parallel to the saw chain and limits the depth of penetration to 4 5 of the file diameter 30 1 5 1 Fig 30 1 File holder After sharpening the chain check the height of the depth gauge using ...
Страница 16: ...the oil discharge hole by discharging chain oil 4 Remove the battery cartridge from the tool Reinstall the sprocket cover and saw chain and guide bar on the tool Replacing the sprocket CAUTION A worn sprocket will damage a new saw chain Have the sprocket replaced in this case Before fitting a new saw chain check the condition of the sprocket 1 2 Fig 35 1 Sprocket 2 Areas to be worn out Always fit ...
Страница 17: ...orized Service Centers always using Makita replacement parts for repairs Malfunction status Cause Action The tool does not start Battery cartridge is not installed Install a charged battery cartridge Battery problem low voltage Recharge the battery cartridge If recharging is not effective replace the battery cartridge The motor stops running after a little use Battery s charge level is low Recharg...
Страница 18: ...rvice Center Saw chain Guide bar Guide bar cover File Tool bag Holster Makita genuine battery and charger NOTE Some items in the list may be included in the tool package as standard accessories They may differ from country to country MAKITA LIMITED WARRANTY Please refer to the annexed warranty sheet for the most current warranty terms applicable to this product If annexed warranty sheet is not ava...
Страница 19: ...ción de los accesorios incluido el o los cartuchos de batería Combinación de cadena de la sierra barra de guía y pieza dentada Tipo de cadena de sierra 80TXL Número de eslabones motorices 26 32 Barra de guía Longitud de la barra de guía 100 mm 4 150 mm 6 Longitud de corte 111 mm 4 3 8 161 mm 6 3 8 No de pieza 162B84 9 162C41 3 Paso 0 325 Calibre 1 1 mm 0 043 Tipo Barra de punta rígida Pieza dentad...
Страница 20: ... exponga las herramientas eléctricas a la lluvia ni a condiciones húmedas La entrada de agua en una herramienta eléctrica aumentará el riesgo de que se produzca una descarga eléctrica 4 No maltrate el cable Nunca utilice el cable para transportar jalar o desconectar la herra mienta eléctrica Mantenga el cable alejado del calor aceite objetos cortantes o piezas móvi les Los cables dañados o enredad...
Страница 21: ...ada haga que la reparen antes de utilizarla Muchos de los accidentes son ocasio nados por no dar un mantenimiento adecuado a las herramientas eléctricas 6 Mantenga las herramientas de corte limpias y filosas Si recibe un mantenimiento adecuado y tiene los bordes afilados es probable que la herramienta se atasque menos y sea más fácil controlarla 7 Utilice la herramienta eléctrica los accesorios y ...
Страница 22: ... en la cadena de la sierra y ser lanzado hacia usted o hacerle perder el equilibrio 9 Transporte la sierra para podar estando apa gada y alejada de su cuerpo Cuando vaya a transportar o almacenar la sierra para podar coloque siempre la cubierta de la barra de guía La manipulación adecuada de la sierra para podar reducirá la probabilidad de un con tacto accidental con la cadena de la sierra en movi...
Страница 23: ... cadena haya sido afilada y tensionada de acuerdo con los reglamentos 2 No arranque la herramienta con la cubierta de la cadena instalada en esta El arrancar la herra mienta con la cubierta de la cadena instalada en esta podría causar que la cubierta de la cadena saliera arrojada hacia adelante ocasionando lesiones perso nales y daños a los objetos alrededor del operador 3 No se pare directamente ...
Страница 24: ...ujetas a los requisitos reglamentarios en materia de bie nes peligrosos Para el trasporte comercial por ej mediante terceros o agentes de transporte se deben tomar en cuenta los requisitos especiales relativos al empaque y el etiquetado Para efectuar los preparativos del artículo que se va a enviar se requiere consultar a un experto en materiales peligrosos Si es posible consulte ade más otras reg...
Страница 25: ...tura ambiente de 10 C 40 C 50 F 104 F Si un cartucho de batería está caliente déjelo enfriar antes de cargarlo 4 Cuando no utilice el cartucho de batería sáquelo de la herramienta o del cargador 5 Cargue el cartucho de batería si no va a utili zarlo durante un período prolongado más de seis meses DESCRIPCIÓN DE LAS PIEZAS 1 2 3 4 5 7 8 10 11 9 6 12 Fig 2 1 Mango delantero 2 Cubierta de seguridad 3...
Страница 26: ... indicador rojo no pueda verse Si no podría accidentalmente salirse de la herramienta y caer al suelo causando una lesión a usted o alguien a su alrededor PRECAUCIÓN No instale el cartucho de batería a la fuerza Si el cartucho no se desliza al interior fácilmente se debe a que no está siendo insertado correctamente Indicación de la capacidad restante de la batería Únicamente para cartuchos de bate...
Страница 27: ...y que vuelve a la posición OFF apagado cuando lo suelta AVISO No jale fuerte el gatillo interruptor sin presionar la palanca de desbloqueo Esto podría dañar el interruptor Se proporciona una palanca de desbloqueo para evitar que el gati llo interruptor sea jalado accidentalmente Para arrancar la herra mienta presione la palanca de desbloqueo y jale el gatillo inte rruptor Para detener la herramien...
Страница 28: ...la sierra Para instalar la cadena de la sierra realice los siguien tes pasos 1 Tire de la palanca hacia arriba 1 Fig 8 1 Palanca 2 Gire la palanca en sentido inverso al de las mane cillas del reloj hasta que la cubierta de la pieza dentada se desprenda 1 2 Fig 9 1 Palanca 2 Cubierta de la pieza dentada 3 Retire la cubierta de la pieza dentada 4 Alinee el orificio de la barra de guía con el pasa do...
Страница 29: ...ro extremo de la cadena de la sierra alrededor de la pieza dentada luego fije la barra de guía al cuerpo de la herramienta para que el orificio de la barra de guía se alinee con el pasador del cuerpo 1 Fig 13 1 Pieza dentada Presione la barra de guía contra el cuerpo de la herra mienta para liberar el pasador La tensión de la cadena de la sierra se ajusta automáticamente 1 2 3 Fig 14 1 Cadena de l...
Страница 30: ...ligeramente en sentido inverso al de las manecillas del reloj para aflojar un poco la cubierta de la pieza dentada La tensión de la cadena se ajusta automáticamente 2 1 Fig 18 1 Cubierta de la pieza dentada 2 Palanca 3 Gire la palanca en el sentido de las manecillas del reloj hasta que la cubierta de la pieza dentada quede asegurada y luego regrésela a la posición original 1 2 Fig 19 1 Palanca 2 C...
Страница 31: ...erramienta está en funcionamiento Verifique periódicamente la cantidad de aceite restante en el tanque de aceite a través de la ventanilla de ins pección de aceite 1 2 Fig 20 1 Ventanilla de inspección de aceite 2 Tapa del tanque de aceite Para llenar con el aceite siga los siguientes pasos 1 Limpie completamente el área alrededor de la tapa del tanque de aceite para evitar que entre sucie dad en ...
Страница 32: ...a y la barra de guía encienda la herramienta y sierre la rama moviendo la herramienta hacia abajo a lo largo de la rama Fig 24 PRECAUCIÓN Antes de la operación de corte asegúrese de que la rama a cortar esté en contacto con la raíz de la barra de guía y la parte de soporte del cuerpo de la herramienta De lo contrario la herramienta podría tirar hacia la punta de la barra de guía y esta podría tamb...
Страница 33: ...2 Distancia entre el borde de corte y el calibrador de profundidad 3 Longitud mínima de la parte cortadora 3 mm Todas las partes cortadoras deberán tener la misma longitud El que las partes cortadoras ten gan diferentes longitudes impide que la cadena de la sierra se accione fácilmente y puede ocasionar que ésta se rompa No afile la cadena cuando la longitud de la parte cortadora haya alcanzado 3 ...
Страница 34: ...n de la cadena accesorio opcional Fig 31 Elimine cualquier material protuberante indepen diente de cuán pequeño sea con una lima plana especial accesorio opcional Redondee la parte delantera del calibrador de profundidad de nuevo Limpieza de la barra de guía En la ranura de la barra de guía se acumularán astillas y aserrín Éstas pueden obstruir la ranura de la barra y afectar el flujo de aceite Li...
Страница 35: ... aceite de la cadena 4 Retire el cartucho de batería de la herramienta Reinstale la cubierta de la pieza dentada la cadena de la sierra y la barra de guía en la herramienta Reemplazo de la pieza dentada PRECAUCIÓN Una pieza dentada desgas tada dañará una cadena nueva de la sierra En este caso reemplace la pieza dentada Antes de instalar una nueva cadena de la sierra verifi que la condición de la p...
Страница 36: ...ngún trabajo de mantenimiento que no esté descrito en el manual de instrucciones Todo este tipo de trabajo deberá ser realizado por nuestro centro de servicio autorizado Elemento a revisar Tiempo de operación Antes de la operación Diariamente Semanal mente Cada 3 meses Anualmente Antes del almacena miento Herramienta completa Inspección Limpieza Inspección en el centro de servicio autorizado Caden...
Страница 37: ...amente La barra de guía o la cadena de la sierra están sueltas Ajuste la barra de guía o la tensión de la cadena de la sierra Avería de la herramienta Solicite la reparación en el centro de servicio autorizado de su región La cadena de la sierra no puede instalarse La combinación de cadena de la sierra y la pieza dentada no es correcta Utilice la combinación correcta de cadena de la sierra y la pi...
Страница 38: ...38 ...
Страница 39: ...39 ...
Страница 40: ...ados por el lijado aserrado esmerilado taladrado y otras actividades de la construcción contienen sustancias químicas reconocidas por el Estado de California como causantes de cáncer defectos de nacimiento y otros peligros de reproducción Algunos ejemplos de estos productos químicos son plomo de pinturas a base de plomo sílice cristalino de ladrillos y cemento y otros productos de albañilería y ar...