


good about finding your APM and selecting the correct COM
port by default, but there is a trick to that. You need to plug the
APM in before you open Mission Planner. If this still doesn’t
work, look into your PC settings and find all open COM ports.
You should see your APM listed there as an Arduino Mega. Take
note of that COM port and remember it moving forward.
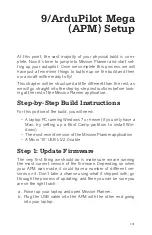
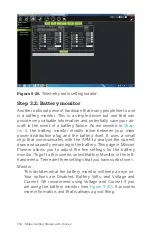
Step 2: Connect and Complete
Mandatory Setup
Now that we have updated our firmware, we have a nice clean
slate to start from. Let’s walk through our mandatory setup now
and get this bird ready to fly!
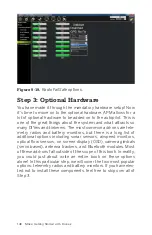
There are actually two ways you can complete this step. One is
to use the Wizard that is located directly under the Install Firm-
ware button you used in the last step. The second way is to do it
manually. We are going to walk through the manual process in
this example, but both ways are essentially the same thing; the
wizard just forces you to do all the steps together, while manual
entry allows you to do only the steps you want. Any time we set
up a new copter, we want to complete all of these steps, but
there may be times in the future where you also want to revisit
just one or two of these steps—such as GPS or IMU calibration
—and we want to you show you that from the beginning.
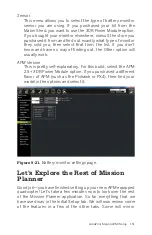
Before we can set anything up, we need to connect our APM to
Mission Planner. This requires you to select the COM port and
Baud Rate before clicking the Connect button in the upper-right
corner of the application. Once you connect, you will notice a
new set of menu options appear in the left-hand column, includ-
ing Mandatory Hardware and Optional Hardware.
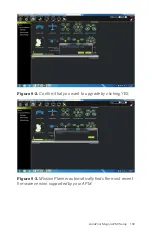
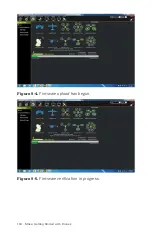
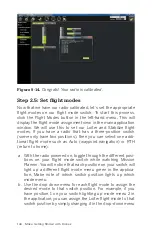
Step 2.1: Set frame type
Click the Frame type button from the left-hand column under
the Mandatory Hardware heading and select the X copter cate-
gory (see
).
136 Make: Getting Started with Drones
Содержание Belinda Kilby
Страница 1: ......
Страница 3: ...Make Getting Started with Drones Terry Kilby and Belinda Kilby...
Страница 25: ...Figure 1 5 Basic quadcopter showing how the stick commands would move the craft Introduction 13...
Страница 26: ......
Страница 90: ......
Страница 126: ......
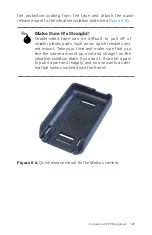
Страница 142: ...Figure 8 7 Mobius camera next to the quick release camera mount 130 Make Getting Started with Drones...
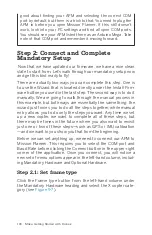
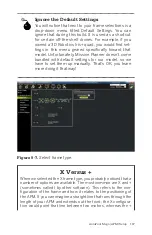
Страница 146: ...Figure 9 4 Firmware upload has begun Figure 9 5 Firmware verification in progress 134 Make Getting Started with Drones...
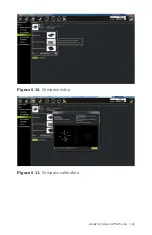
Страница 153: ...Figure 9 10 Compass setup Figure 9 11 Compass calibration ArduPilot Mega APM Setup 141...
Страница 198: ......


