background image

3 - XY Transport Module Replacement Procedure 

ExpressCard 2000| Instant Issuance Card Personalization System | XY Transport Module Replacement Procedure 

 
Page 13 


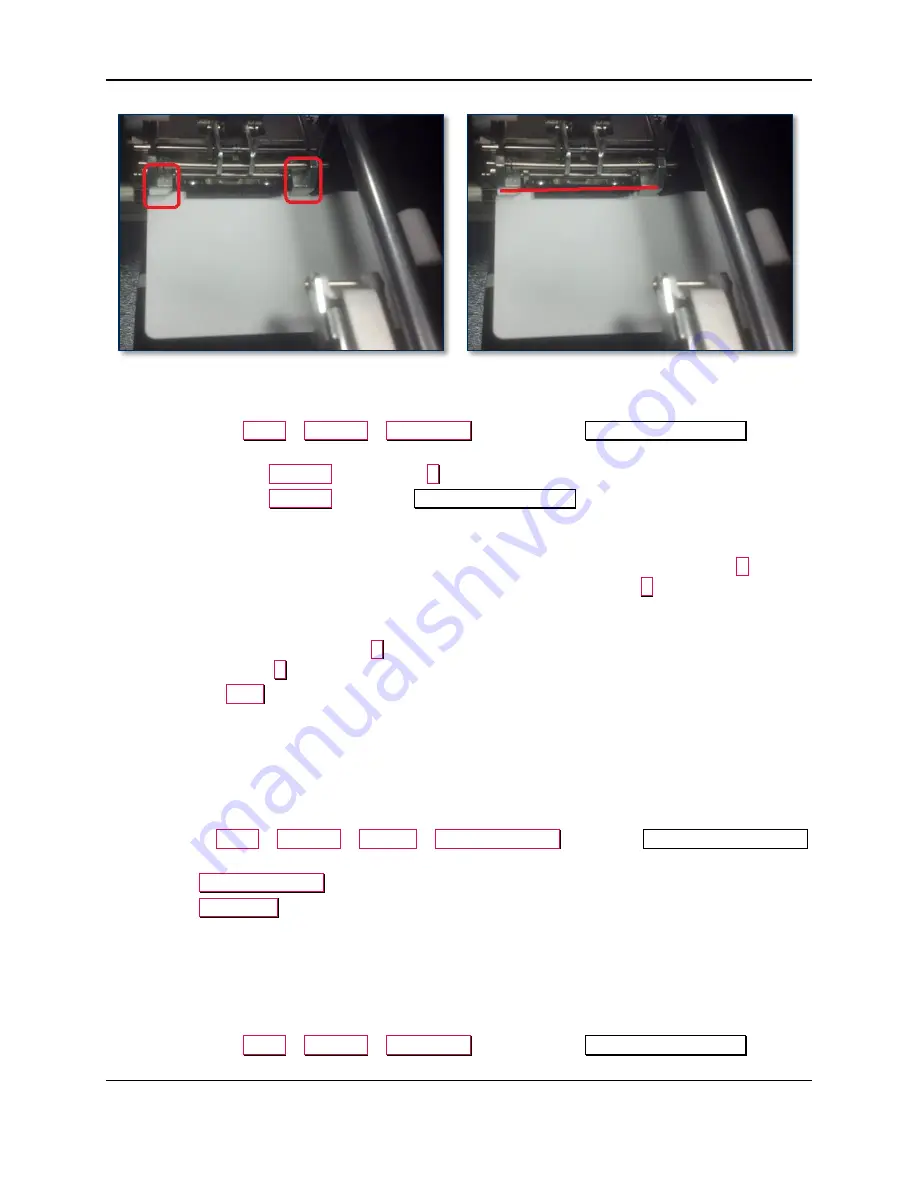
Figure 3-6 - Card Clamps On Card (FRONT VIEW) 

17)


If the card doesn’t fit all these conditions, adjust the handoff location by following these steps: 
a)


Navigate to 

Menu

 > 

Settings

 > 

Edit Config

 to open the first 

Configuration Editing


password page. 

b)


Enter password 

1234567

 and press the 

E

 button to open the second password page. 

c)


Enter password 

7654321

 to open the 

Configuration Editing

 page. 

d)


Scroll down in the list of settings until you find the 

PrinterHandoffAdjustmentX

 setting. 

e)


If the card did not push far enough toward the second clamp, 

decrease

 the 

PrinterHandoffAdjustmentX

 setting by selecting the number in the list, pressing the 

C

 button, 

then entering the new number on the on-screen keypad and pressing the 

E

 button. 

f)


If the card did not make contact with the plastic portion of the clamp or did not press on the 
justifier and raise it a little bit, 

decrease

 the 

PrinterHandoffAdjustmentY

 setting by clicking the 

number in the list, pressing the 

C

 button, then entering the new number on the on-screen keypad 

and pressing the 

E

 button. 

g)


Press the 

Save

 button to save your changes. 

h)


Repeat the steps in this section until the card clamps correctly when it exits the printer.  

Keep the 

card in the XY Transport for the next section

3.3.3


How to Calibrate XY Transport to Exit Transport Handoff 

To calibrate where the XY Transport goes to push a card into the exit rollers, follow these steps: 

1)


Make sure you have moved a card to the XY Transport as described in the previous section. 

2)


Navigate to 

Menu

 > 

Settings

 > 

Service

 > 

MCP Commands

 to open the 

Controller Commands


page. 

3)


Press the 

XY To Embosser

 button. 

4)


Press the 

XY To Exit

 button. 

5)


Make sure the XY Transport does not bump against the Exit Transport. 

6)


Make sure the first green roller on the exit ramp is centered on the card. 

7)


Make sure the card is pushed into the exit ramp past the point where the first green roller touches it. 

8)


If the card doesn’t fit all three of these conditions, adjust the handoff location by following these 
steps: 

a)


Navigate to 

Menu

 > 

Settings

 > 

Edit Config

 to open the first 

Configuration Editing


password page. 

Содержание ExpressCard 2000

Страница 1: ...Phone 562 546 6400 I Technical Support 888 624 8350 www magtek com ExpressCard 2000 Instant Issuance Card Personalization System XY Transport Module Replacement Procedure September 22 2014 Manual Par...

Страница 2: ...be reproduced or transmitted in any form or by any means electronic or mechanical for any purpose without the express written permission of MagTek Inc MagTek is a registered trademark of MagTek Inc M...

Страница 3: ...any cable electronic board or assembly SAFETY REQUIREMENTS Caution Never do any of the following DO NOT use a ground adapter plug to connect equipment to a power socket outlet that lacks a ground con...

Страница 4: ...ts 4 1 Required Tools Materials and Documents 5 1 1 Required Tools 5 1 2 Suggested Tools 5 1 3 Required Materials 5 1 4 Suggested Materials 5 1 5 Required Software and Documents 5 2 Introduction 6 3 X...

Страница 5: ...mostat pliers or equivalent 1 3 Required Materials Part Number Quantity Description 33070932 1 ea ASM REPLACEMENT KIT XY TRANSPORT MODULE EC2000 1 4 Suggested Materials Part Number Quantity Descriptio...

Страница 6: ...maintenance functions so many of the cross references to deeper how to procedures from that manual have been removed for brevity The information in this document is intended for use by trained profess...

Страница 7: ...consumables from the device including card stock image printer ribbons indent cartridges and tipper foils Some consumables contain negative imprints of cardholder data and must be handled securely 2...

Страница 8: ...ted along the left side of the device Figure 3 1 Removing and Re Installing the XY Transport Module FRONT RIGHT VIEW Follow these steps to remove the XY transport module from the device 1 Disengage an...

Страница 9: ...set it aside 5 Snap open the XY transport ribbon cable clamp between the rails as shown in Figure 3 3 Figure 3 3 XY Transport Ribbon Cable TOP VIEW FROM FRONT 6 Grasping the XY transport ribbon cable...

Страница 10: ...deck plate near the rear of the device see Figure 3 1 and set them aside 10 Move the XY transport toward the rear of the device see 99875607 ExpressCard 2000 Hardware Service Manual for details 11 Use...

Страница 11: ...Allen wrench to fasten and tighten the three screws securing the XY transport to the top deck plate near the front of the device see Figure 3 1 6 Move the XY transport carriage toward the front of th...

Страница 12: ...rd clamp If the XY transport needs to be calibrated follow the steps in this section 3 3 2 How to Calibrate Printer to XY Transport Handoff To calibrate where the XY transport goes to take a card from...

Страница 13: ...e PrinterHandoffAdjustmentY setting by clicking the number in the list pressing the C button then entering the new number on the on screen keypad and pressing the E button g Press the Save button to s...

Страница 14: ...ressing the E button Adjust about 10 steps at a time g If the card is off center from the green roller and is too close to the front of the EC2000 increase the ExitHandoffAdjustmentY setting by clicki...

Отзывы: