


QUICK START GUIDE FOR LUMENERA Lg Camera Series
Lumenera Corporation • 7 Capella Ct. Ottawa, ON, Canada K2E 8A7 • (t) 1.613.736.4077 • (f) 1.613.736.4071 •
www.lumenera.com
Technical Assistance Centre: [email protected]
©
2012 Lumenera Corporation, all rights reserved.
Design, features, and specifications are subject to change without notice
V03052012
Thank you for purchasing a Lumenera GigE camera. This camera is ready to use, but requires connection
to a network card that supports Giga-bit Ethernet. Please read these instructions in their entirety before
proceeding and then follow the steps below for a quick and easy installation.
Required Tools and Parts:
Recommended PC Specifications:
•
1.0 Ghz or higher Pentium III compatible processor
•
512 MB RAM memory
Operat
ing system:
•
Windows XP (SP3), Windows Vista or Windows 7
•
32-bit & 64-bit operating systems are supported
•
The computer should also have as a minimum Microsoft .Net Framework 2.0 installed to
be able to continue on with this installation.
Recommendation:
•
The computer should have (at least) two network cards: One for the office network connection
and the other to be dedicated to the camera which should be a gigabit Ethernet NIC.
•
Items Included in the box:
•
Lg model camera.
•
Quick Start Guide for Lumenera Lg Camera Series
Camera Set-up and Installation:
1. You must ensure you are logged into the computer with administrator privileges prior to continuing
the installation.
2. Download LgCam Software for Lumenera Industrial product support webpage.
(
http://www.lumenera.com/support/downloads/industrial-downloads.php).
Please note that a
CD-ROM can be purchased as an optional item when placing the camera orde
r
.
3. Lumenera recommends the removal of any previously installed version by using the Windows
Add/Remove Control Panel function, prior to installing a new version.
4. Close all application software that is running and then insert the Lumenera Installer CD into your
CD-ROM drive. The camera should NOT be connected to the computer at this point.
5. Double-click on the installation program, or wait a few moments for the auto-play function to load
the setup program automatically, when installing from the CD.
6. Follow the onscreen prompts to install the software drivers and user application. The installation
script steps are the same whether the installation takes place on a Windows XP, Windows VISTA,
or Windows 7 platforms, whether they are 32-bit or 64-bit.
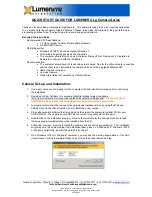
7. On a Windows VISTA or Windows7 computer, you may see the warning shown above, if the UAC
(User Access Control) is enabled. Respond by clicking the button labeled as
Yes
.