


Using the Report Manager
CentreVu Report Designer Version 8 User Guide
Copying a Report to the Designer Category
3-5
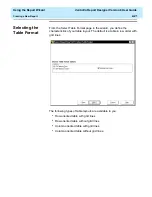
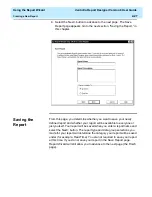
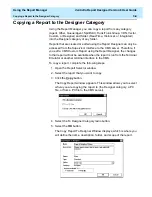
To define the properties information for a copied report, complete
the following steps:
6. Enter a name for your report in the Name field. The name can have
up to 40 characters, including blanks. Because the name you give
your report should be unique, you may want to look at existing report
names before entering a name for your report.
7. Move the cursor to the Description field and enter a description of
the report. The description can have up to 100 characters, including
blanks. It is not required that you enter a report description.
Do not use the \ (backslash), ; (semicolon), ’ (grave accent), ~
(tilde), “ (double quote), | (pipe), * (asterisk), or ? (question mark)
characters in your description of the report.
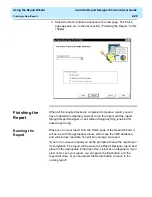
8. Move the cursor to the Folder field. Use the pull-down list to select
Real-Time, Historical, or Integrated. The report will be stored in the
Designer category of the folder you select here.
When you edit the report you will access the database for the folder
you select here. If you select Real-Time, you will not be able to
access the Historical database tables to define queries for the
report. If you select Historical, you will not be able to access the
Real-Time database tables to define queries for the report. However,
if you select Integrated, you will be able to access both the Real-
Time and Historical databases to define queries for the report.
You must select the Historical or Integrated folder if you want to
include the following:
●
Exceptions data
●
Agent trace data
●
Call record data.
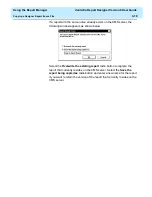
9. Select the Everyone radio button to make the report accessible to
all CMS users who have the appropriate permissions, or select the
Only Me radio button to make the report accessible only to yourself
It is a good idea
initially to make your reports available only to
yourself until they have been debugged and run successfully. This
prevents the possibility of other users running reports that you have
saved but not yet tested.
Assigning “Everyone” access to the report allows other users to run
the report and to copy the report to create new designer reports.
Assigning “Only Me” access to the report means that only you (and
the CMS administrator(s)) can run the report. In addition, no other
users, except for CMS administrators, can copy the report design for
use in their own designer reports.
Содержание CentreVu Report Designer
Страница 1: ...CentreVu Report Designer Version 8 User Guide 585 210 930 Comcode 108502196 Issue 1 December 1999...
Страница 4: ......
Страница 18: ...Introduction CentreVu Report Designer Version 8 User Guide Related Documents 1 8...
Страница 102: ...Edit Inputs CentreVu Report Designer Version 8 User Guide Viewing the Input Window 6 16...
Страница 142: ...Insert Field CentreVu Report Designer Version 8 User Guide Inserting Time Report Run Field on the Report 9 8...
Страница 148: ...Insert Table CentreVu Report Designer Version 8 User Guide Inserting a Table on the Report 10 6...
Страница 194: ...Format Field CentreVu Report Designer Version 8 User Guide Using the Field Format Options Window 14 6...
Страница 198: ...Format Text CentreVu Report Designer Version 8 User Guide Formatting Text on the Report 15 4...
Страница 212: ...Error Messages CentreVu Report Designer Version 8 User Guide Phase 2 Real Time Report Error Codes 16 14...
Страница 248: ...SQL Query and CMS Database Table Basics CentreVu Report Designer Version 8 User Guide Modifying a Table 18 26...
Страница 254: ...Database Items and Calculations CentreVu Report Designer Version 8 User Guide General Information B 2...
Страница 264: ...Index CentreVu CMS R3V8 Upgrades and Migration IN 10...
Страница 266: ......


