background image

62                               CellPipe® 60A/60A-BX User Guide


Interfaces 


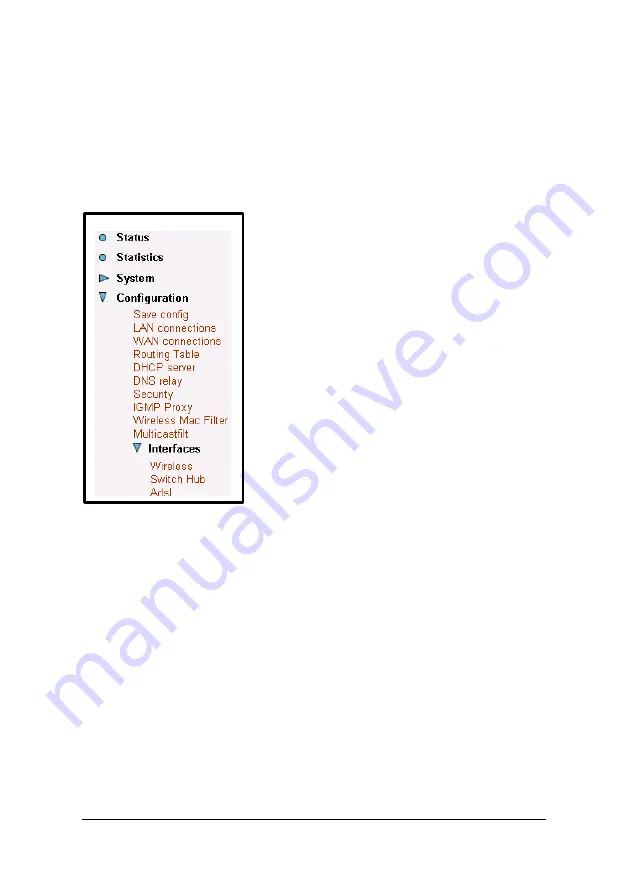
The Interfaces section includes 
Wireless, Switch Hub and ADSL 
links. Each link is described in detail 
in the pages that follow.   


Wireless 

Click on the 

Wireless

 link on the navigation bar. This page 

displays the wireless port configurations. You can change the 
MAC address on this page, then click on the 

Apply

 button when 

completed. 

Содержание CellPipe 60A

Страница 1: ...CellPipe 60A 60A BX User Guide June 2003...

Страница 2: ...RTTE Compliance Hereby Lucent Technologies declares that the equipment documented in this publication is in compliance with the essential requirements and other relevant provisions of the Radio and Te...

Страница 3: ...ment In rare instances unauthorized individuals make connections to the telecommunications network through the use of access features Trademarks Lucent the Lucent logo and all Lucent brand and product...

Страница 4: ...24hours a day seven days a week Log in and select a service Obtaining technical assistance Lucent On Line Customer Support at http www lucent com support provides access to technical support You can o...

Страница 5: ...pport Calling the technical assistance center TAC If you cannot find an answer through the tools and information of Lucent OnLine Customer Support or if you have a very urgent need contact TAC Access...

Страница 6: ...a cordless type during a electrical storm There may be a remote risk of electric shock form lightning 3 Do not use the telephone to report a gas leak in the vicinity of the leak Caution To reduce the...

Страница 7: ...Safety Guidelines 12 Appearance 13 Hardware Installation 15 Management 16 Default Values 17 Software Upgrade 18 Console Setup 19 Chapter 2 Web Management Operation Introduction 21 Preparing for Web Ma...

Страница 8: ...nnections 36 WAN Connections 40 Routing Table 47 DHCP Server 49 DNS Relay 52 Security 54 IGMP Proxy 60 Wireless MAC Filter 60 Multicast Filter 60 Interfaces 62 Wireless 62 Switch Hub 64 ADSL 65 Append...

Страница 9: ...peed Internet access via one wide area network WAN port over Asynchronous Transport Mode ATM over ADSL and also connects to a corporate network via four 10 100BT Ethernet ports and one 802 11b wireles...

Страница 10: ...ver existing wire infrastructure POTS or ISDN line 802 11b WLAN support up to 11Mbps DHCP server supported for easy LAN IP address management Support PPPoE RFC2516 PPP RFC2364 and IP RFC 2225 RFC1577...

Страница 11: ...CellPipe 60A 60A BX User Guide 11 Packaging This package consists of the following items CellPipe 60A 60A BX ADSL router unit RJ 45 cable RJ 11 cable AC Adapter User Guide CD ROM...

Страница 12: ...wer adapter supplied this device should not be connected to any other adapters Do not spill liquid of any kind on this device Do not place the unit on an unstable stand or table This unit may drop and...

Страница 13: ...roperly connected j PWR WAN ON Green ADSL line is connected Green 100M data transfer k LAN 4 ON Orange 10M data transfer Green 100M data transfer l LAN 3 ON Orange 10M data transfer Green 100M data tr...

Страница 14: ...14 CellPipe 60A 60A BX User Guide Rear panel Label Description j PWR DC inlet for AC adapter k WLAN Wireless LAN AP slot l 1X 4X Four RJ 45 ports for LAN connections m WAN RJ 11 ADSL port j k l m...

Страница 15: ...er end into your PC or LAN 3 Plug in the AC adapter into the AC power socket and connect the DC jack into the PWR inlet of the modem 4 Use a 9 pin RS 232 cable to connect the Console cable to the RJ 4...

Страница 16: ...lPipe 60A 60A BX from any workstation in the LAN The default local Ethernet IP address is 192 168 1 1 ADSL Port from Remote Site While the ADSL connection is in service you can connect remotely by Tel...

Страница 17: ...s by selecting System Update in the web interface For further details see the section Update in chapter 2 Default Mode Bridge Username Password root root Bridge Mode Setting WAN and ADSL Ethernet loca...

Страница 18: ...local IP address is 192 168 1 1 3 Under the DOS prompt execute the command xupgrade IP address of CellPipe 60A 60A BX For example xupgrade 192 168 1 1 4 This upgrading process can last as long as 60 s...

Страница 19: ...8 or Windows NT Select Start Programs Accessories HyperTerminal Group hyperterminal executable Enter a Connection Name select an icon and click OK 2 Select COM port to communicate with the modem Choos...

Страница 20: ...20 CellPipe 60A 60A BX User Guide 4 ASCII Setup Echo typed characters locally Line delay 0 milliseconds Character line feeds incoming line ends enable...

Страница 21: ...Mmanagement 1 Refer the hardware installation procedure in chapter 1 to install the CellPipe 60A 60A BX 2 Configure the PC to the same IP subnet as the CellPipe 60A 60A BX Example The CellPipe 60A 60...

Страница 22: ...window Enter Network password will pop up while starting the configuration With the window active type root for both the User Name and the Password You can also edit the Username and Password or add...

Страница 23: ...urations 4 Click WAN Settings to edit add WAN connections See Configuration WAN Connections for further details 4 Click LAN Settings to edit the default LAN IP address See Configuration LAN Connection...

Страница 24: ...24 CellPipe 60A 60A BX User Guide...

Страница 25: ...ent interfaces of the CellPipe 60A 60A BX Click on the appropriate Show Statistics link to view the statistics of that interface Three examples follow Example 1 LAN IP Show Statistics wlan This page d...

Страница 26: ...26 CellPipe 60A 60A BX User Guide transfer receive packets You can edit the default LAN port by clicking on the Configure LAN Connections button For instructions on how to configure LAN connection see...

Страница 27: ...s page displays the current statistics of the Ethernet port This includes port name connection status speed and transfer receive packets You can edit the default LAN port by clicking on the Configure...

Страница 28: ...ays the current statistics of the default bridge RFC 1483 This includes port name VPI VCI values transfer receive packets and encapsulation type You can edit add WAN connections by clicking on the Con...

Страница 29: ...ch link is described in the following sections Users Click on the Users link on the navigation bar to view the list of users By default only the admin user exists Click on the Edit User link to change...

Страница 30: ...k on the Create a new user link to add a new user On this page you need to enter a username password select true or false if you would like this user to have configuration rights and add a comment Cli...

Страница 31: ...Click on the Error Log link in the navigation bar to view the history of errors Click on the Clear Logs button to clear the log table Update Click on the Update link on the navigation bar to view the...

Страница 32: ...configurations to and from you computer 1 To back up a configuration file click on the Backup button and then select a location where you would like to save the file 2 To restore a configuration file...

Страница 33: ...rt To restart the modem click on the Restart button You may also check the box Reset to factory default settings if you would like to restart the modem with the factory settings The default settings a...

Страница 34: ...34 CellPipe 60A 60A BX User Guide...

Страница 35: ...n Configuration The Configuration section includes Save Config LAN connections WAN connections Routing table DHCP server DNS relay Security IGMP proxy Wireless MAC filter and Multicastfilt links Each...

Страница 36: ...n bar to view the save confirmation page To save the current configuration click on the Save button LAN Connections This page displays a list of currently defined LAN interfaces You can create a new L...

Страница 37: ...en select between Ethernet Routed and Ethernet bridged After you make a selection click on the Configure button To create an Ethernet route the following fields need to be filled in Description Enter...

Страница 38: ...s need to be filled in Description Enter a description for the route Port Select between Ethernet and wireless Click on the Apply button Changing the default LAN IP Click on the LAN connections link i...

Страница 39: ...CellPipe 60A 60A BX User Guide 39 Define the primary IP address and subnet mask of your device here and make the change by editing the IP address in the text box Then click on the Apply button...

Страница 40: ...cribe how to create each type of the WAN connection You can create multiple WAN connection services from each of following protocols C 1 RFC 1483 routed C 2 RFC 1483 bridged C 3 PPPoA routed C 4 MER C...

Страница 41: ...X User Guide 41 Define the VPI VCI WAN IP to match the DSLAM setting provided by the ISP Select LLC SNAP for Encapsulation Choose between DHCP and WAN IP and then click on the Apply button to confirm...

Страница 42: ...Create a new service to display the type of service Select RFC 1483 Bridged and then click on the Configure button Define the VPI VCI to match the DSLAM setting Select LLC SNAP for Encapsulation and...

Страница 43: ...routed and then click on the Configure button Type PPPoA router for the description then define the VPI VCI to match the DSLAM setting Keep WAN IP default setting 0 0 0 0 Leave LLC header Mode HDLC h...

Страница 44: ...BX User Guide C 4 MER Click Create a new service to display the type of service Select MER and then click on the Configure button Type MER router for the description Define the VPI VCI WAN IP based o...

Страница 45: ...ation C 5 IPoA Routed Click Create a new service to display the type of service Select IPoA routed and then click on the Configure button Type IPoA router for the description Define the VPI VCI WAN IP...

Страница 46: ...he type of service Select PPPoE routed and then click on the Configure button Type PPPoE router for the description Define the VPI VCI value to match the DSLAM ISP setting Set PPPoE Auto Connect to En...

Страница 47: ...Username and Password and type idle time number Click on the Configure button to confirm the configuration Routing Table Click on the Routing Table link in the navigation bar This page displays a tab...

Страница 48: ...ination Enter the destination of the router Gateway Enter the IP address of the gateway Netmask Enter the subnet mask Cost Enter the cost number of hops Cost Enter an interface name Advertise Select t...

Страница 49: ...he DHCP server and enables the data connection between multiple PCs by configuring IP address ranges and lease times Click on the DHCP Server link in navigation bar Click on the Enable button to enabl...

Страница 50: ...e IP address and subnet mask belonging to the chosen IP interface IP addresses to be available on this subnet Make sure that the start and end addresses offered in this range are within the subnet you...

Страница 51: ...CellPipe 60A 60A BX User Guide 51...

Страница 52: ...ot clash with an IP address already present in a dynamic address range You should also ensure that there is a suitable subnet defined for the IP address to reside in The MAC address should be expresse...

Страница 53: ...CellPipe 60A 60A BX User Guide 53 Enter the primary and secondary DNS Server IP address into the text boxes provided...

Страница 54: ...urity interfaces policies triggers and intrusion detection Select Enabled Security and then click the Change State button Under the Security Interfaces menu click on the Add Interface link to add a se...

Страница 55: ...click on the Add Interface button Select an interface name ppp 0 and interface type external and then click on the Apply button The interface is added to the main page Click on the Enable NAT to inter...

Страница 56: ...n the Firewall Policy Configuration link under the Policies Triggers and Intrusion Detection section You will then see the following screen Currently there are no policies set Click on New Policy to a...

Страница 57: ...ow edit the port filters or host validators on this interface Port Filters You can add the following port filters Field Name Description TCP Filter Requires port range start end IP and direction inbou...

Страница 58: ...new firewall trigger Firewall Add Trigger The following fields are required for adding a firewall trigger Field Name Description Transport type Choose between TCP or UDP Port number start Enter the st...

Страница 59: ...m protection block duration maximum TCP open handshaking count maximum ping count and maximum ICMP count Set the values and click Apply To set up Policies Triggers and Intrusion Detection settings aut...

Страница 60: ...ick on the Apply button Wireless MAC Filter 4 Click on the Wireless MAC Filter link on the navigation bar This page is used to filter MAC addresses You can enter up to five MAC addresses of wireless d...

Страница 61: ...Guide 61 Multicast Filter 4 Click on the Multicastfilt link on the navigation bar This page is used to configure the multicast filter Select enable or disable from the drop down list 4 Click on the Ap...

Страница 62: ...Switch Hub and ADSL links Each link is described in detail in the pages that follow Wireless 4 Click on the Wireless link on the navigation bar This page displays the wireless port configurations You...

Страница 63: ...re WEP encryption fill in the following fields WEP Encryption Select between 64 bit 128 bit or disable if you do not want to use web encryption Default Tx Key Enter an option 0 3 depending on the prev...

Страница 64: ...rea described in the preceding paragraphs Click on the Apply button when completed Switch Hub Click on the Switch Hub link on the navigation bar This page displays a table of the port configurations I...

Страница 65: ...ly button when completed ADSL Click on the ADSL link on the navigation bar This page displays a table of the default ADSL settings including standard trellis coding coding gain EC FDM mode and Tx powe...

Страница 66: ...66 CellPipe 60A 60A BX User Guide...

Страница 67: ...ETSI ITS 101388 and Deutsche Telekom U R2 Automatic rate adaptation or programmable in step of 32Kbps Line Impedance 100 Connector RJ 11 n OAM P Remote Telnet or Web browser Local UART port n Memory c...

Страница 68: ...P over ATM CHAP and PAP supported RFC2516 PPPoE PPP over Ethernet over ATM n Bridging Transparent Bridging IEEE 802 1D RFC2684 RFC1483 Bridged Spanning Tree Protocol IEEE 802 1D Supporting IP IGMP and...

Страница 69: ...rference But if it does the user will be required to correct the interference at his or her own expense The authority to operate this equipment is conditioned by the requirement that no modifications...

Страница 70: ...r to this equipment or equipment malfunctions may give the telecommunications company cause to request the user to disconnect the equipment Users should ensure for their own protection that the electr...

Отзывы: