background image

SOFTWARE LOADING INSTRUCTIONS


19                                                                                       Logicube OmniWIPE-

2 ™ User’s Manual 

Host PC preparation 

1.  Place the Software Update CD in the Host 

PC’s CD-ROM drive. 

2.  Boot the PC and go into BIOS. Make sure 

that the PC is set to boot from the CD-ROM. 

3.  Reboot the PC. It will go into a menu on the 

CD that contains six different boot methods.  

4.  Try the first 

boot method. If it doesn’t work, 

reboot and try the second. Keep trying until 
you find one that works (goes to an A 
prompt). 

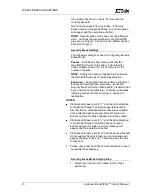
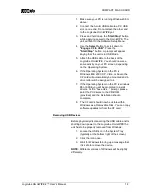
Once the above has been accomplished, perform the 
following: 

1.  Attach the parallel cable between the host PC 

and Logicube OmniWIPE. 

2.  If you are loading a new version of software, 

Insert the removable drive with the new 
ocx.h86 file and copy it to the Ramdrive 
created by the CD. 

NOTE: 

Ignore step 2 if you are reloading the original 

ocx.h86 file, which is automatically copied to the 
Ramdrive. 

3.  Go to the Ramdrive (always the last drive 

letter) and run 

UPDATE

. The Software 

Update screen will appear. 


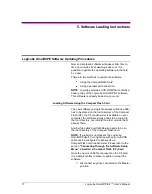
Logicube OmniWIPE Software Update 

Note

: Make sure the update is running on the PC and 

the Logicube OmniWIPE is connected to the host PC 
via the supplied parallel cable. 

1.  Press and hold the 

START/STOP 

button on 

the Logicube OmniWIPE while inserting the 
power cord into the Logicube OmniWIPE to 
bring up the Setup menu. 

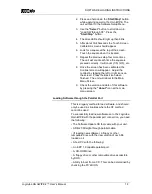
2. 

Scroll to the “Load SW from P. Port” option in 
the menu. 

3.  Press 

SELECT 

to UPDATE software and 

then follow the LCD on-screen prompts. The 
update will run for one to three minutes after 
which the Logicube OmniWIPE will restart. 

4.  Check the version and date of this software 

by 

pressing the “

About

” icon at the main 

menu 

Содержание OmniWIPE

Страница 1: ...I Logicube OmniWIPE 2 User s Manual Logicube OmniWIPE User s Manual Version 1 2 MAN OMNIWIPE 2 Date 12 08 14...

Страница 2: ......

Страница 3: ...NOWLEDGES THAT IMPROPER OPERATION OF LOGICUBE PRODUCT AND OR SOFTWARE OR HARDWARE PROBLEMS CAN CAUSE LOSS OF DATA DEFECTIVE FORMATTING OR DATA LOADING LOGICUBE WILL MAKE EFFORTS TO SOLVE OR REPAIR ANY...

Страница 4: ...OR ANY PRODUCT DAMAGED DUE TO IMPROPER PACKAGING OF THE WARRANTY RETURN TO LOGICUBE AT LOGICUBE S OPTION ANY PRODUCT PROVEN TO BE DEFECTIVE WITHIN THE WARRANTY PERIOD WILL EITHER BE REPAIRED OR REPLAC...

Страница 5: ...Compliance LOGICUBE PRODUCTS COMPLY WITH THE EUROPEAN UNION RESTRICTION OF THE USE OF CERTAIN HAZARDOUS SUBSTANCES IN ELECTRONIC EQUIPMENT ROHS DIRECTIVE 2002 95 EC THE ROHS DIRECTIVE PROHIBITS THE S...

Страница 6: ...LOGICUBE OMNIWIPE 1 Introduction 1 Features 2 Using this guide 2 System description 2 2 GETTING STARTED FAST START 4 Connecting Drives to the Logicube OmniWIPE 4 Connecting Parallel ATA PATA IDE Drive...

Страница 7: ...by Step 13 4 COMPACT FLASH CF CARD 15 Introduction 15 Inserting and Removing the Compact Flash Card 15 Connecting the CF Card to Windows via USB 15 Connecting Through the Software Setup Menu 15 Removi...

Страница 8: ......

Страница 9: ...sional features that are not available anywhere else The Logicube OmniWIPE is designed solely for erasing data on one two or three hard drives The OmniWIPE has two modes of operation WipeOut and Secur...

Страница 10: ...troduction Getting Started Fast Start Wiping Modes and Settings CompactFlash Card Software Loading Instructions Frequently Asked Questions Index Please read Section 1 Introduction and Section 2 Gettin...

Страница 11: ...s are missing Caution Avoid dropping the Logicube OmniWIPE 2 or subjecting it to sharp jolts When in use place it on a flat surface Caution Keep the unit dry If you need to clean your Logicube OmniWIP...

Страница 12: ...r position on the top of your OmniWIPE unit You will notice three connections One for a flat cable the drive data cable and another for a small drive power cable Above is the third connector for the S...

Страница 13: ...SATA drives CompactFlash CF cards Other specialized adapters are also available If you are unsure about the type of drive that you have please contact Logicube Technical Support for assistance It is O...

Страница 14: ...be ready to use in a few seconds NOTE User settings are retained after the unit is restarted Power On Off There is no ON OFF switch for the OmniWIPE When the unit needs to be hard booted unplug the p...

Страница 15: ...were present on older Logicube products The screen is bright and easy to read It also emits an audible beep every time the touch screen is pressed This lets the user know that the touch screen is act...

Страница 16: ...ess the SET button to change the settings before continuing SET button Press this button once to bring up the Settings screen where you can change the wipe modes and other settings of the unit Indicat...

Страница 17: ...number from 1 to 23 for the hour the clock is set to military time Tap OK when finished 3 Tap a number from 0 to 59 for the minutes Tap OK when finished 4 Tap a number from 1 to 31 for the day Tap OK...

Страница 18: ...he Main Menu screen A note about the Back icon The Back icon can be found in the lower left hand corner on most of the screens Tapping this icon will go back to the previous Settings screen or the Mai...

Страница 19: ...itten on the last pass The options are 0xf6 0x00 0xff and Random The Random setting will fill the Target drive with a pseudo random pattern Speed The speed can be manually set from UDMA 5 to PIO SLOW...

Страница 20: ...n tap No 9 If Yes is chosen a second message will appear stating that you are about to erase the Target If you wish to continue tap Yes If you want to abort the operation tap No 10 If Yes is chosen th...

Страница 21: ...support an Enhanced Security Erase procedure Enhanced Security Erase will write a data pattern predetermined by the hard drive manufacturer to all user data areas including sectors that are no longer...

Страница 22: ...epresented with a Y or No which is represented with an X 6 Press the Start Stop button twice 7 A message will appear stating that you are about to erase the Target drives If you wish to continue choos...

Страница 23: ...k of the Logicube OmniWIPE is a Compact Flash CF slot Make sure that it is empty 2 Hold the CF card with the Logicube label facing up 3 Slide the CF card into the CF slot As it slides into place the e...

Страница 24: ...PC is Windows ME 2000 XP Vista or Seven the CF card will automatically be mounted and a drive letter will be assigned to it 7 If the Operating System on the PC is windows 98 or 98SE you will be prompt...

Страница 25: ...file always called ocx h86 has to be placed on the root directory of the Compact Flash CF If a CF reader writer is available on your computer the software simply needs to be copied to the root direct...

Страница 26: ...t by tapping the left or right icons on the screen Press the Back icon when finished The unit will reboot to the Main Menu Screen 9 Check the version and date of this software by pressing the About ic...

Страница 27: ...d copy it to the Ramdrive created by the CD NOTE Ignore step 2 if you are reloading the original ocx h86 file which is automatically copied to the Ramdrive 3 Go to the Ramdrive always the last drive l...

Страница 28: ...ches and can sustain rates as high as 16MB sec The condition of the drives Drives with bad weak sectors or other hardware problems will typically run slower than healthy drives Wiping more than one Ta...

Страница 29: ...Single Master If needed drive jumper settings can be found at the drive manufacturer web site Also make sure all cables data and power are connected properly to all drives Q In Drive Info I try to lo...

Страница 30: ...0 Mode WipeOut 1 10 11 20 21 OmniWIPE Logicube 1 2 3 4 5 9 14 17 20 21 Partition Partitions 10 21 Position Master 11 13 Position Target 4 13 Power Supply 2 5 6 Scratch drive 2 11 Screen About 9 Screen...

Отзывы: