QUICK START
Logicube Forensic Falcon™ User’s Manual
18
Select which file system to use (EXT4 or NTFS) and whether to
format with encryption (ON) or without encryption (OFF). Details
on encryption can be found in Chapter 8 of the Falcon User’s
Manual. For details on formatting a drive, see
Formatting the drive may take up to two minutes. Tap the
OK
icon
to continue. For in-depth information regarding drive encryption,
please see
Chapter 8: Drive Encryption and Decryption
6.
Tap the
Start
icon to start the imaging task.
7.
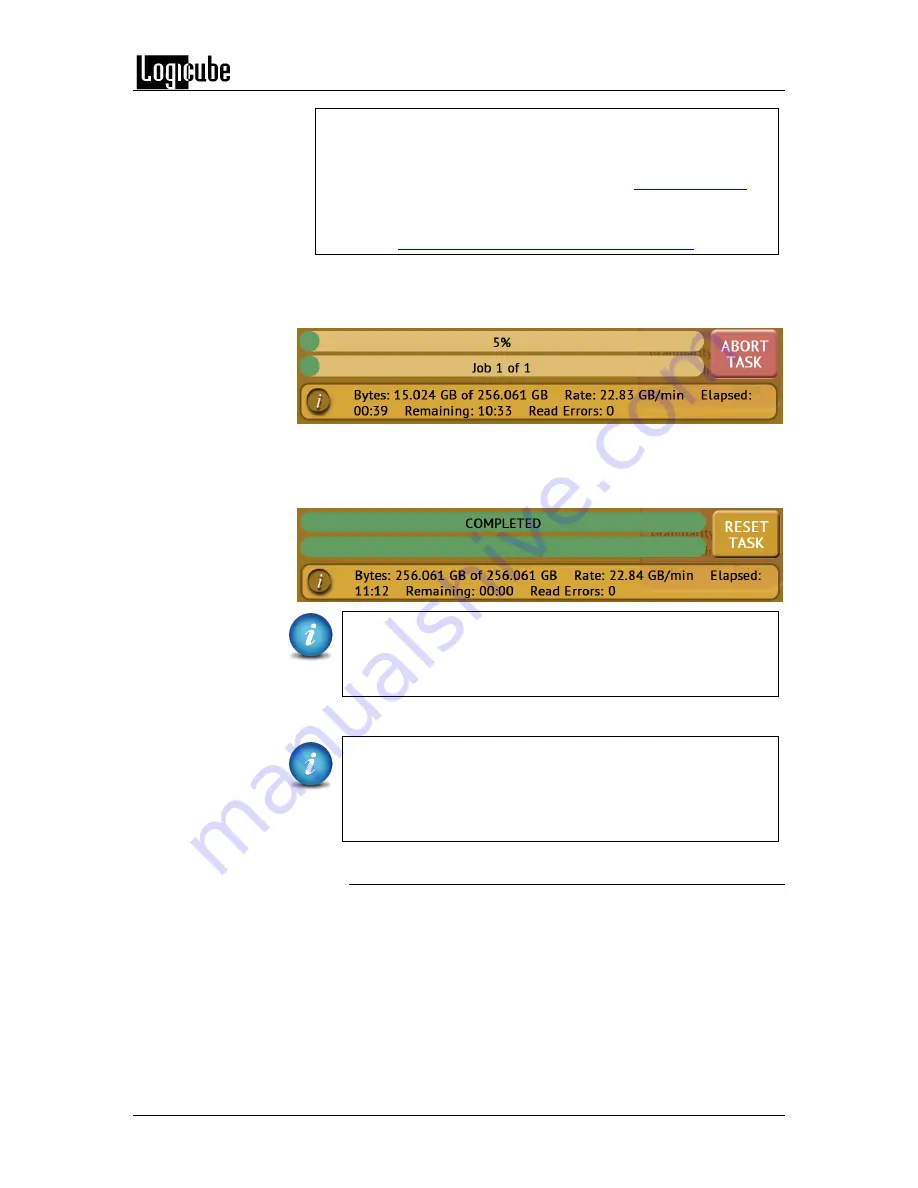
A progress bar will appear at the bottom of the screen showing the
bytes processed, the rate (speed), elapsed time, and time remaining.
8.
When finished, the status will show “COMPLETED”. At this point, it is
recommended to tap
Reset Task
to reset the task, and also to delete the
task in order for the drive bays to be properly reset and not show as
being used or assigned for other tasks to be configured.
The number of bytes shown on the progress bar is not the
actual size of the drive. This is the actual data being
processed. When ‘Verify’ is set to “Yes”, the reported number
will double in size.
For parallel imaging, prior to starting the first task, users must
set all other tasks that need to be run in parallel. When all
other tasks to be run in parallel are set, a confirmation screen
will appear stating there are multiple tasks setup with the
same Source drive.
3.1.1.1 Blank Disk Check
The Falcon, with software v3.0 or higher, has the ability to check
a drive to see if it is blank or wiped. To perform a blank disk
check:
1.
Connect a drive to the Falcon.
2.
Choose Imaging, Hash, or Wipe/Format.
3.
Choose Source, Destination, or Drives to list the
connected drives.
Содержание F-FALCON-SA
Страница 15: ......
Страница 17: ...GETTING STARTED Logicube Forensic Falcon User s Manual 8...
Страница 152: ...SCSI MODULE Logicube Forensic Falcon User s Manual 143...


