background image

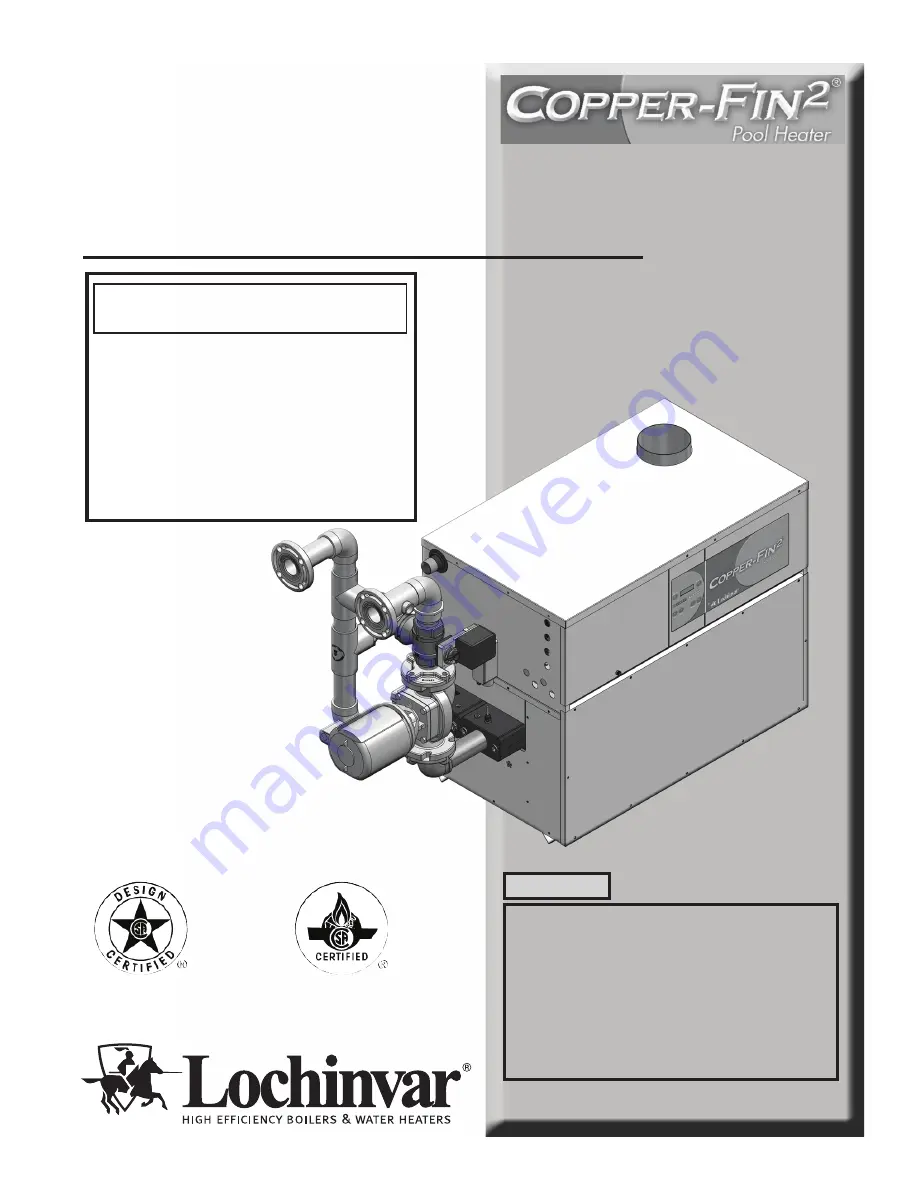
Installation & Operation 

Manual

Models:  502 - 2072

This manual supplies information for the 
installation, operation, and servicing of the 
appliance.  It is strongly recommended that this 
manual and the Copper-fin

2

 Pool Heater Service 

Manual be reviewed completely before proceeding 
with an installation.  Perform steps in the order 
given.  Failure to comply could result in severe 
personal injury, death, or substantial property 
damage.

WARNING

Save this manual for future reference.

CPX-I-O_100160928_2000001946_Rev Y

-- Do not store or use gasoline or other flammable vapors and 
     liquids in the vicinity of this or any other appliance.

-- 

WHAT TO DO IF YOU SMELL GAS

•  Do not try to light any appliance.
•  Do not touch any electrical switch; do not use any phone in your 
 building.
• Immediately call your gas supplier from a neighbor's phone.  
  Follow the gas supplier’s instructions.
•  If you cannot reach your gas supplier, call the fire department.
-- Installation and service must be performed by a qualified 
    installer, service agency, or the gas supplier.

WARNING:


If the information in these instructions is 

not followed exactly, a fire or explosion may result causing 
property damage, personal injury or death.

Содержание Copper-Fin2 CP 501 - 751

Страница 1: ...8_2000001946_Rev Y Do not store or use gasoline or other flammable vapors and liquids in the vicinity of this or any other appliance WHAT TO DO IF YOU SMELL GAS Do not try to light any appliance Do not touch any electrical switch do not use any phone in your building Immediately call your gas supplier from a neighbor s phone Follow the gas supplier s instructions If you cannot reach your gas suppl...

Страница 2: ...efore You Begin 13 Vent System Options 14 General Venting Information 15 Conventional Negative Draft Venting 16 18 Vertical DirectAire Venting 19 21 Sidewall Venting 22 24 Horizontal DirectAire Venting 25 Direct Venting 26 32 Outdoor Installation 33 3 GAS CONNECTIONS Connecting to Gas Supply 34 Gas Pressure Test 34 Checking Manifold Gas Pressure 34 Gas Piping 34 Gas Connection 34 35 Combination Ga...

Страница 3: ...r the gas supplier Special instructions REMOVAL OF COMBUSTION CHAMBER LINING OR BASE PANELS Avoid breathing dust and contact with skin and eyes Use NIOSH certified dust respirator N95 This type of respirator is based on the OSHA requirements for cristobalite at the time this document was written Other types of respirators may be needed depending on the job site conditions Current NIOSH recommendat...

Страница 4: ...ration Be careful not to touch hot surfaces Keep all adults children and animals away from an operating pool heater Severe burns can occur 9 This pool heater must have an adequate supply of fresh air during operation for proper gas combustion and venting 10 Make sure all exhaust venting is properly installed and maintained Improper venting of this pool heater could lead to increased levels of carb...

Страница 5: ...tains the programming that operates the blower gas valve and pumps in addition to other programmable features 13 Air intake Fresh air for combustion is drawn through a filter provided at the air intake located at either the rear or right side of the appliance 14 Line voltage terminal strip The line voltage terminal strip provides a location to connect all of the line voltage 120 VAC contact points...

Страница 6: ...orks 16 11 16 16 16 24 Models 502 752 Front View Models 502 752 Left Side inside unit Models 502 752 Right Side inside unit Models 502 752 Rear View 13 20 23 2 22 4 3 15 21 14 8 12 19 5 6 1 18 17 7 Installation Operation Manual ...

Страница 7: ...ntinued Models 992 2072 Left Side inside unit Models 992 2072 Right Side inside unit Models 992 2072 Rear View Models 992 2072 Front View 16 16 16 11 16 24 13 20 23 15 3 4 2 22 8 21 14 12 6 19 5 1 18 17 7 Installation Operation Manual ...

Страница 8: ...ch 1000 feet above sea level up to 4 500 feet Consult the factory for installations above 4 500 feet elevation Maximum allowed working pressure is located on the rating plate NOTICE Model Number Note Change N to L for L P gas models Specifications Appliance Water Content Gallons Water Connections Gas Connections Air Vent Sizes Note 1 CPN0502 1 7 2 1 1 4 6 CPN0652 2 0 2 1 1 4 8 CPN0752 2 1 2 1 1 4 ...

Страница 9: ...te block over wood flooring is not considered non combustible 8 DO NOT install this appliance directly on carpeting or other combustible material 9 Maintain required clearances from combustible surfaces reference the Indoor Clearances from Combustible Construction Section this page 10 For outdoor models you must install an optional vent cap Instructions for mounting the vent cap are included in th...

Страница 10: ...s 1 Outside Combustion Air No Ducts You can direct outside combustion air to this unit using either one or two permanent openings One Opening The opening must have a minimum free area of one square inch per 3000 Btu input 7 cm2 per kW You must locate this opening within 12 30 cm of the top of the enclosure see FIG 1 2 Figure 1 2_Outside Combustion Air Single Opening Two Openings The combustion air...

Страница 11: ...premature unit failure TABLE 1C MINIMUM RECOMMENDED COMBUSTION AIR SUPPLY TO EQUIPMENT ROOM Model Number Outside Air from 2 Openings Directly from Outdoors Outside Air from 1 Opening Directly from Outdoors in2 Inside Air from 2 Ducts Delivered from Outdoors Inside Air from 2 Ducts Delivered from Interior Space Top Opening in2 Bottom Opening in2 Top Opening in2 Bottom Opening in2 Top Opening in2 Bo...

Страница 12: ...combustion air inlet from either the back or right side of the unit To arrange the combustion air inlet for side entry follow the steps below 1 Remove the metal panel from the unit s side wall see FIG 1 6 2 Remove screws from the air filter bracket assembly 3 Move the filter bracket assembly from the rear of unit to the side opening see FIG 1 7 4 Attach filter bracket assembly to the unit s side u...

Страница 13: ...e pressure condensing An appliance that operates with a positive vent static pressure with a vent gas temperature that may cause excessive condensate production in the vent CAT IV Flue pipe materials The following manufacturers supply flue materials suitable for these models when installed as CAT IV All materials are made with AL29 4C stainless steel Heat Fab Inc Saf T CI Vent with AL29 4C stainle...

Страница 14: ... vent assembly to exhaust the flue products out a sidewall vent terminationwithairsuppliedfromtheequipment room see page 22 This option uses the installation of a special air inlet cap on rear of the unit and vent pipe and cap see page 33 NOTE CAT I B VENT MATERIALS MAY BE USED WHEN THE POWERED VENT IS CONNECTED DIRECTLY TO THE OUTSIDE VENT CAP IF THE POWERED VENT IS NOT CONNECTED DIRECTLY TO THE ...

Страница 15: ... system to prevent sagging Provide an upward slope of at least 1 4 inch per foot 21mm m on all horizontal runs from the unit to the vertical flue run or to the vent terminal on sidewall venting installations Do not use an existing chimney as a raceway if another appliance or fireplace is vented through the chimney The weight of the venting system must not rest on the unit Provide adequate support ...

Страница 16: ...o reduction in diameter Use the National Fuel Gas Code venting tables for double wall vent to properly size all vent connectors and stacks Follow the vent manufacturer s instructions when installing Type B vents and accessories such as firestop spacers vent connectors thimbles caps etc Provide adequate clearance to combustibles for the vent connector and firestop When planning the venting system a...

Страница 17: ... This will result in condensing of flue products damage to the masonry flue tile insufficient draft and possible spillage of flue products into an occupied living space Carefully inspect all chimney systems before installation WARNING Do not vent this unit into a masonry chimney without a sealed stainless steel liner system Any breaks leaks or damage to the masonry flue tile will allow the flue pr...

Страница 18: ...hown in FIG s 2 1 thru 2 4 Make sure all vertical vents are installed with vent terminations recommended by the vent manufacturer Figure 2 2_Vent Termination from Peaked Roof 10 ft or More From Ridge Figure 2 4_Vent Termination from Flat Roof 10 ft or More From Parapet Wall Figure 2 3_Vent Termination from Flat Roof 10 ft or Less From Parapet Wall ...

Страница 19: ... air for a single unit only See Table 2B page 21 for kit numbers Locate the unit as close as possible to the sidewall where you will install the combustion air supply system WARNING Locate and install the combustion air inlet cap correctly Failure to do so can allow the discharge of flue products to be drawn into the combustion process This can result in incomplete combustion and potentially hazar...

Страница 20: ...e roof or above normal snow levels If the air inlet cap is within a 10 foot 3 05 m radius of the flue outlet the point of termination for the combustion air inlet cap must be at least 3 feet 0 91 m below the point of flue gas termination vent cap Do not install the combustion air inlet cap closer than 10 feet 3 05 m from an inside corner of an L shaped structure The air inlet point for multiple po...

Страница 21: ...njury or death due to carbon monoxide poisoning For single unit installations with sidewall air inlet you must order the sidewall air inlet kit from the appliance manufacturer The part number for each SVK kit is listed by unit size in Table 2B For single unit installations with rooftop air inlet see FIG 2 8 you must order the rooftop air inlet kit from the appliance manufacturer The part number fo...

Страница 22: ...d possible contact with plumbing or electrical wiring inside walls The maximum installed length of sidewall vent pipe with an induced draft fan must not exceed 100 feet 30 5 m Subtract 5 feet 1 5 m for each 90 elbow Subtract 2 5 feet 0 7 m for each 45 elbow Sidewall venting termination The sidewall vent cap must be installed on an exterior sidewall The sidewall fan powered sidewall vent cap and ac...

Страница 23: ...cm above any door window or gravity air inlet into any building Locate vent termination at least 8 feet 2 4 m horizontally from any combustion air intake located above the sidewall termination cap This vent system has specific vent material and installation requirements Only use listed sealed AL29 4C vent system materials Follow all installation requirements See Table 2A for proper pipe size for y...

Страница 24: ...loors Locate the unit as close as possible to chimney or gas vent When a vent system is disconnected for any reason the flue must be reassembled and resealed according to the vent manufacturer s instructions The installed length of flue from the unit to the outside point of termination must not exceed 50 equivalent feet 15 2 m Subtract 5 feet 1 5 m of equivalent length for each 90 elbow Subtract 2...

Страница 25: ...on page 10 NOTICE Before installing a venting system follow all requirements found in the General Venting section You must order the Horizontal DirectAire Vent Kit for sidewall installation from the appliance manufacturer See Table 2D for kit numbers Each kit includes a sidewall powered vent cap fan proving switch controls combustion air inlet cap to supply air to a single unit the transition adap...

Страница 26: ...e trap loop in position with nylon wire ties Use caution not to collapse or restrict the condensate drain line with the nylon wire ties The condensate drain must be routed to a suitable drain for disposal of condensate that may occur in the direct vent system Refer to the condensate drain installation instructions as supplied by the manufacturer of the vent material WARNING Do not combine the flue...

Страница 27: ...e wall opening must provide an air space clearance of 2 inches 5 1 cm around the flue pipe The diameter of the opening for installation of the sidewall cap will be 4 inches 10 2 cm larger minimum than the nominal diameter of the installed vent pipe to the horizontal vent cap Install the horizontal vent cap from the outside Mount the vent cap to the wall using four screws or wall anchors Seal under...

Страница 28: ...pter VERTICAL DV BOX ADAPTER HORIZONTAL DV BOX ADAPTER Air inlet piping materials The air inlet pipe s must be sealed Select air inlet pipe material from the following specified materials PVC CPVC or ABS Dryer vent or sealed flexible duct not recommended for rooftop air inlet Galvanized steel vent pipe with joints and seams sealed as specified below Type B double wall vent with joints and seams se...

Страница 29: ...the first elbow The outlet of the second 90 elbow will be pointing down You may use a 90 elbow and a 90 straight elbow to make this assembly If you use a straight piece of pipe between the two 90 elbows it should not exceed 6 51 mm in length Figure 2 13_Vertical Rooftop Air Inlet 6 MAX For horizontal direct vent termination of combustion air you must use the termination cap from the appliance manu...

Страница 30: ...nces 10 000 Btuh 3 kW 9 in 23 cm for appliances 10 000 Btuh 3 kW and 50 000 Btuh 15 kW 12 in 30 cm for appliances 50 000 Btuh 15 kW C Clearance to permanently closed window D Vertical clearance to ventilated soffit located above the terminal within a horizontal distance of 2 ft 61 cm from the center line of the terminal E Clearance to unventilated soffit F Clearance to outside corner G Clearance t...

Страница 31: ...odes and the requirements of the gas supplier A vent shall not terminate directly above a sidewalk or paved driveway that is located between two single family dwellings and serves both dwellings Permitted only if veranda porch deck or balcony is fully open on a minimum of two sides beneath he floor NOTES 1 In accordance with the current CSA B149 1 Natural Gas and Propane Installation Code 2 In acc...

Страница 32: ...00 Btuh 3kW 12 in 30 cm for appliances 10 000 Btuh 3 kW and 100 000 Btuh 30 kW 36 in 91 cm for appliances 100 000 Btuh 30 kW 4 ft 1 2 m below or to side of opening 1 ft 300 mm above opening K Clearance to a mechanical air supply inlet 6 ft 1 83 m 3 ft 91 cm above if within 10 ft 3 m horizontally L Clearance above paved sidewalk or paved driveway located on public property 7 ft 2 13 m 7 ft 2 13 m f...

Страница 33: ...d You must install the outdoor unit on a concrete brick block or other non combustible pad Do not locate unit so that high winds can deflect off of adjacent walls buildings or shrubbery causing recirculation Recirculation of flue products may cause operational problems bad combustion or damage to controls Locate unit at least 3 feet 0 91 m from any wall or vertical surface to prevent wind conditio...

Страница 34: ...t adjust regulator pressure follow the instructions under Gas Manifold Pressure Adjustment in the Copper Fin2 Pool Heater Service Manual Do not increase regulator pressure beyond specified pressure setting Gas connection All gas connections must be made with pipe joint compound resistant to the action of liquefied petroleum L P and natural gases All piping must comply with local codes and ordinanc...

Страница 35: ... 752 1 1 2 2 2 2 1 2 3 992 2 2 2 1 2 2 1 2 3 1262 2 2 1 2 2 1 2 3 3 1442 2 1 2 2 1 2 3 3 3 1 2 1802 2 1 2 3 3 3 1 2 3 1 2 2072 2 1 2 3 3 3 1 2 4 For each elbow or tee add equivalent straight pipe to total length from Table 3C Gas train and controls NOTICE The gas train and controls assembly provided on this unit have been tested under the applicable American National Standard to meet minimum safet...

Страница 36: ...iring Ensure that inlet pressure is within the specified range See Connecting To Gas Supply page 34 for minimum and maximum gas supply pressures 9 If gas pressure is out of range contact gas utility gas supplier qualified installer or service agency to determine necessary steps to provide proper gas pressure to the control 10 If gas supply pressure is within normal range turn the power switch to t...

Страница 37: ...be changed to a sub loop Check pump for correct pump rotation The standard pump selection is based on the following pipe and fittings from the pool heater to the system TABLE 4A Pipe Sizing Chart 502 752 Models Number of units Common Pipe Size Min 1 2 2 3 3 4 4 4 5 6 6 6 992 2072 Models Number of units Common Pipe Size Min 1 2 1 2 2 4 3 4 4 6 5 6 6 6 Install piping from the filter system to the po...

Страница 38: ...or may be installed in the filtration system piping be sure to keep it at least three 3 feet downstream from the point where the heated water from the pool heater is being added to the filtration system Note In order to accurately sense water temperatures both sensors need to be in the actual water flow Installation of return and supply sensors Both pool sensors are immersion type sensors with 1 4...

Страница 39: ...ECONDARY LOCATION COPPER OR CPVC SEE TABLE RECOMMENDED ISOLATION VALVE NOTE IF THE RETURN SYSTEM SENSOR IS LOCATED IN THE SECONDARY LOCATION SHOWN ON THE PIPING DIAGRAM THE UNIT PUMP MUST RUN CONTINUOUSLY TO ENSURE THE WATER FLOW PAST THE SENSOR IS MAINTAINED FROM POOL POOL RETURN SENSOR PRIMARY LOCATION VALVE 12 MAX OR 4X PIPE DIAMETERS 3 MIN REQUIRED POOL RETURN SENSOR LOCATION TO POOL 110 LIMIT...

Страница 40: ...CATION RECOMMENDED ISOLATION VALVE COPPER OR CPVC SEE TABLE 110 LIMIT TO POOL MODEL NO CONNECTION SIZE CP N L 502 752 2 MIN CP N L 992 2072 2 1 2 MIN NOTE IF THE RETURN SYSTEM SENSOR IS LOCATED IN THE SECONDARY LOCATION SHOWN ON THE PIPING DIAGRAM THE UNIT PUMP MUST RUN CONTINUOUSLY TO ENSURE THE WATER FLOW PAST THE SENSOR IS MAINTAINED POOL RETURN SENSOR SECONDARY LOCATION RECOMMENDED ISOLATION V...

Страница 41: ...IZE CP N L 502 752 2 MIN CP N L 992 2072 2 1 2 MIN Please note that these illustrations are meant to show system piping concept only the installer is responsible for all equipment and detailing required by local codes NOTICE NOTICE System flow should always remain higher than the required flow for the pool heater s when the pool heater s is in operation to prevent short cycling and high limit issu...

Страница 42: ...actuator cover from the 3 way automatic bypass valve by loosening the screw above the conduit fitting FIG 4 9 3 Grasp the cover on the screw side and lift the cover up and away from the valve 4 Disconnect the wires at the terminal block if connected 5 Unscrew the plastic conduit cap from the conduit fitting FIG 4 9 and pull the plastic conduit hose and wires from the valve 6 Feed the plastic condu...

Страница 43: ...e standard flow switch is installed in the outlet side of the piping loop when shipped from the factory These pool heaters require a sufficient flow of 26 GPM to make the flow switch and start burner operation CAUTION Avoid contact with hot discharge water NOTICE High chemical concentrations from improperly adjusted feeders and Chlorinator can cause rapid corrosion to the heat exchanger This damag...

Страница 44: ... to avoid possible electric shock hazard Failure to do so can cause severe personal injury or death WARNING General information A 120 VAC 15 Amp 1 ph 60 Hz circuit is required for operation of the appliance controls The appliance when installed must be electrically grounded and bonded in accordance with the requirements of the authority having jurisdiction or in the absence of such requirements wi...

Страница 45: ... 4 21 4 1802 7 3 6 7 8 8 22 8 2072 7 3 6 7 8 8 22 8 With standard factory supplied pump ELECTRICAL SHOCK HAZARD For your safety turn off electrical power supply before making any electrical connections to avoid possible electric shock hazard Failure to do so can cause severe personal injury or death Wiring must be N E C Class 1 If original wiring as supplied with the pool heater must be replaced u...

Страница 46: ...acts on its proving switch FIG 5 5 Pool return sensor 2 wire The pool return sensor should be installed into the return of the primary loop making sure it is immersed in the water flow The SMART SYSTEM control regulates the pool heater firing rate to maintain the system return temperature to the desired set point for the pool Pool supply limit sensor 4 wire The pool supply limit sensor should be i...

Страница 47: ...S should be connected to the Leader heater s S1 input located on the low voltage terminal board see FIG 5 5 Jumpers on all Member heaters should be left in place Communication between the Leader and the Member heaters is accomplished by using shielded 2 wire twisted pair communication cable Connect one of the twisted pair wires to terminal A on each of the low voltage connection boards and the oth...

Страница 48: ...k to ensure that all water connections are tight 6 Relief valve has been piped to a suitable floor drain 7 Combustion air openings are not obstructed in any way 8 Ensure all air is purged from the water piping Starting the filter system Verify proper installation of the pool heater temperature controls and the installation of the 110 F auxiliary limit and pool supply sensor in the mixed discharge ...

Страница 49: ...ion physical damage or sagging Verify air piping and vent piping are intact and correctly installed per this manual Placing the pool heater in operation Pool heater operational checks 1 Turn the pool heater main power switch to the ON position 2 Verify operation of the SMART SYSTEM control module and Operator Interface 3 Program the adjustable points from the Operator Interface 4 Push the reset fo...

Страница 50: ...IONS 1 STOP Read the safety information above on this label 2 Turn off all electric power to the appliance 3 Open control access panel 4 This appliance is equipped with an ignition device which automatically lights the burner Do not try to light the burner by hand 5 Push in gas control knob slightly and turn clockwise to OFF NOTE On the 36C valve knob cannot be turned to OFF unless knob is pushed ...

Страница 51: ...umber and the NEXT and PREVIOUS keys to select which number flashes 10 Press the ENTER key to save the setting 11 Press the MENU key twice to exit the Programming Mode Configuration of the cascade When installed in a Cascade system the individual controls must be programmed for cascade operation This is accomplished by accessing the control parameters Input the Installer code as described in the C...

Страница 52: ...ly enable disable the pool heater Pool heater pump operation The pool heater s unit pump will turn on whenever there is a call for heat based on the set point of the pool return water and it will remain on as long as the unit is firing Once set point is achieved the pump will complete a purge cycle to remove any residual heat from the heat exchanger and will then turn off Note If the pump s pre ru...

Страница 53: ...time and cycle counting The control uses two timers to monitor the total hours of burner operation One timer monitors the time the appliance is firing under 50 of rate The other timer monitors the time the appliance is firing over 50 rate The control uses four 4 ignition counters to monitor the amount of appliance cycles The first counter counts all ignitions of the control The second counter coun...

Страница 54: ...t If the set point still cannot be met the Leader will continue firing more Members until either the heat demand is met or all appliances on the Cascade are firing As the heat demand decreases the last appliance on will stage down to its minimum firing rate Once the demand for that appliance is 0 it will shut down As the heat demand decreases further the second to last appliance will stage down an...

Страница 55: ... second prepurge the blower slows down and the hot surface igniter HSI is energized The HSI is heated for at least 20 seconds HTR PREPURGE OUT 123 9F 78 5 Once the HSI is hot the trial for ignition begins with the opening of the gas valve HTR IGNITION OUT 123 9F 78 6 If the SMART SYSTEM control does not sense flame then it will lock out HTR POSTPURGE LOCKOUT OUT 123 9F 78 7 If the SMART SYSTEM con...

Страница 56: ...ess to change boiler water temperature and or tank water temperature set point during normal operation Press to change displayed data values in Menu Mode Press to navigate through menu listing in Menu Mode Press to toggle display during normal operation to show outlet and return temperatures fan speed flame signal etc Press to toggle between digits when entering access code or between hour minutes...

Страница 57: ...vailable only to the installer accessible only by entering the installer access code see the Copper fin2 Service Manual Saving parameters reference the Parameter Table in the Copper fin2 Service Manual To save parameters and exit programming Press the ENTER RESET button then the MENU EXIT button 3 times To keep parameter settings only for a current operating cycle Press the MENU EXIT button 3 time...

Страница 58: ...s fired and is running at the displayed number of stages 1 2 3 4 HTR POST PURGE The call for heat has been satisfied and the unit runs the fan to clear the combustion chamber and vent system of residual flue products HTR SERVICE MODE The unit has been placed in a temporary mode that will allow the unit to fire for the purpose of combustion analysis Screen 1 Line 2 OUT F The outlet temperature is d...

Страница 59: ...mber of stages firing Screen 6 Line 2 0 10V RATE V The control will display 0 to 10 volts based upon fan speed and unit capacity Press the Next arrow key on the SMART SYSTEM display to access Screen 7 Screen 7 Line 1 PH CFH The control will display either ON or OFF based upon a demand call for heat for heat Press the Next arrow key on the SMART SYSTEM display to access Screen 8 Screen 8 Line 1 SYS...

Страница 60: ...rformance verification per Section 6 in the Copper fin2 Installation and Operation Manual If combustion or performance indicate need Clean heat exchanger with a stiff bristle brush Remove and clean burners using water Dry before re assembling Clean the blower wheel with a brush and vacuum Do not let dirt from cleaning get pulled into the blower ANNUAL START UP Owner maintenance Daily Check applian...

Страница 61: ... any problems reported by the owner and correct before proceeding Inspect appliance area 1 Verify that appliance area is free of any combustible materials gasoline and other flammable vapors and liquids Inspect appliance interior 1 Remove the outer access panels and inspect the interior of the appliance 2 Vacuum any sediment from inside the appliance and components Remove any obstructions Eliminat...

Страница 62: ...lief valve has been installed 2 After following the above warning directions if the relief valve weeps or will not seat properly replace the relief valve Ensure that the reason for relief valve weeping is the valve and not over pressurization of the system due to expansion tank waterlogging or undersizing WARNING WARNING Inspect replace hot surface igniter This unit uses a proven SMART SYSTEM cont...

Страница 63: ...om need flue cleaning All gaskets sealants on disassembled components or jacket panels must be replaced with new gaskets sealants on reassembly Gasket and sealant kits are available from your distributor NOTICE CAUTION When a Category IV vent system is disconnected for any reason the flue must be reassembled and resealed according to the vent manufacturer s instructions Inspect and clean burner 1 ...

Страница 64: ...ke sure frame runners seal securely where they contact the front and rear compartment refractory 10 Carefully reinstall inner jacket panels burners manifolds wires and hoses Use new gasket material to ensure a proper air seal 11 Reassemble all gas and water piping Test for gas leaks Upon completion of any testing on the gas system leak test all gas connections with a NOTICE HEAT EXCHANGER Figure 8...

Страница 65: ...D BUS BMS 1 6 2 3 4 5 BL R O R W 6 1 5 4 3 2 Y Y Y NEUTRAL UNIT PUMP SYSTEM PUMP RELAY COIL IND DHW PUMP RELAY COIL LINE GROUND 1 3 5 2 4 BK W G BK W BK R 1 3 5 2 4 BK W G BK W BK R CONTROLLER DISPLAY INLET SENSOR BR BR SAFETY OUTLET SENSOR ON OFF SWITCH BK BK BR BR CHASSIS GROUND W P W PR X3 1 2 3 4 P P PR PR 1 2 3 4 R W BK G 1 2 3 4 W Y W BK Y 1 7 2 5 6 8 Y BK P W R R BK BK R FIELD WIRING W BK G...

Страница 66: ... O O BK BL BL BL CIRCUIT BREAKER LO MAIN UNIT HARNESS Notes 1 All wiring must be installed in accordance with local state provincial and national code requirements per either N E C in USA or C S A in Canada 2 If any original equipment wire as supplied with the appliance must be replaced it must be replaced with wire having same wire gauge AWG and rated for a minimum of 105 C 3 Actual connector blo...

Страница 67: ...IT PUMP RELAY X1 6 F4 5A BLOWER RELAY 8 1 X 8 1 X 8 1 X HI LO SPEED RELAY X2 4 X1 2 UNIT PUMP RELAY X1 1 X1 4 TERMINAL STRIP TERMINAL STRIP SYSTEM RECIRC PUMP RELAY DHW PUMP RELAY BOILER CHASSIS X1 7 X2 1 X1 10 X2 2 X1 3 F5 5A F6 5A STAGE 1 HSI STAGE 3 HSI X1 12 X1 2 X1 3 X1 1 MODBUS INTERFACE BOARD CIRCUIT BREAKER OR FUSE CN4 1 CN4 4 CONNECTION BOARD 1 1 2 TRANSFORMER INTERGRATED CONTROL BOARD X1...

Страница 68: ... A B 0 10V RATE OUTPUT CASCADE 0 10V BMS INPUT CN5 6 X8 19 CN1 5 X8 14 CN1 6 X8 13 CN1 2 OUTDOOR SENSOR S5 2ND POOL SUPPLY SENSOR S8 SYSTEM POOL SUPPLY SENSOR S6 SYSTEM POOL RETURN SENSOR S7 CONNECTION BOARD 2 X8 3 X4 3 X4 1 X8 10 X4 2 X8 20 CN1 1 X6 3 CN1 3 X6 1 CN1 2 X6 2 X8 11 BOILER POOL A B SHIELD MODBUS RTU MODBUS INTERFACE BOARD DISPLAY BOARD COMPUTER X4 X11 AIR PRESSURE LOW GAS PRESS HIGH ...

Страница 69: ...69 Notes ...

Страница 70: ...70 Notes ...

Страница 71: ...71 Notes ...

Страница 72: ...g diagrams on pages 62 65 Revision K CN 500000696 reflects the update of FIG 4 8 on page 39 Revision L PCP 3000000249 CN 500000347 reflects an update to the piping diagrams as well as the addition of Table 4C on page 35 SAP part numbers have been updated Revision M PCP 3000003954 CN 500004068 reflects an update to the common pipe diameters in Table 4A on page 34 Revision N PCP 3000005238 CN 500005...

Отзывы: